Act 2: Python
Python can be used for almost any application you can imagine, from building websites to running robots.
A thorough overview of the language would take months, so our class is going to concentrate on the absolute basics – basic principles that you need to understand as you complete this course.
How to run a Python program
A Python file is nothing more than a text file that has the extension “.py” at the end of its name. Any time you see a “.py” file, you can run it from the command line by typing into the command line:
python filename.py
That’s it. And it works for both OSX and Windows.
Python also comes with a very neat feature called an interactive interpreter, which allows you to execute Python code one line at a time, sort of like working from the command line.
We’ll be using this a lot in the beginning to demonstrate concepts, but in the real world it’s often useful for testing and debugging.
To open the interpreter, simply type python from your command line, like this.
python
And here’s what you should get.
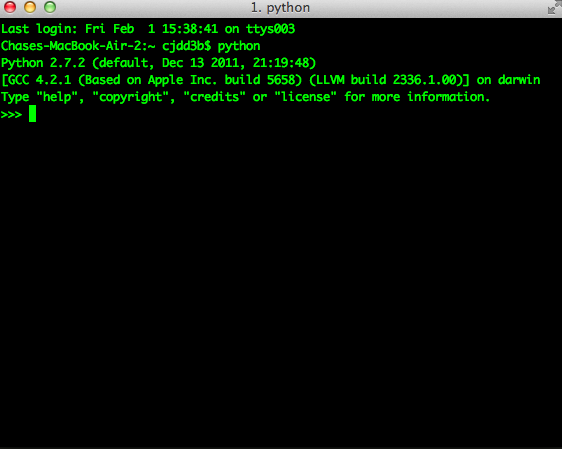
Next we’ll use the interpreter to walk through a handful of basic concepts you need to understand if you’re going to be writing code, Python or otherwise.
Variables
Variables are like containers that hold different types of data so you can go back and refer to them later. They’re fundamental to programming in any language, and you’ll use them all the time.
To try them out, open your Python interpreter.
python
Now let’s start writing Python!
greeting = "Hello, world!"
In this case, we’ve created a variable called greeting and
assigned it the string value “Hello, world!”.
In Python, variable assignment is done with the = sign. On the left is the name of the variable you want to create (it can be anything) and on the right is the value that you want to assign to that variable.
If we use the print command on the variable, Python will output “Hello, world!” to
the terminal because that value is stored in the variable.
print(greeting)
"Hello world!"
Data types
Variables can contain many different kinds of data types. There are integers, strings, floating point numbers (decimals), and other types of data that languages like SQL like to deal with in different ways.
Python is no different. In particular, there are six different data types you will be dealing with on a regular basis: strings, integers, floats, lists, tuples and dictionaries. Here’s a little detail on each.
Strings
Strings contain text values like the “Hello, world!” example above. There’s not much to say about them other than that they are declared within single or double quotes like so:
greeting = "Hello, world!"
goodbye = "Seeya later, dude."
favorite_animal = "Donkey"
Integers
Integers are whole numbers like 1, 2, 1000 and 1000000. They do not have decimal points. Unlike many other variable types, integers are not declared with any special type of syntax. You can simply assign them to a variable straight away, like this:
a = 1
b = 2
c = 1000
Floats
Floats are a fancy name for numbers with decimal points in them. They are declared the same way as integers but have some idiosyncracies you don’t need to worry about for now.
a = 1.1
b = 0.99332
c = 100.123
Lists
Lists are collections of values or variables. They are
declared with brackets like these [], and items inside are separated by
commas. They can hold collections of any type of data, including other
lists. Here are several examples:
list_of_numbers = [1, 2, 3, 4, 5]
list_of_strings = ["a", "b", "c", "d"]
list_of_both = [1, "a", 2, "b"]
list_of_lists = [[1, 2, 3], [4, 5, 6], ["a", "b", "c"]]
Lists also have another neat feature: The ability to retrieve individual items. In order to get a specific item out of a list, you just pass in its position.
All lists in Python are zero-indexed, which means the first item in them sits at position 0.
my_list = ["a", "b", "c", "d"]
my_list[0]
"a"
my_list[2]
"c"
You can also extract a range of values by specifiying the first and last positions you want to retrieve with a colon in between them, like this:
my_list[0:2]
["a", "b"]
To specify the last value in a list, you use -1
my_list[-1]
"d"
So if you want every item in a list besides the last, you would do:
my_list[-1]
"d"
Tuples
Tuples are a special type of list that cannot be changed once they are created. That’s not especially important right now. All you need to know is that they are declared with parentheses (). For now, just think of them as lists.
tuple_of_numbers = (1, 2, 3, 4, 5)
tuple_of_strings = ("a", "b", "c", "d")
Dictionaries
Dictionaries are probably the most difficult data type to explain, but also among the most useful. In technical terms, they are storehouses for pairs of keys and values. You can think of them like a phonebook.
An example will make this a little more clear.
my_phonebook = {"Mom": "713-555-5555", "Chinese Takeout": "573-555-5555"}
In this example, the keys are the names “Mom” and “Chinese takeout”, which are declared as strings (Python dictionary keys usually are).
The values are the phone numbers, which are also strings, although dictionary values in practice can be any data type.
If you wanted to get Mom’s phone number from the dictionary, here’s how:
my_phonebook["Mom"]
713 - 555 - 5555
There’s a lot more to dictionaries, but that’s all you need to know for now.
Control structures
As a beginner your first Python scripts won’t be much more complicated that a series of commands that execute one after another, working together to accomplish a task.
In those situations, it is helpful to be able to control the order and conditions under which those commands will run.
That’s where control structures come in – simple logical operators that allow you to execute parts of your code when the right conditions call for it.
Here are two you will end up using a lot.
The if clause
If statements are pretty much exactly what they sound like. If a certain condition is met, your program should do something.
Let’s start with a simple example.
number = 10
if number > 5:
    print("Wow, that's a big number!")
Our little program in this case starts with a variable, which we’ve called number, being set to 10. That’s pretty simple, and a concept you should be familiar with by this point.
number = 10
if number > 5:
    print("Wow, that's a big number!")
The next line, if number > 5: declares our if statement. In this case, we want something to happen if the number variable is greater than 5.
number = 10
if number > 5:
    print("Wow, that's a big number!")
Most of the if statements we build are going to rely on equality operators like the kind we learned in elementary school: greater than (>), less than (<), greater than or equal to (>=), less than or equal to (<=) and plain old “equals”. The equals operator is a little tricky, in that it is declared with two equals signs (==), not one (=). Why is that? Because you’ll remember from above that a single equals sign is the notation we use to assign a value to a variable!
Next, take note of the indentation. In Python, whitespace matters. A lot. Notice that I said indents must be four spaces. Four spaces means four spaces – not a tab.
number = 10
if number > 5:
    print("Wow, that's a big number!")
Tabs and spaces are different. To avoid problems, you should press the space bar four times whenever you indent Python code.
Note
There are some text editors that will automatically convert tabs to spaces, and once you feel more comfortable you might want to use one. But for now, get in the habit of making all indents four spaces.
If you look closely, there’s another small detail you need to remember: The colon! When we declare an if statement, we always end that line with a colon.
number = 10
if number > 5:
    print("Wow, that's a big number!")
It helps sometimes to think of your program as taking place on different levels.
In this case, the first level of our program (the one that isn’t indented) has us declaring the variable number = 10 and setting up our if condition, if number > 5:.
The second level of our program executes only on the condition that our if statement is true. Therefore, because it depends on that if statement, it is indented four spaces.
If we wanted to continue our program back on the first level, we could do something like this:
number = 10
if number > 5:
    print("Wow, that's a big number!")

print("I execute no matter what your number is!")
The last statement doesn’t depend on the if statement, so it will always run.
The else clause
Now let’s talk about a common companion for if statement – the else clause. It can be combined with an if statement to have the script execute a block of code when it turns out not to be true.
You don’t need to have an else condition for your if statements, but sometimes it helps. Consider this example:
number = 10
if number > 5:
    print("Wow, that's a big number!")
else:
    print("Gee, that number's kind of small, don't you think?")
In this case, we’re telling our program to print one thing if number is greater than five, and something else if it’s not. Notice that the else statement also ends with a colon, and as such its contents are also indented four spaces.
For loops
Remember earlier we discussed the concept of a list – the type of variable that can hold multiple items in it all at once?
Many times during your programming career, you’ll find it helps to run through an entire list of items and do something with all of them, one at a time.
That’s where for loops come in. Let’s start by having Python say the ABC’s:
list_of_letters = ["a", "b", "c"]
for letter in list_of_letters:
    print(letter)

a
b
c
The output of this statement is what you might guess. But there are still a few things to unpack here – some familiar and some not.
First, you’ll notice from looking at the print statement that our
indentation rules still apply. Everything that happens within the for
loop must still be indented four spaces from the main level of the
program. You’ll also see that the line declaring the loop ends in a
colon, just like the if and else statements.
Second, turn your attention to the syntax of declaring the loop itself.
list_of_letters = ['a', 'b', 'c']
for letter in list_of_letters:
    print(letter)
All of our for loops start, unsurprisingly, with the word for and
follow the pattern for variable_name in list:. The variable_name
can be anything you want – it’s essentially just a new variable you’re
creating to refer to each item within your list as the for loop iterates
over it.
In this case we chose letter, but you could just as easily call it donkey, like so:
list_of_letters = ['a', 'b', 'c']
for donkey in list_of_letters:
    print(donkey)
The next thing you have to specify is the list you want to loop over, in
this case list_of_letters. The line ends with a colon, and the next
line starts with an indent. And that’s the basics of building a loop!
Functions
Often it’s helpful to encapsulate a sequence of programming instructions into little tools that can be used over and over again. That’s where functions come in.
Think of functions like little boxes. They take input (known as arguments), perform some operations on those arguments, and then return an output.
In Python, a simple function might take an integer and divide it by two, like this:
def divide_by_two(x):
    return x / 2
In order to call that function later in the program, I would simply have to invoke its name and feed it an integer – any integer at all – like so:
def divide_by_two(x):
    return x / 2

divide_by_two(10)
5
Once you write a function (assuming it works) you don’t need to know what’s inside. You can just feed it an input and expect an output in return.
Every function must be declared by the word def, which stands for “define”. That is followed by the name of the function. Like the variable in a loop you can call it anything you want.
def get_half(x):
    return x / 2
The name is then followed by a set of parentheses in which you can define the arguments the function should expect. In our example above, we’ve called the only argument x.
When we feed a value in, like the number 10, a variable by the name of our argument is created within the function. You can name that what you want too.
def get_half(num):
    return num / 2
After you finish declaring arguments, you’ll see something familiar –the colon. Just like the if statements and for loops, the next line must be indented four spaces because any code within the function is nested one level deeper than the base level of the program.
Most functions return some kind of output. Arguments go in, some processing happens, and something comes out. That’s what the return statement is for.
def get_half(num):
    return num / 2
Functions don’t necessarily need arguments, nor do they always need to return a value using the return command. You could also do something like this:
def say_hello():
    print("Hello!")
But the idea of arguments and return values are still fundamental in
understanding functions, and they will come up more often than not.
Python as a toolbox
Lucky for us, Python already has tools filled with functions to do pretty much anything you’d ever want to do with a programming language: everything from navigating the web to scraping and analyzing data to performing mathematical operations to building websites.
Some of these are built into a toolbox that comes with the language, known as the standard library. Others have been built by members of the developer community and can be downloaded and installed from the web.
There are two ways to import these tools into your scripts.
To pull in an entire toolkit, use the import command. In this case,
we’ll get the urllib package, which allows us to visit websites
with Python:
import urllib.request

urllib.request.urlopen("http://www.python.org/").read()
You can also import specific tools from inside a toolkit by working in the from command with something like this:
from urllib.request import urlopen

urlopen("http://www.python.org/").read()
In practice, you’ll use both of these methods.
Note
There’s no rule but most Python programmers try to keep things manageable by lining up all import statements at the top of each script.