2. Scaling your Actions
GitHub Actions can do a lot, but sometimes it’s simply not enough. The free service has limits on disk space, processing units and how long jobs can run.
Our project is just such a case. Processing gigabytes of data to build a map of the entire world will easily exceed what GitHub supplies.
When you need more horsepower, one solution is to link Actions up with more powerful hardware.
2.1. Introducing Amazon Web Services
Amazon Web Services is a cloud platform, commonly referred to as AWS, that offers almost every form of computing power for lease. It includes a service known as Elastic Compute Cloud, or EC2, which spins up servers of all shapes and sizes. You can use to run jobs that exceed the limits of GitHub’s resources.
It’s a great combination. You get the nearly limitless capacity of AWS without losing the convenience of the GitHub Actions interface.
In other circumstances, we’ve used this technique to:
Standardize hundreds of millions of responses to public opinion polls conducted by Reuters and Ipsos
Refine and republish California’s gigantic database of campaign-finance filings
Aggregate decades of climate data into global and regional averages
There is bad news here. You will have to pay for it. Jeff Bezos didn’t get rich by giving things away.
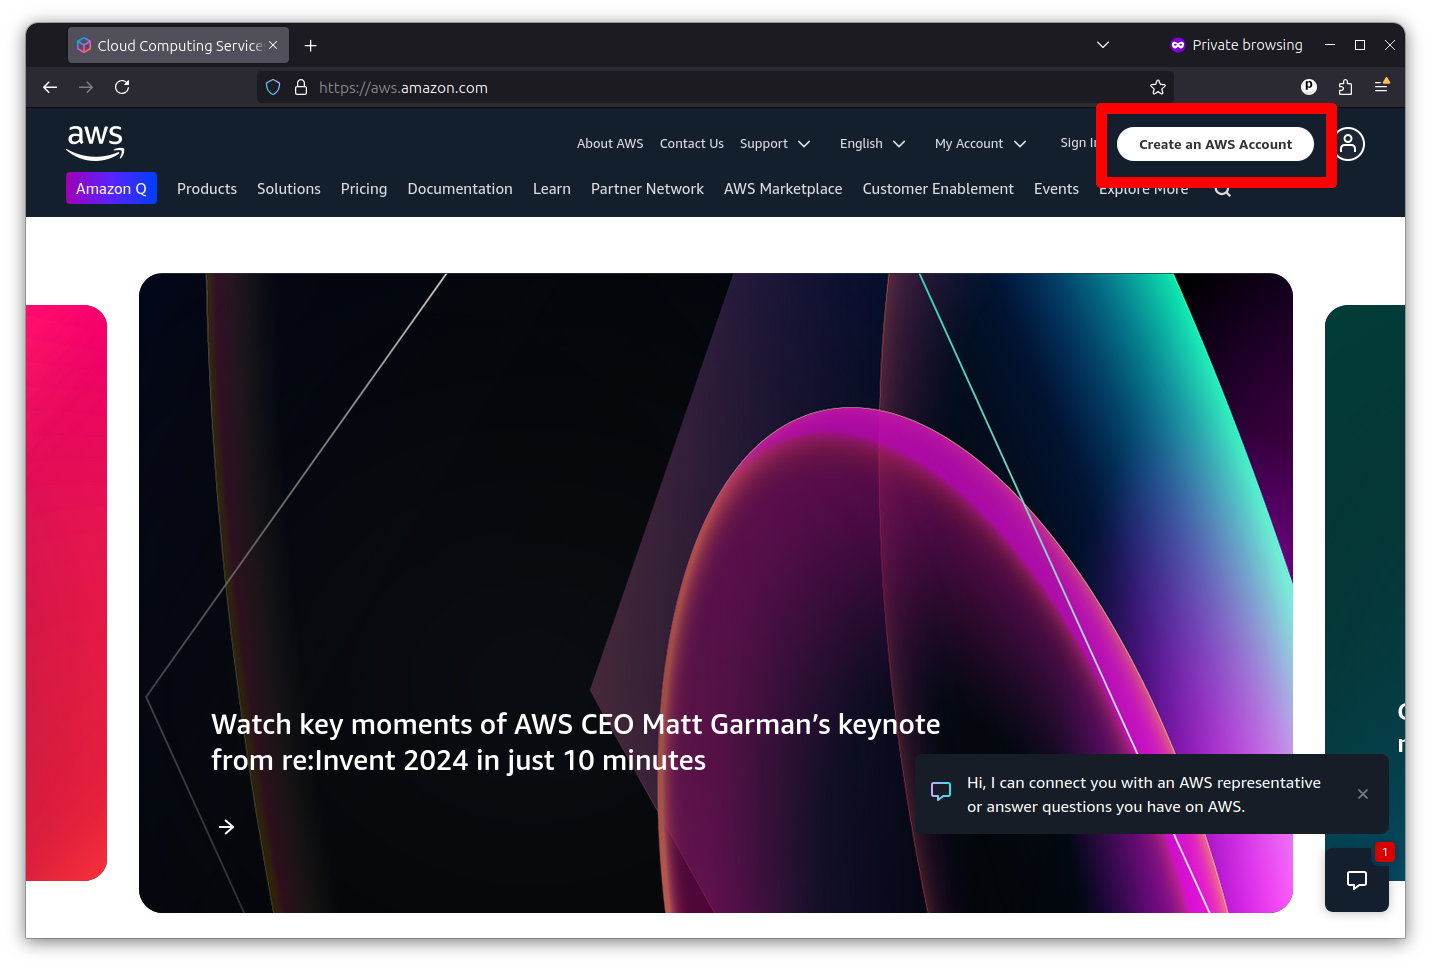
The first step is to create an AWS account, if you don’t already have one. Go to aws.amazon.com and click the button that says “Create an AWS account” in the upper right corner.
You’ll provide a root email address and a name for the account. Then you’ll be asked to verify your email. Then you’ll enter a password, contact information and a payment method. You’ll also have to verify your phone number. Once that’s completed, you’ll be congratulated for your wherewithal.

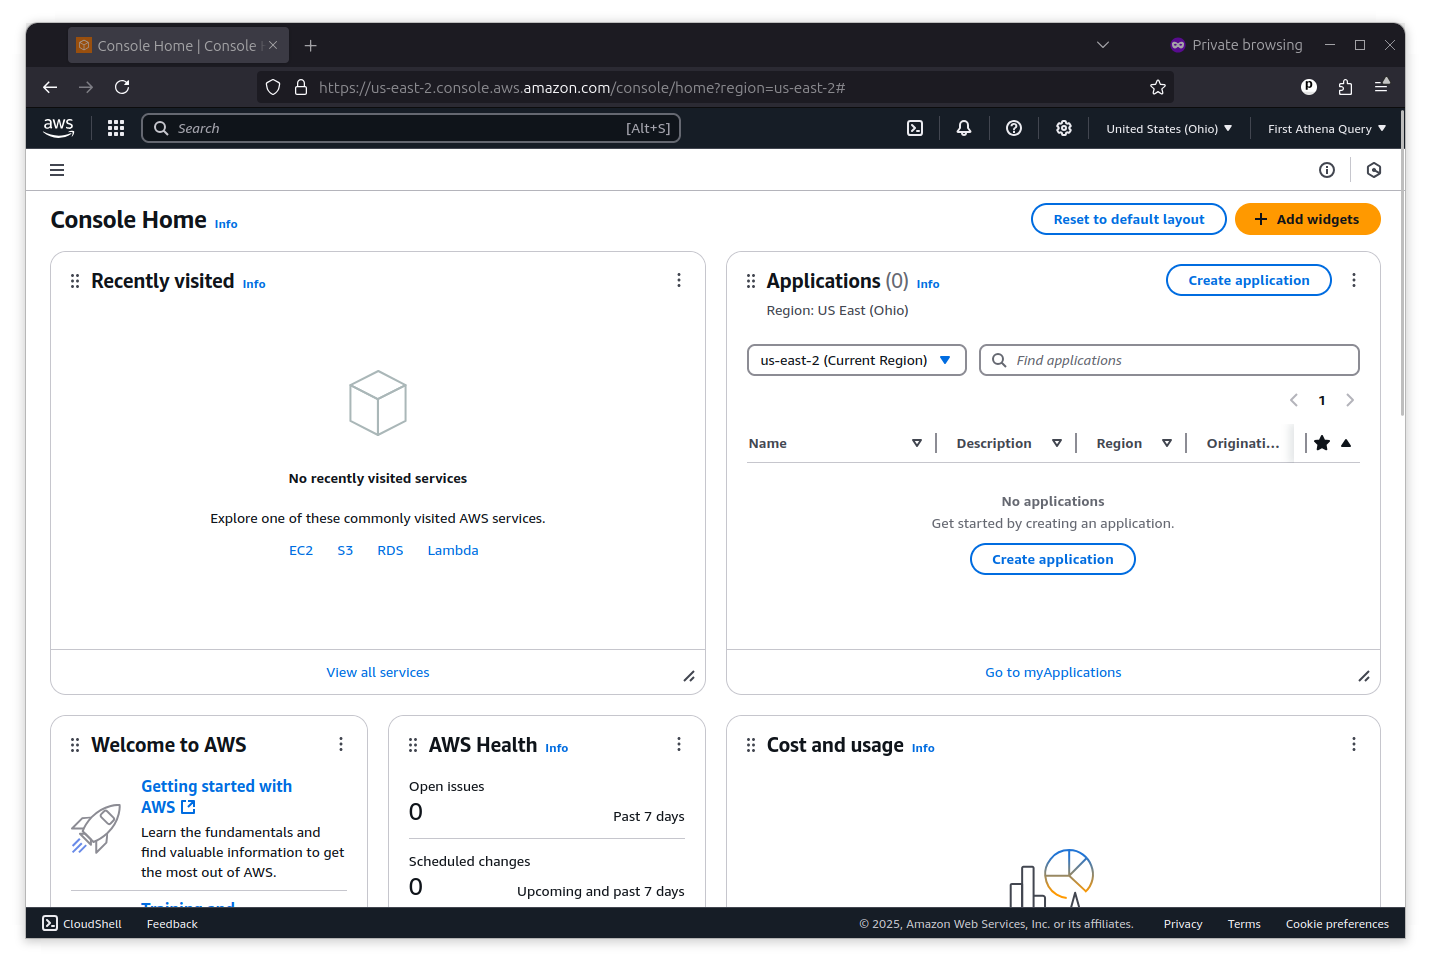
Now you’re ready to sign into the AWS Management Console, where you can access all of the services it offers.
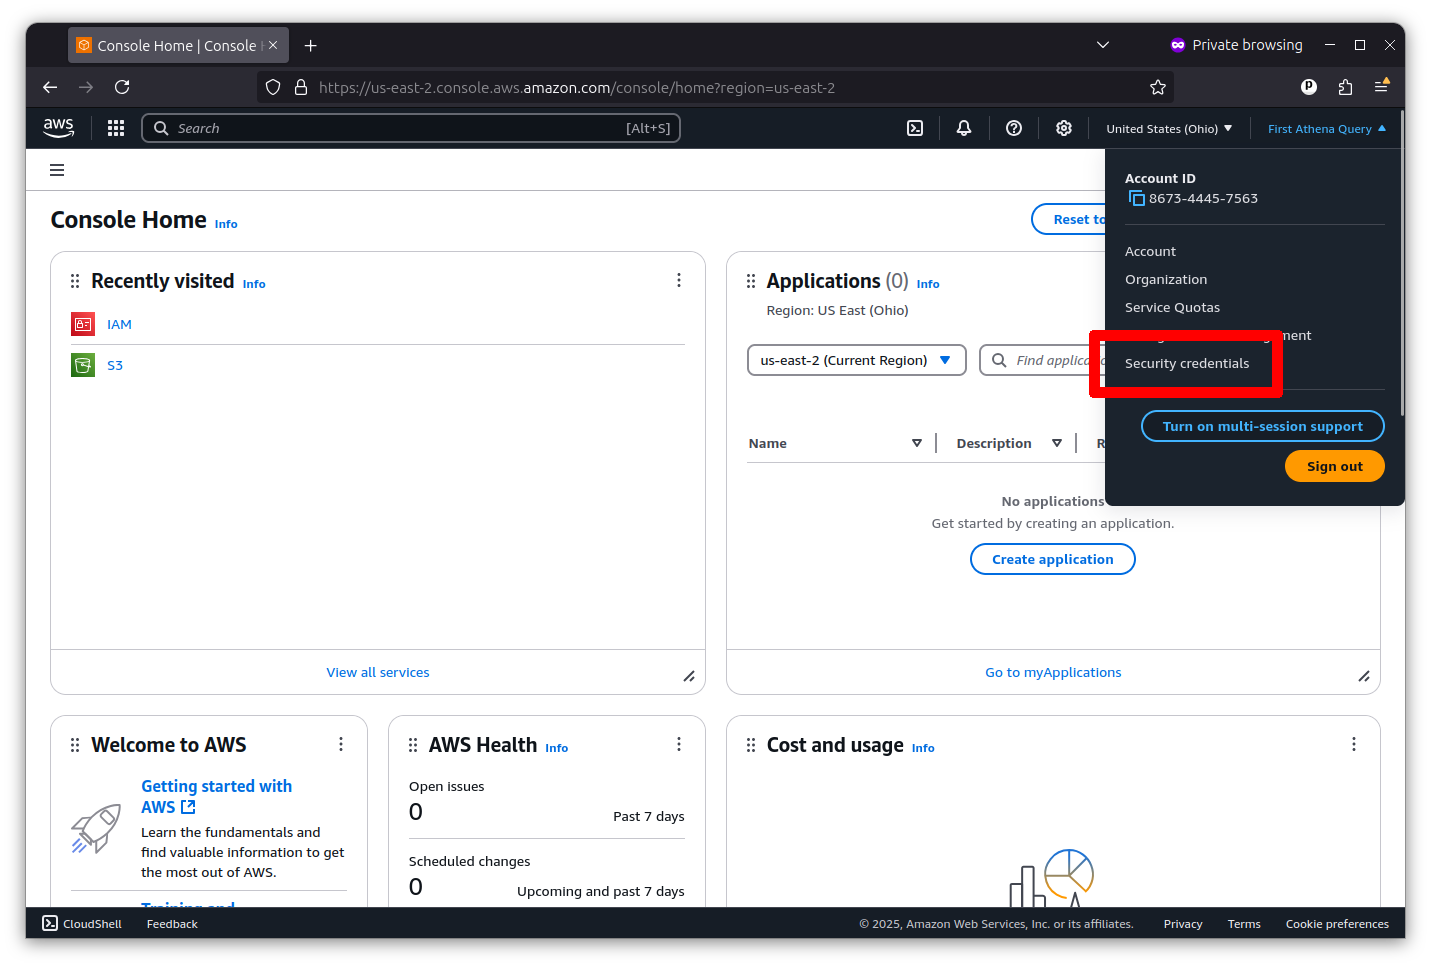
Accessing AWS with GitHub Actions requires that you first establish an API key with permission to access the services you want to use. You can do that by clicking on the pulldown menu in the far upper right corner of the console and selecting “Security Credentials.”
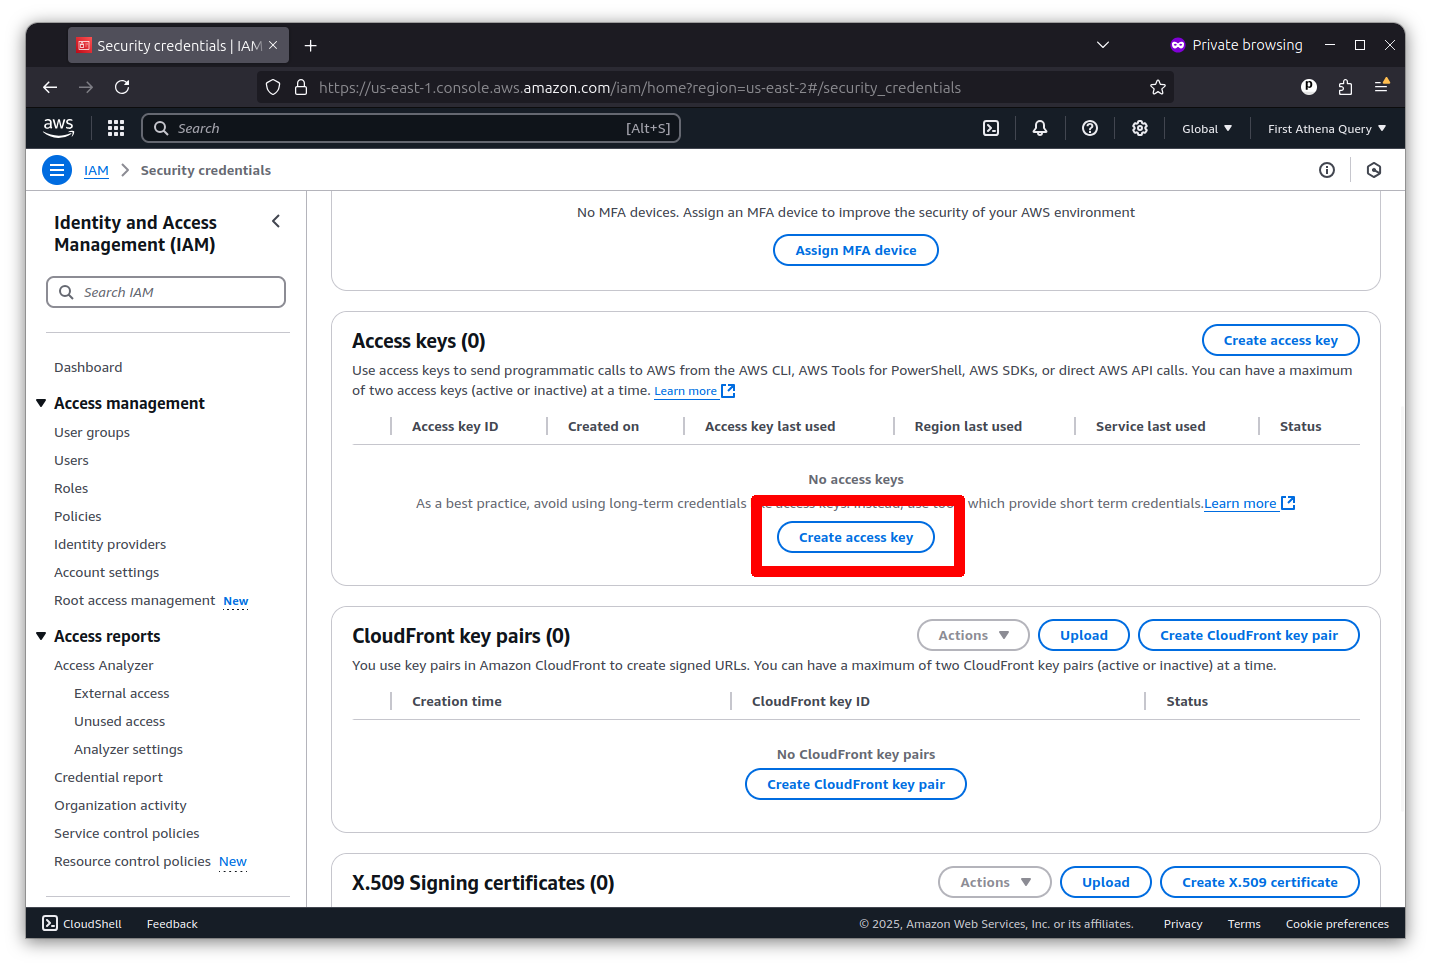
Then scroll down to the “Access keys” section and click the button that says “Create access key.”
Now you can create a root key pair by checking the box and clicking the button that says “Create access key.”
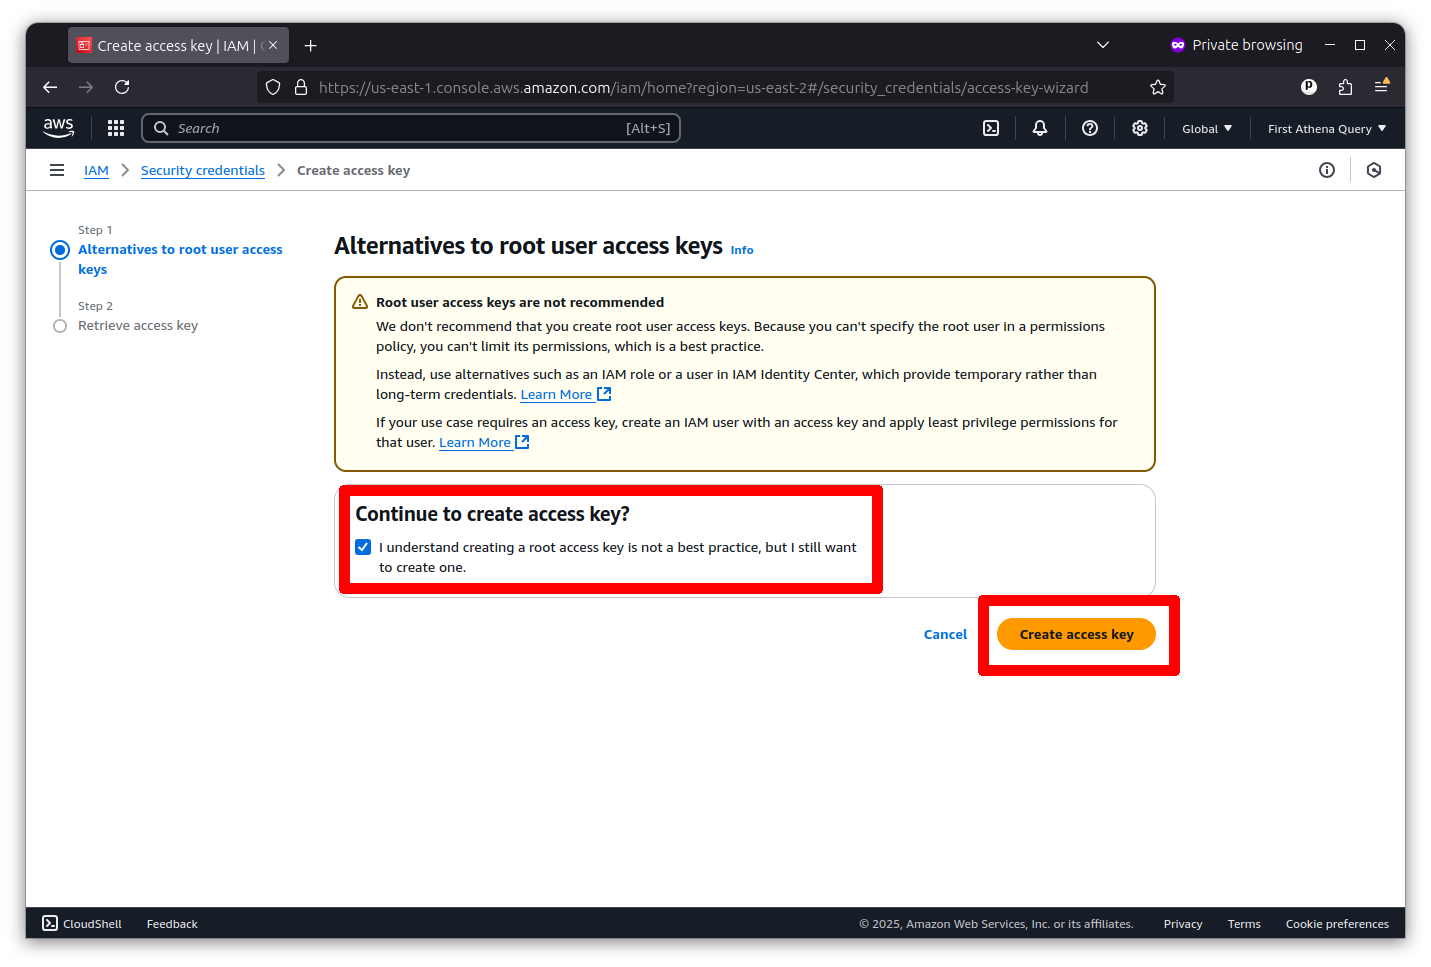
The final screen will show you the key’s ID and secret. I’ve redacted my pair in the example below.
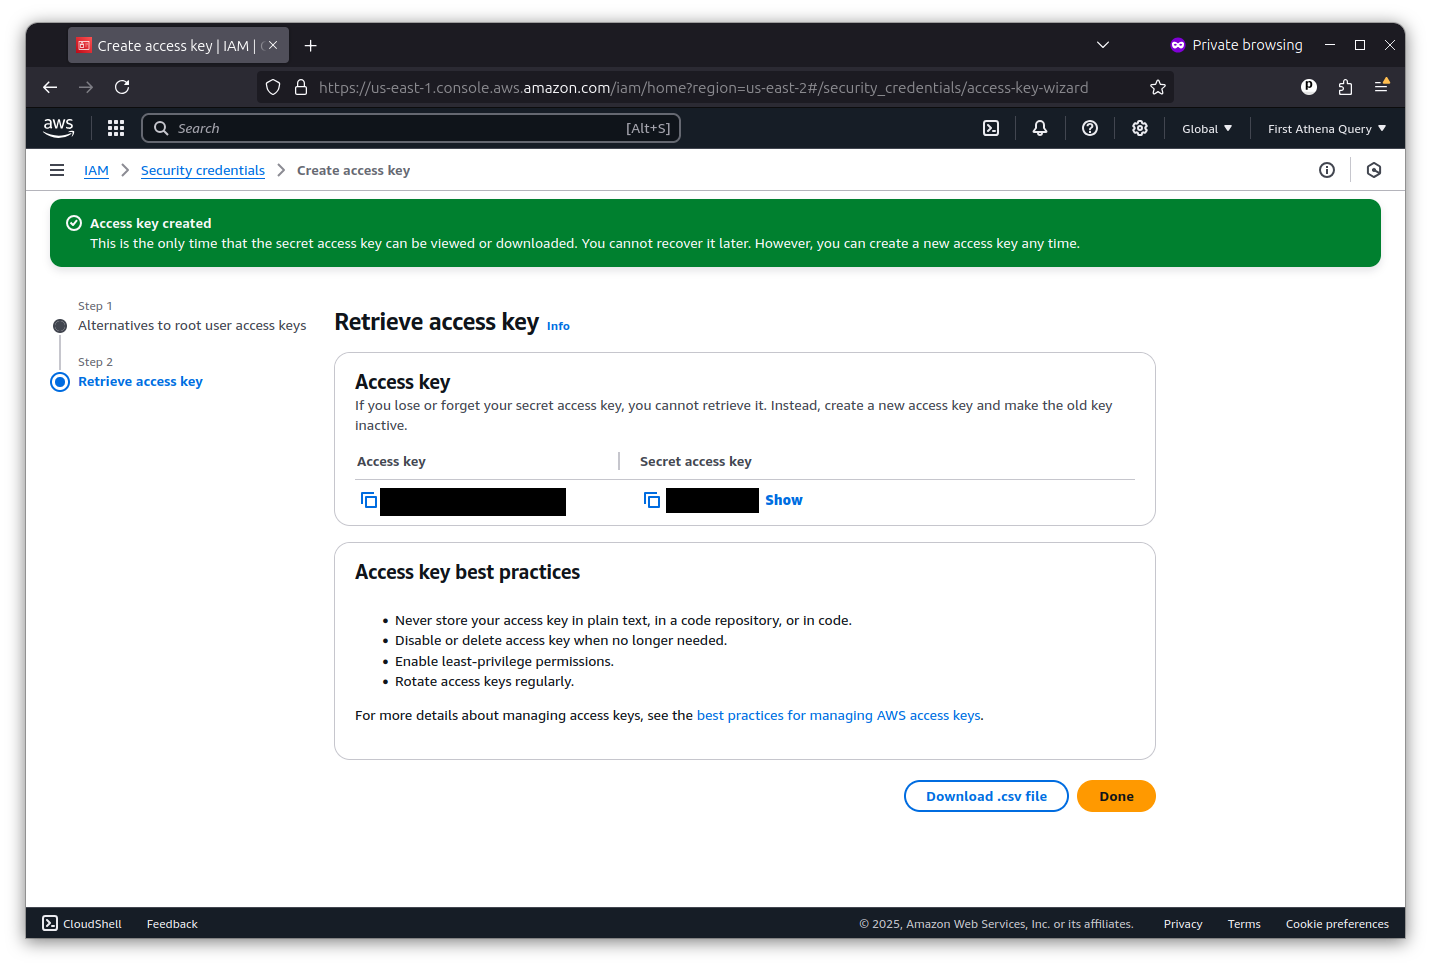
Copy and paste them into a text file for safekeeping. You will not be able to see the secret key again. They are what Actions will use to gain access to AWS from outside the console.
Next we will need to configure your account’s networking to allow for EC2 servers to communicate with GitHub. This is done by creating a virtual private cloud, known as a VPC, with a subnet that allows for public access.
Return to the search bar at the top of the AWS console and search for VPC.
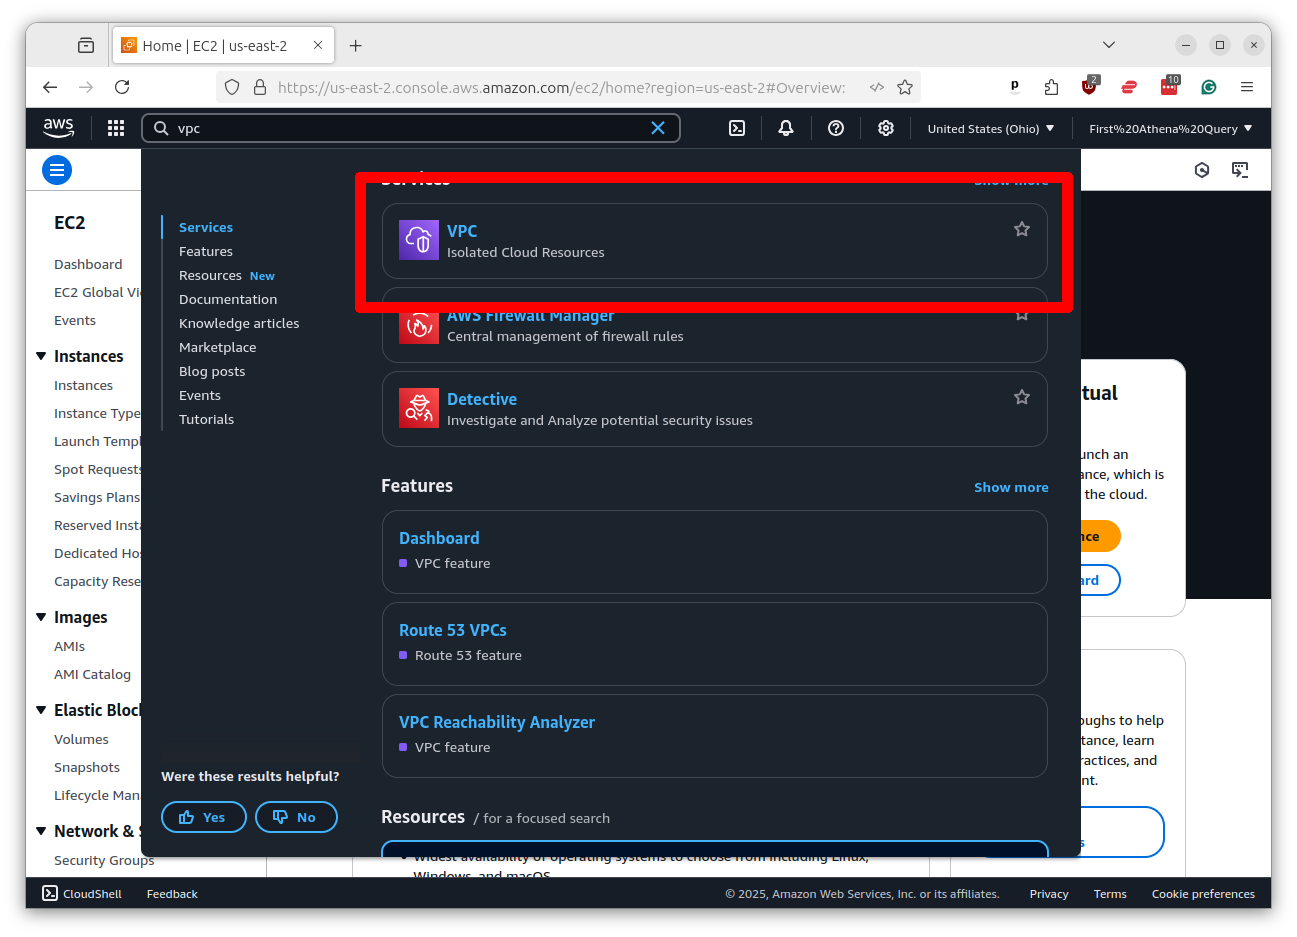
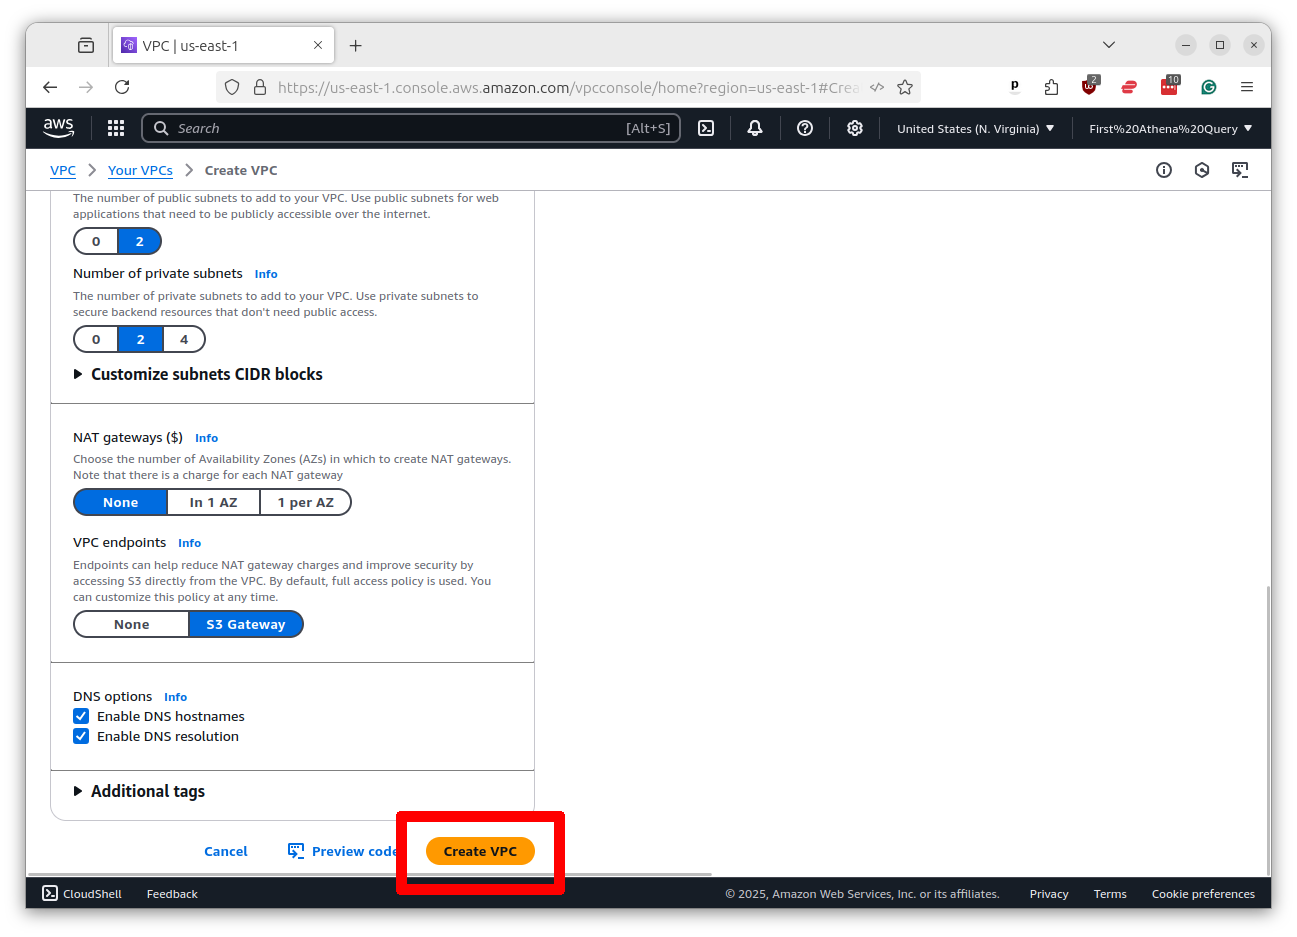
Click on the link that says “VPC” and then click the button that says “Create VPC.”

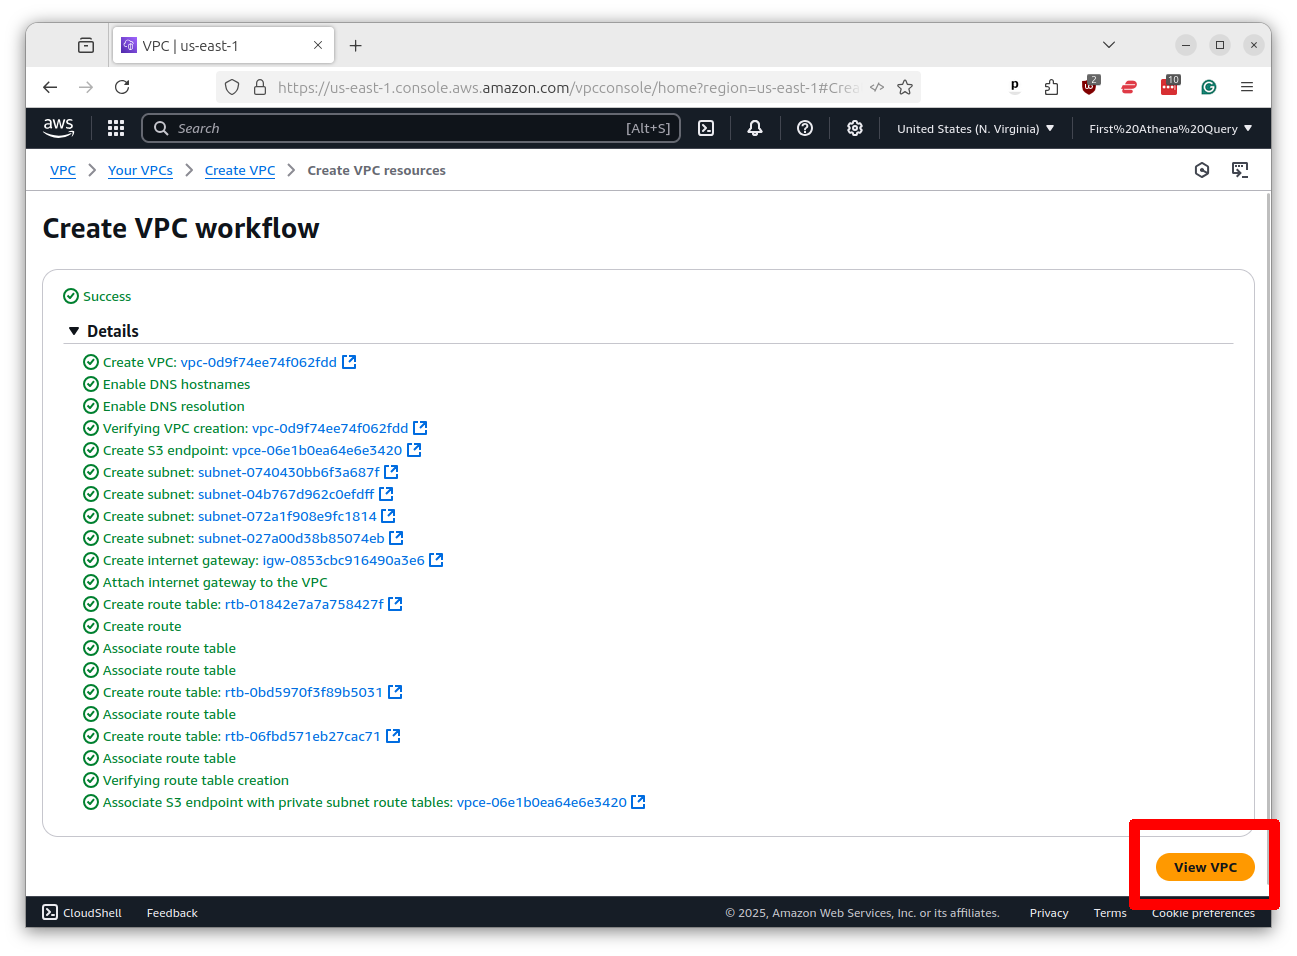
Scroll to the bottom of the page, accepting all the default settings, and click the button that says “Create VPC.”
Wait for the VPC to be created. It will take a few seconds. Once it’s done, click the button that says “View VPC.”
On the profile page of the VPC you will see a link to “Subnets” in the left-hand menu. Click on that link.
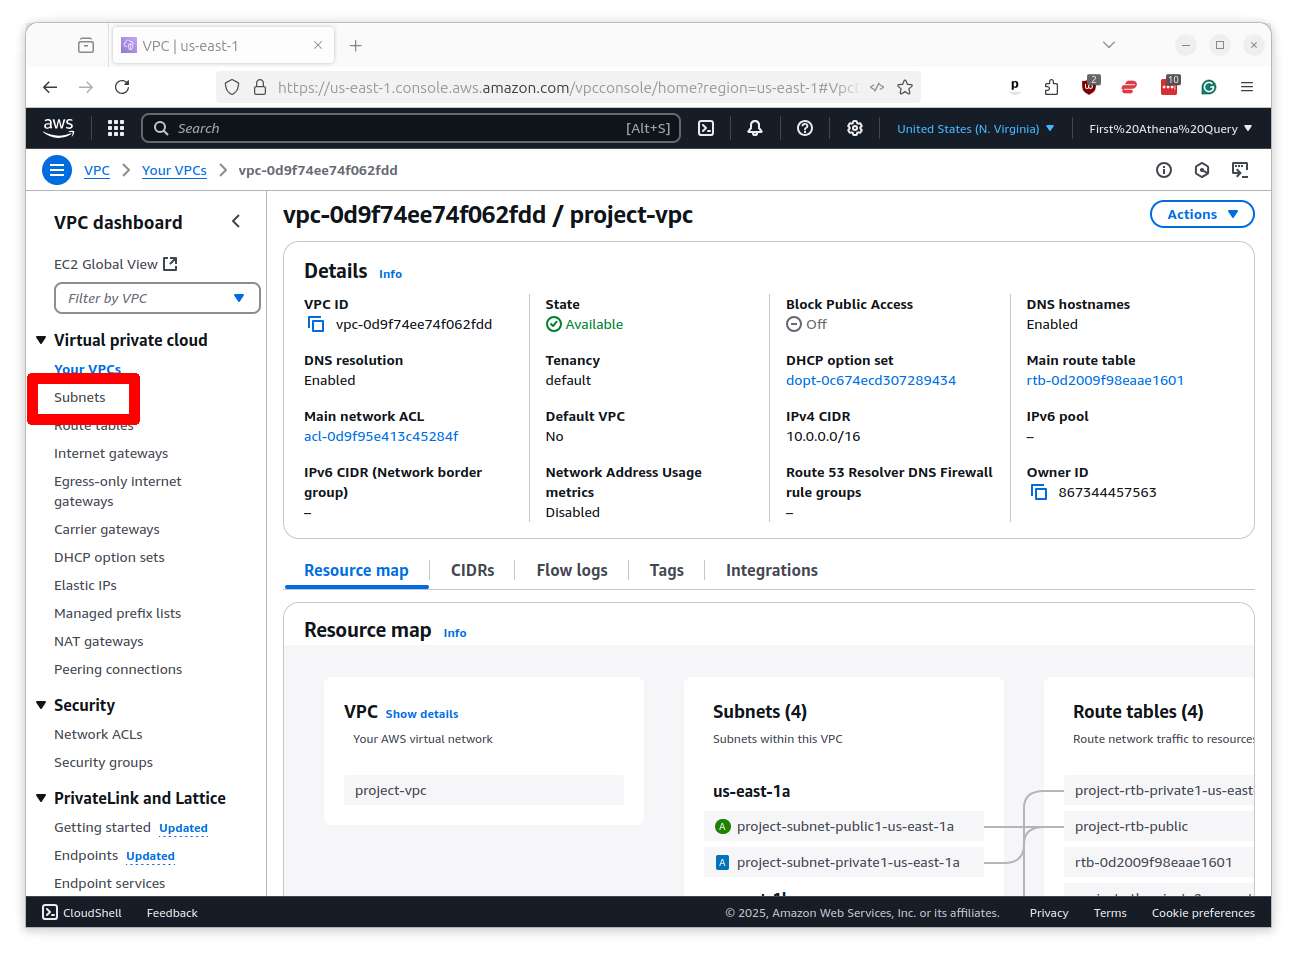
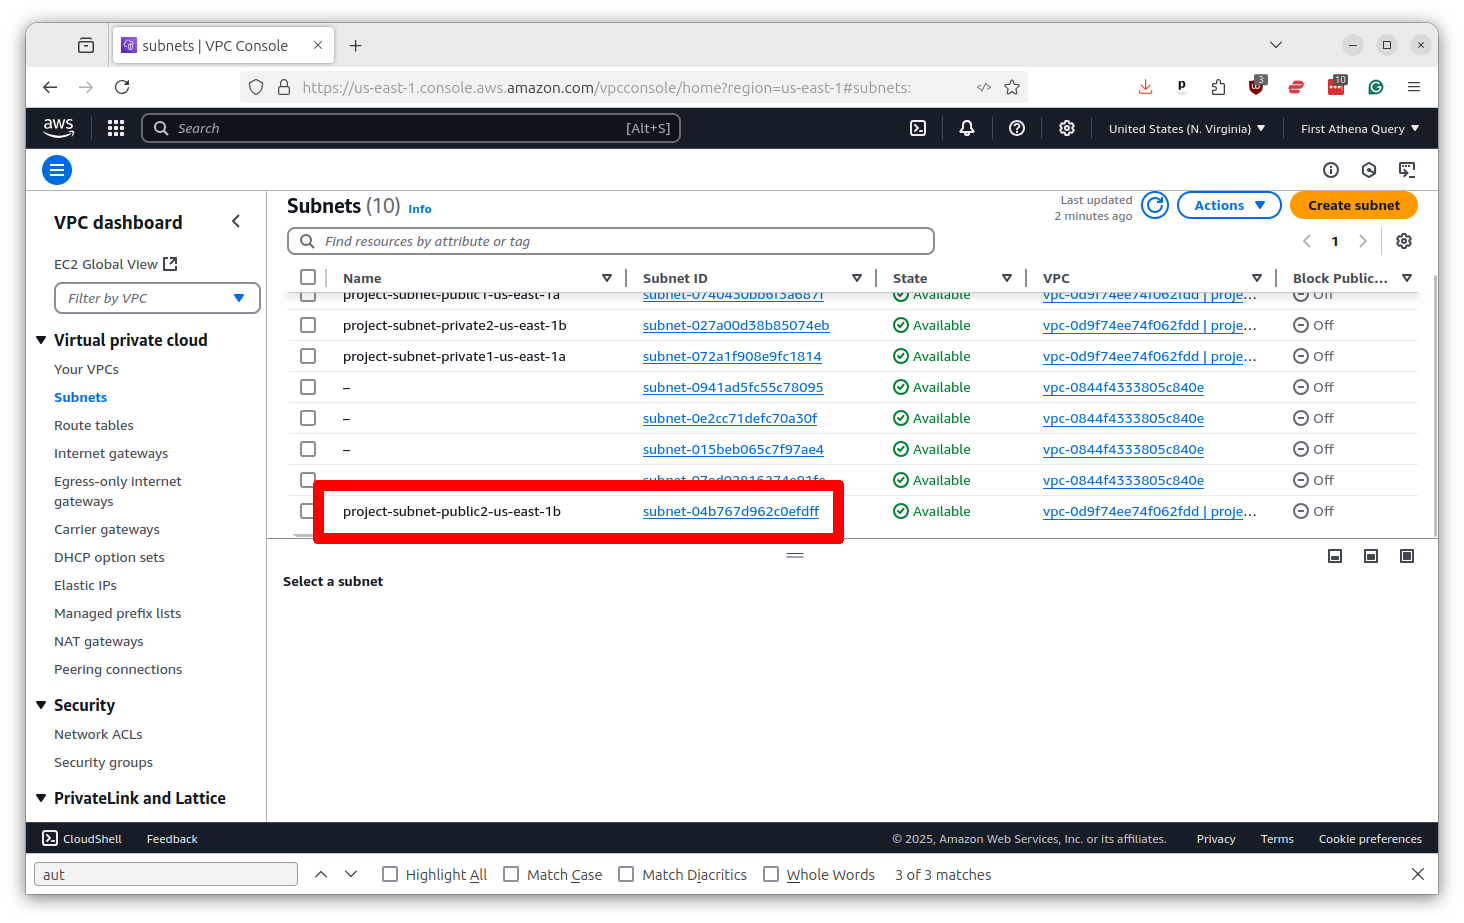
This will show a list of your subnets. Find one of the ones with “public” in its name and click on it.
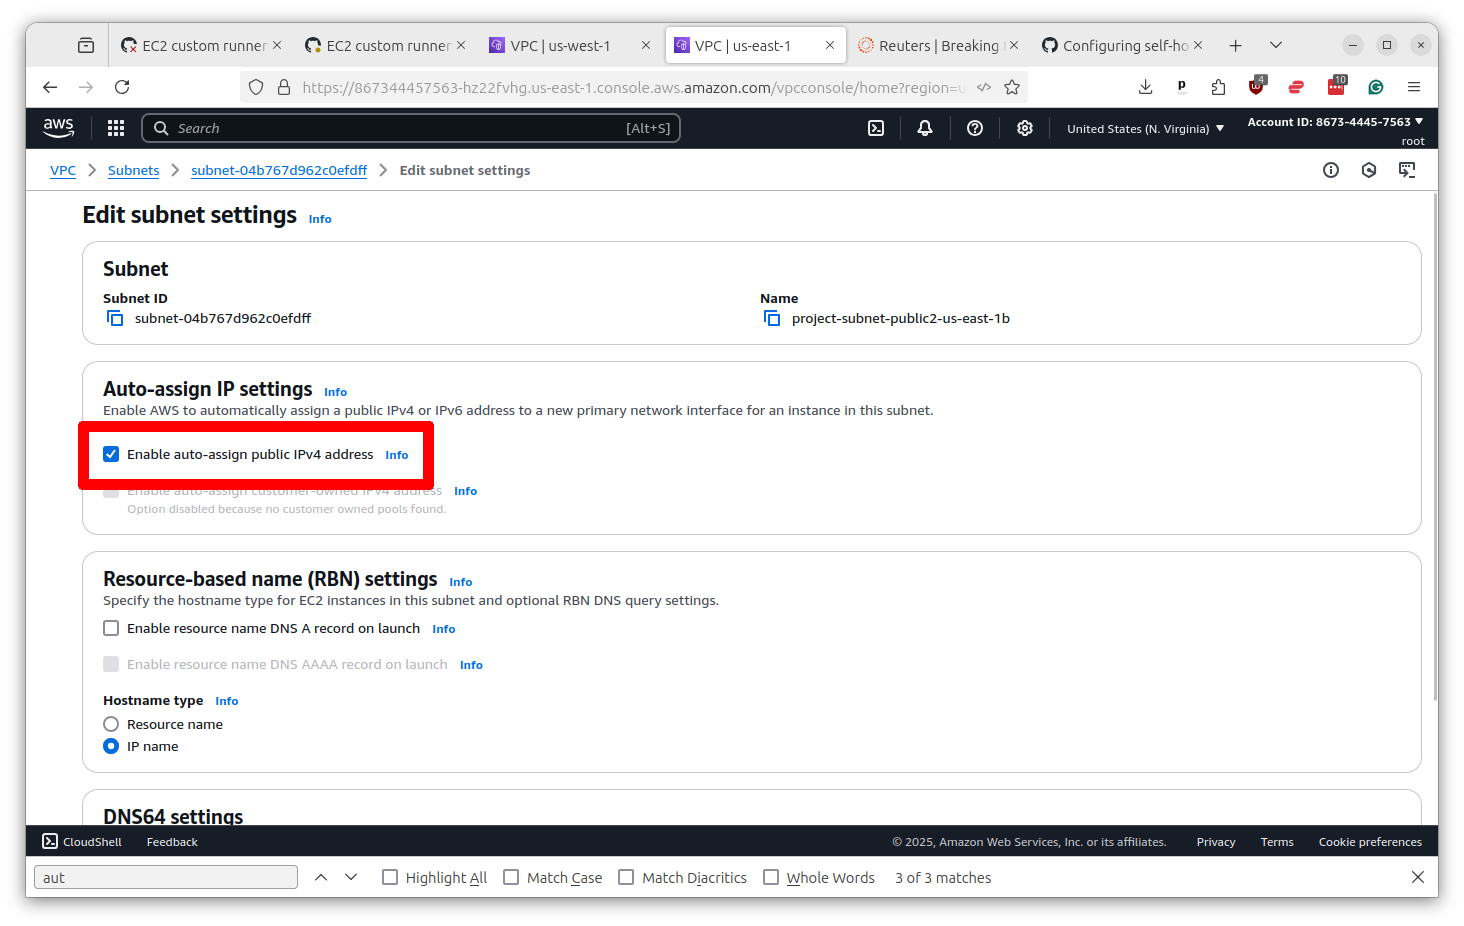
On the subnet profile page, look for an option that says “Auto-assign public IPv4 address.” If it is “no,” you will need to change it to “yes.” Click the button in the upper right that says “Actions” and select “Edit subnet settings.”
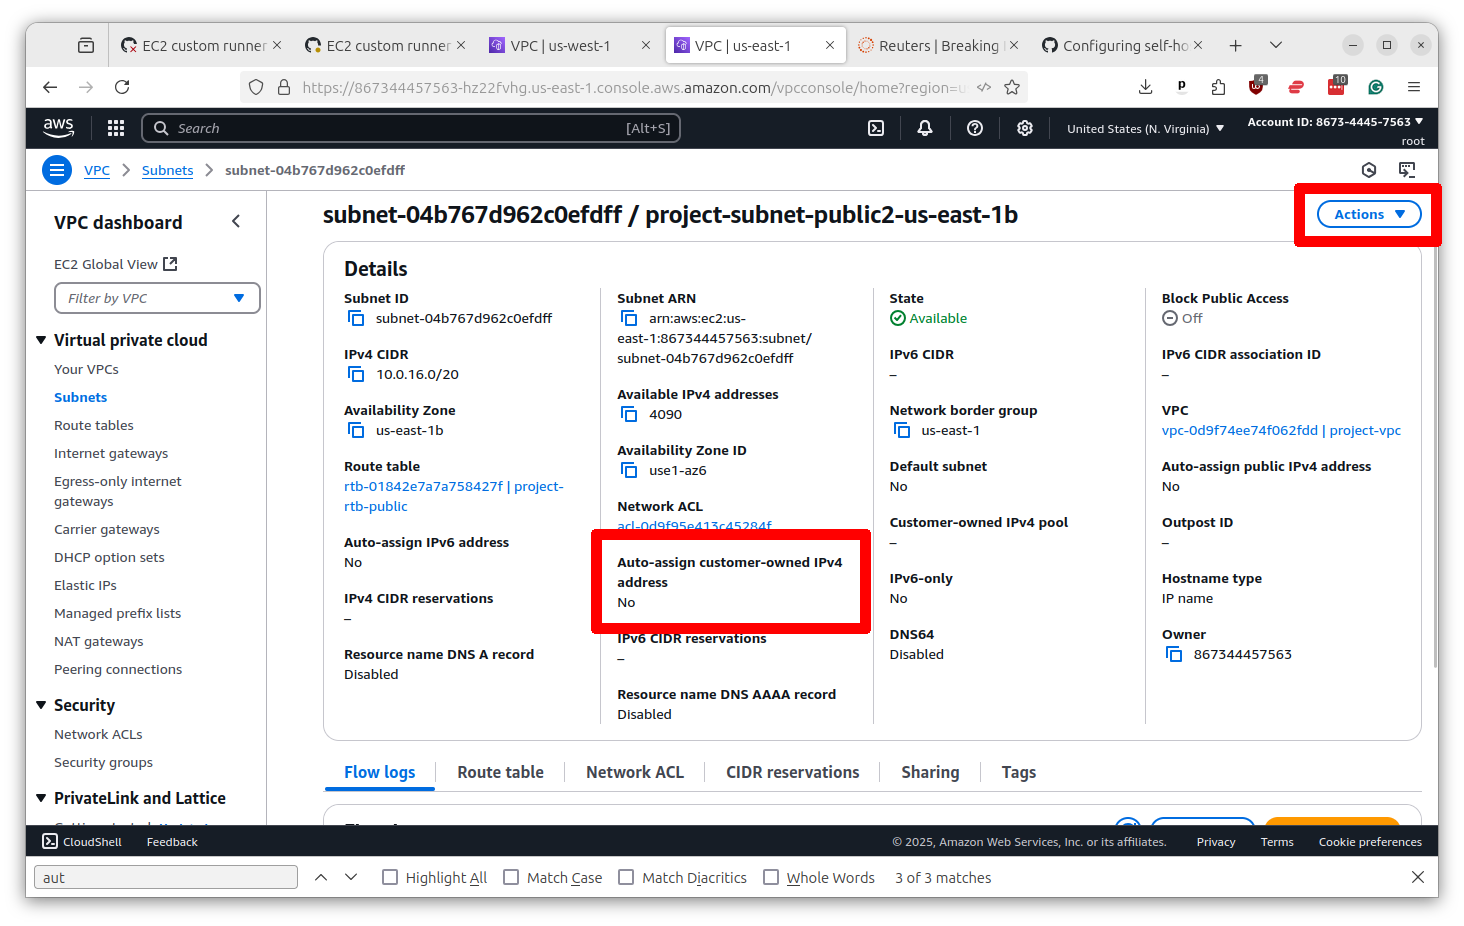
Change the setting to “yes” and then scroll down and click the button that says “Save.”
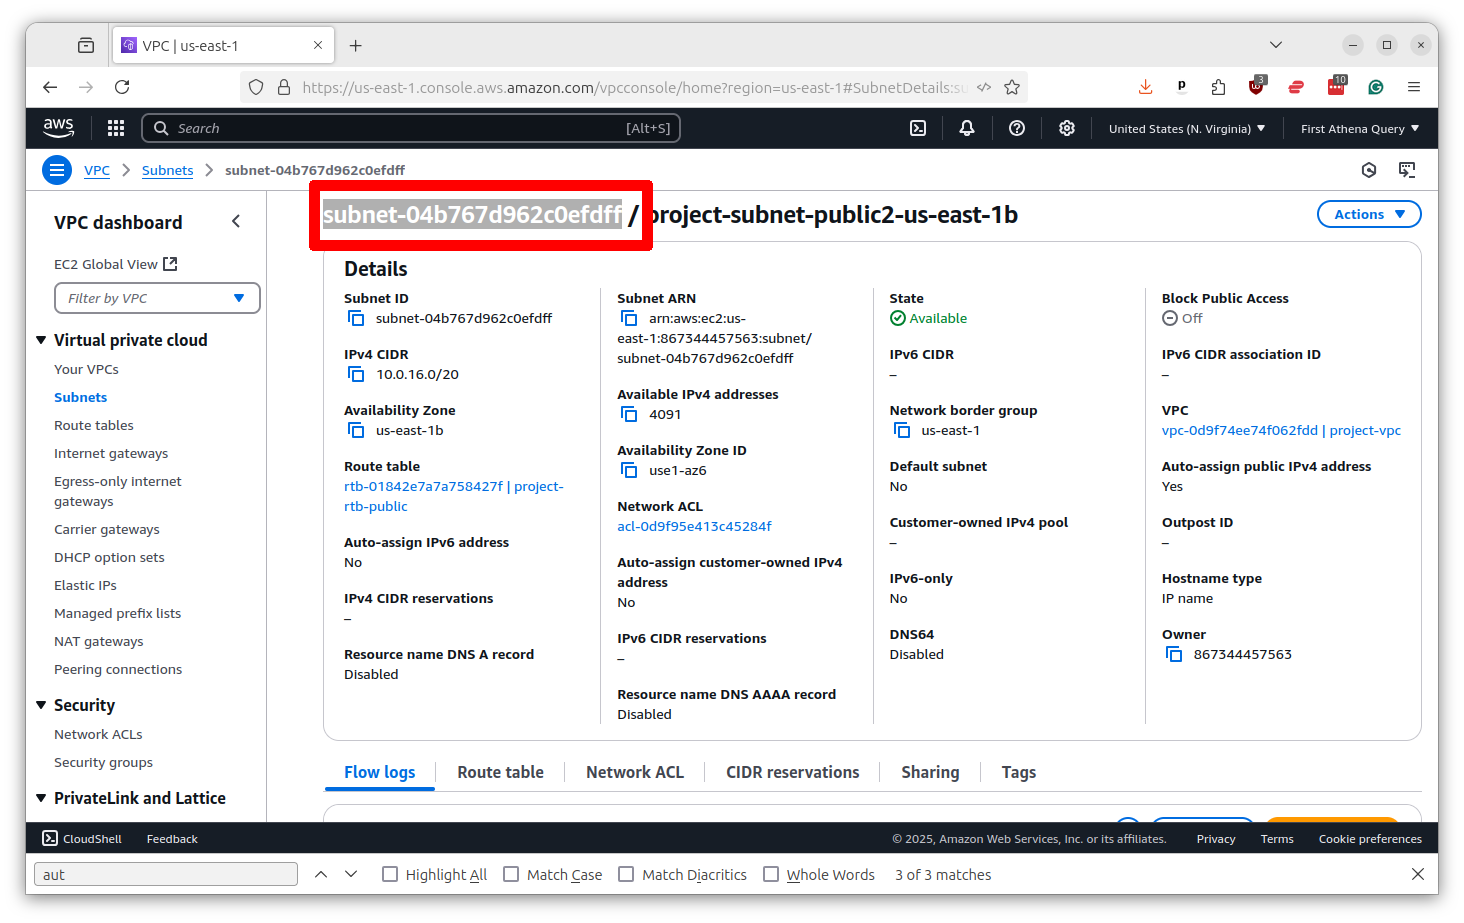
You’ve done it. But before you go, we need to save the subnet identifier for later. You will find it at the top of the profile page. Copy and paste it somewhere safe.
Next we will need to ensure that your EC2 servers use this subnet to access GitHub. We do this by setting what is known as a security group.
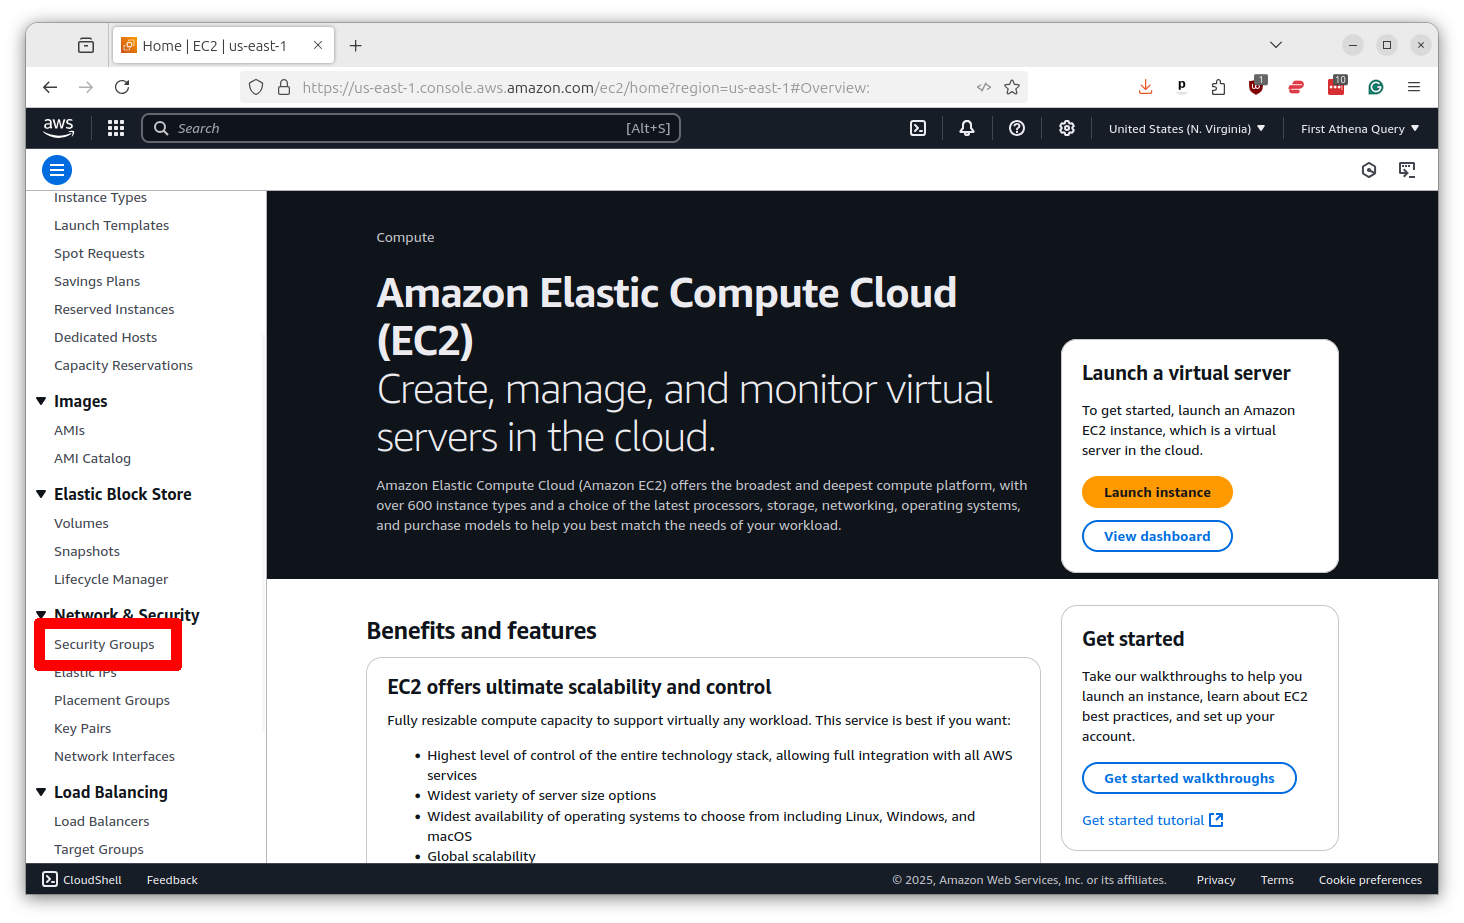
Return to the top search bar and this time punch in EC2. Select the top result.

Scroll down the left-hand toolbar and select “Security Groups.”
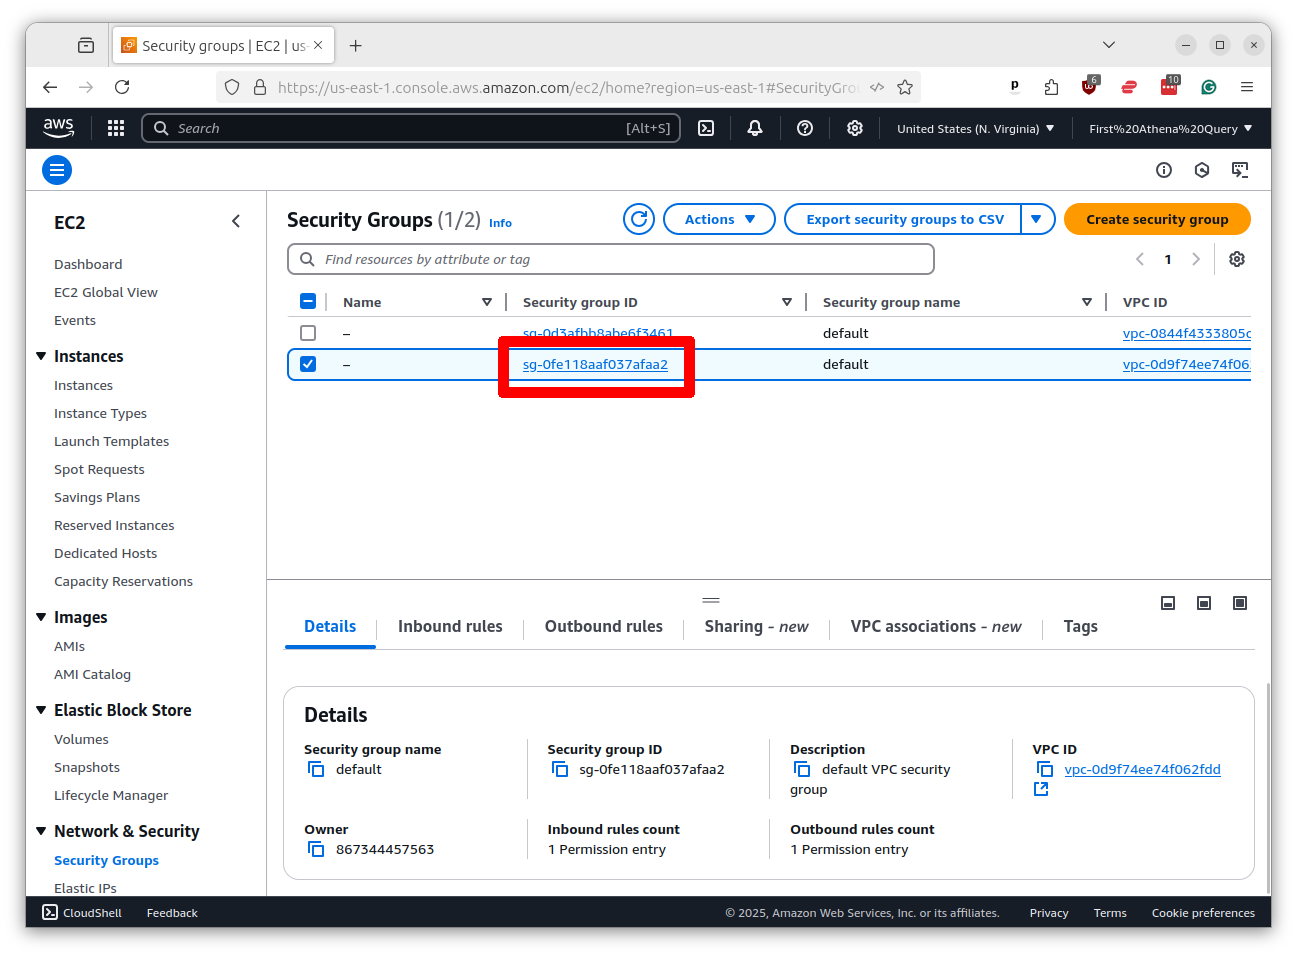
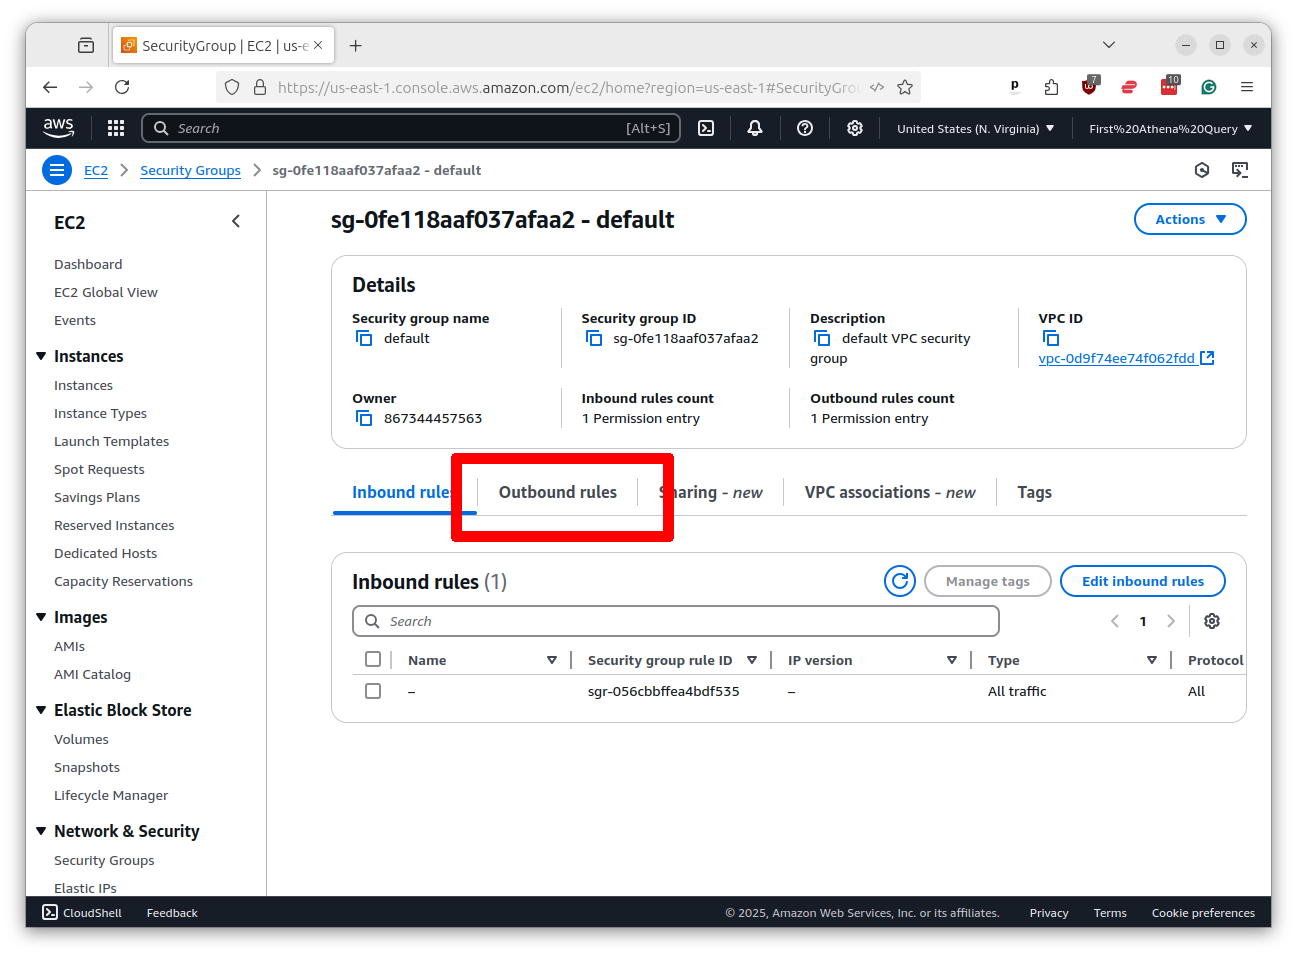
There will likely already be a security group created for you with the same name as your VPC. Click on its name.
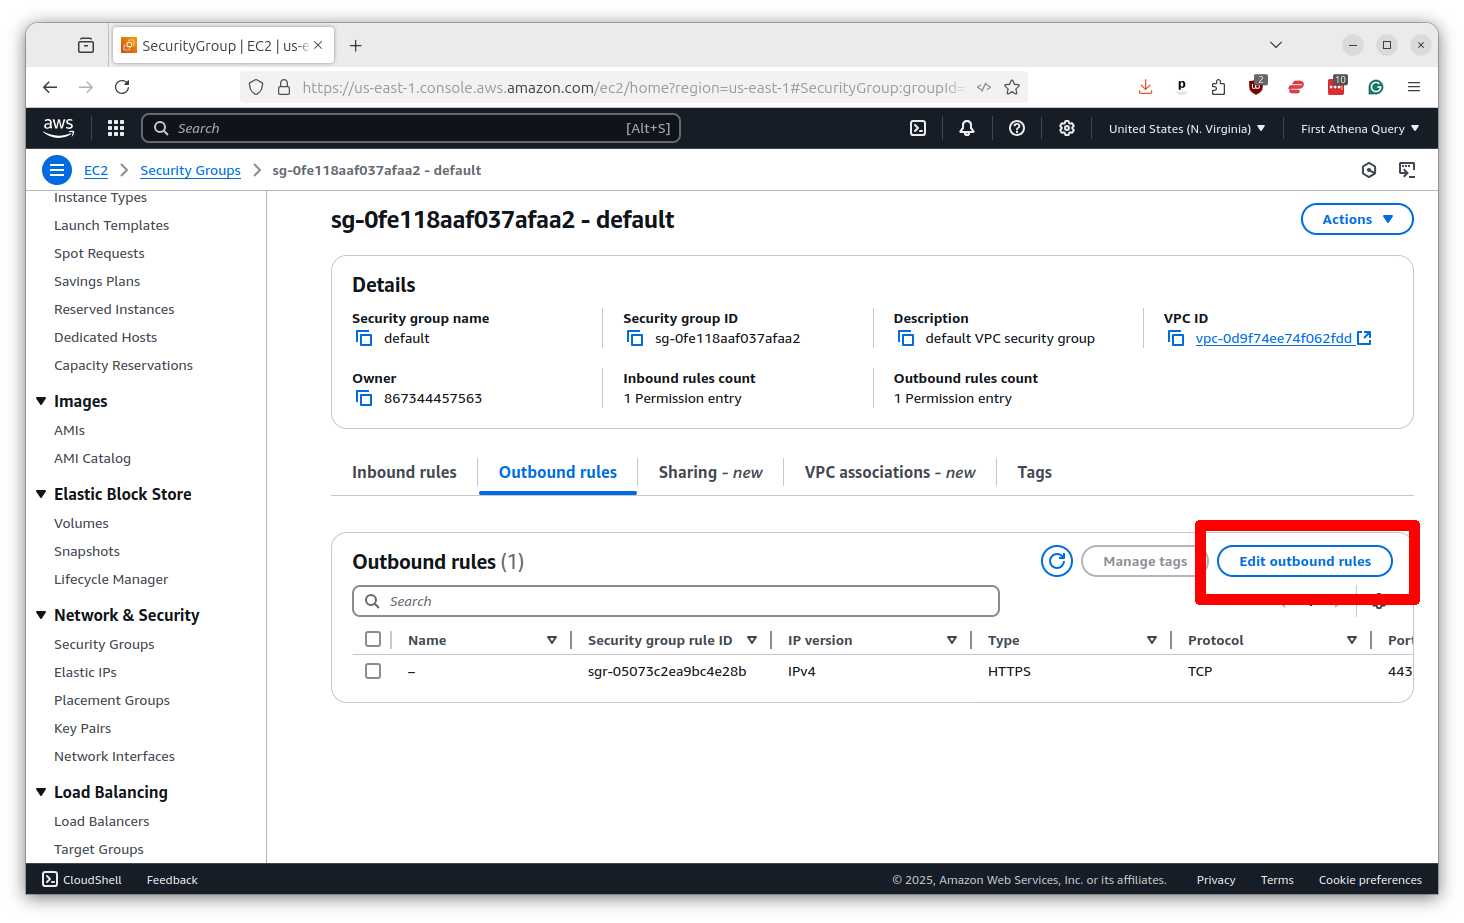
We need to make sure that your servers have “outbound” rights to talk to GitHub. Click on the “Outbound rules” tab.
Then click the button that says “Edit outbound rules.”
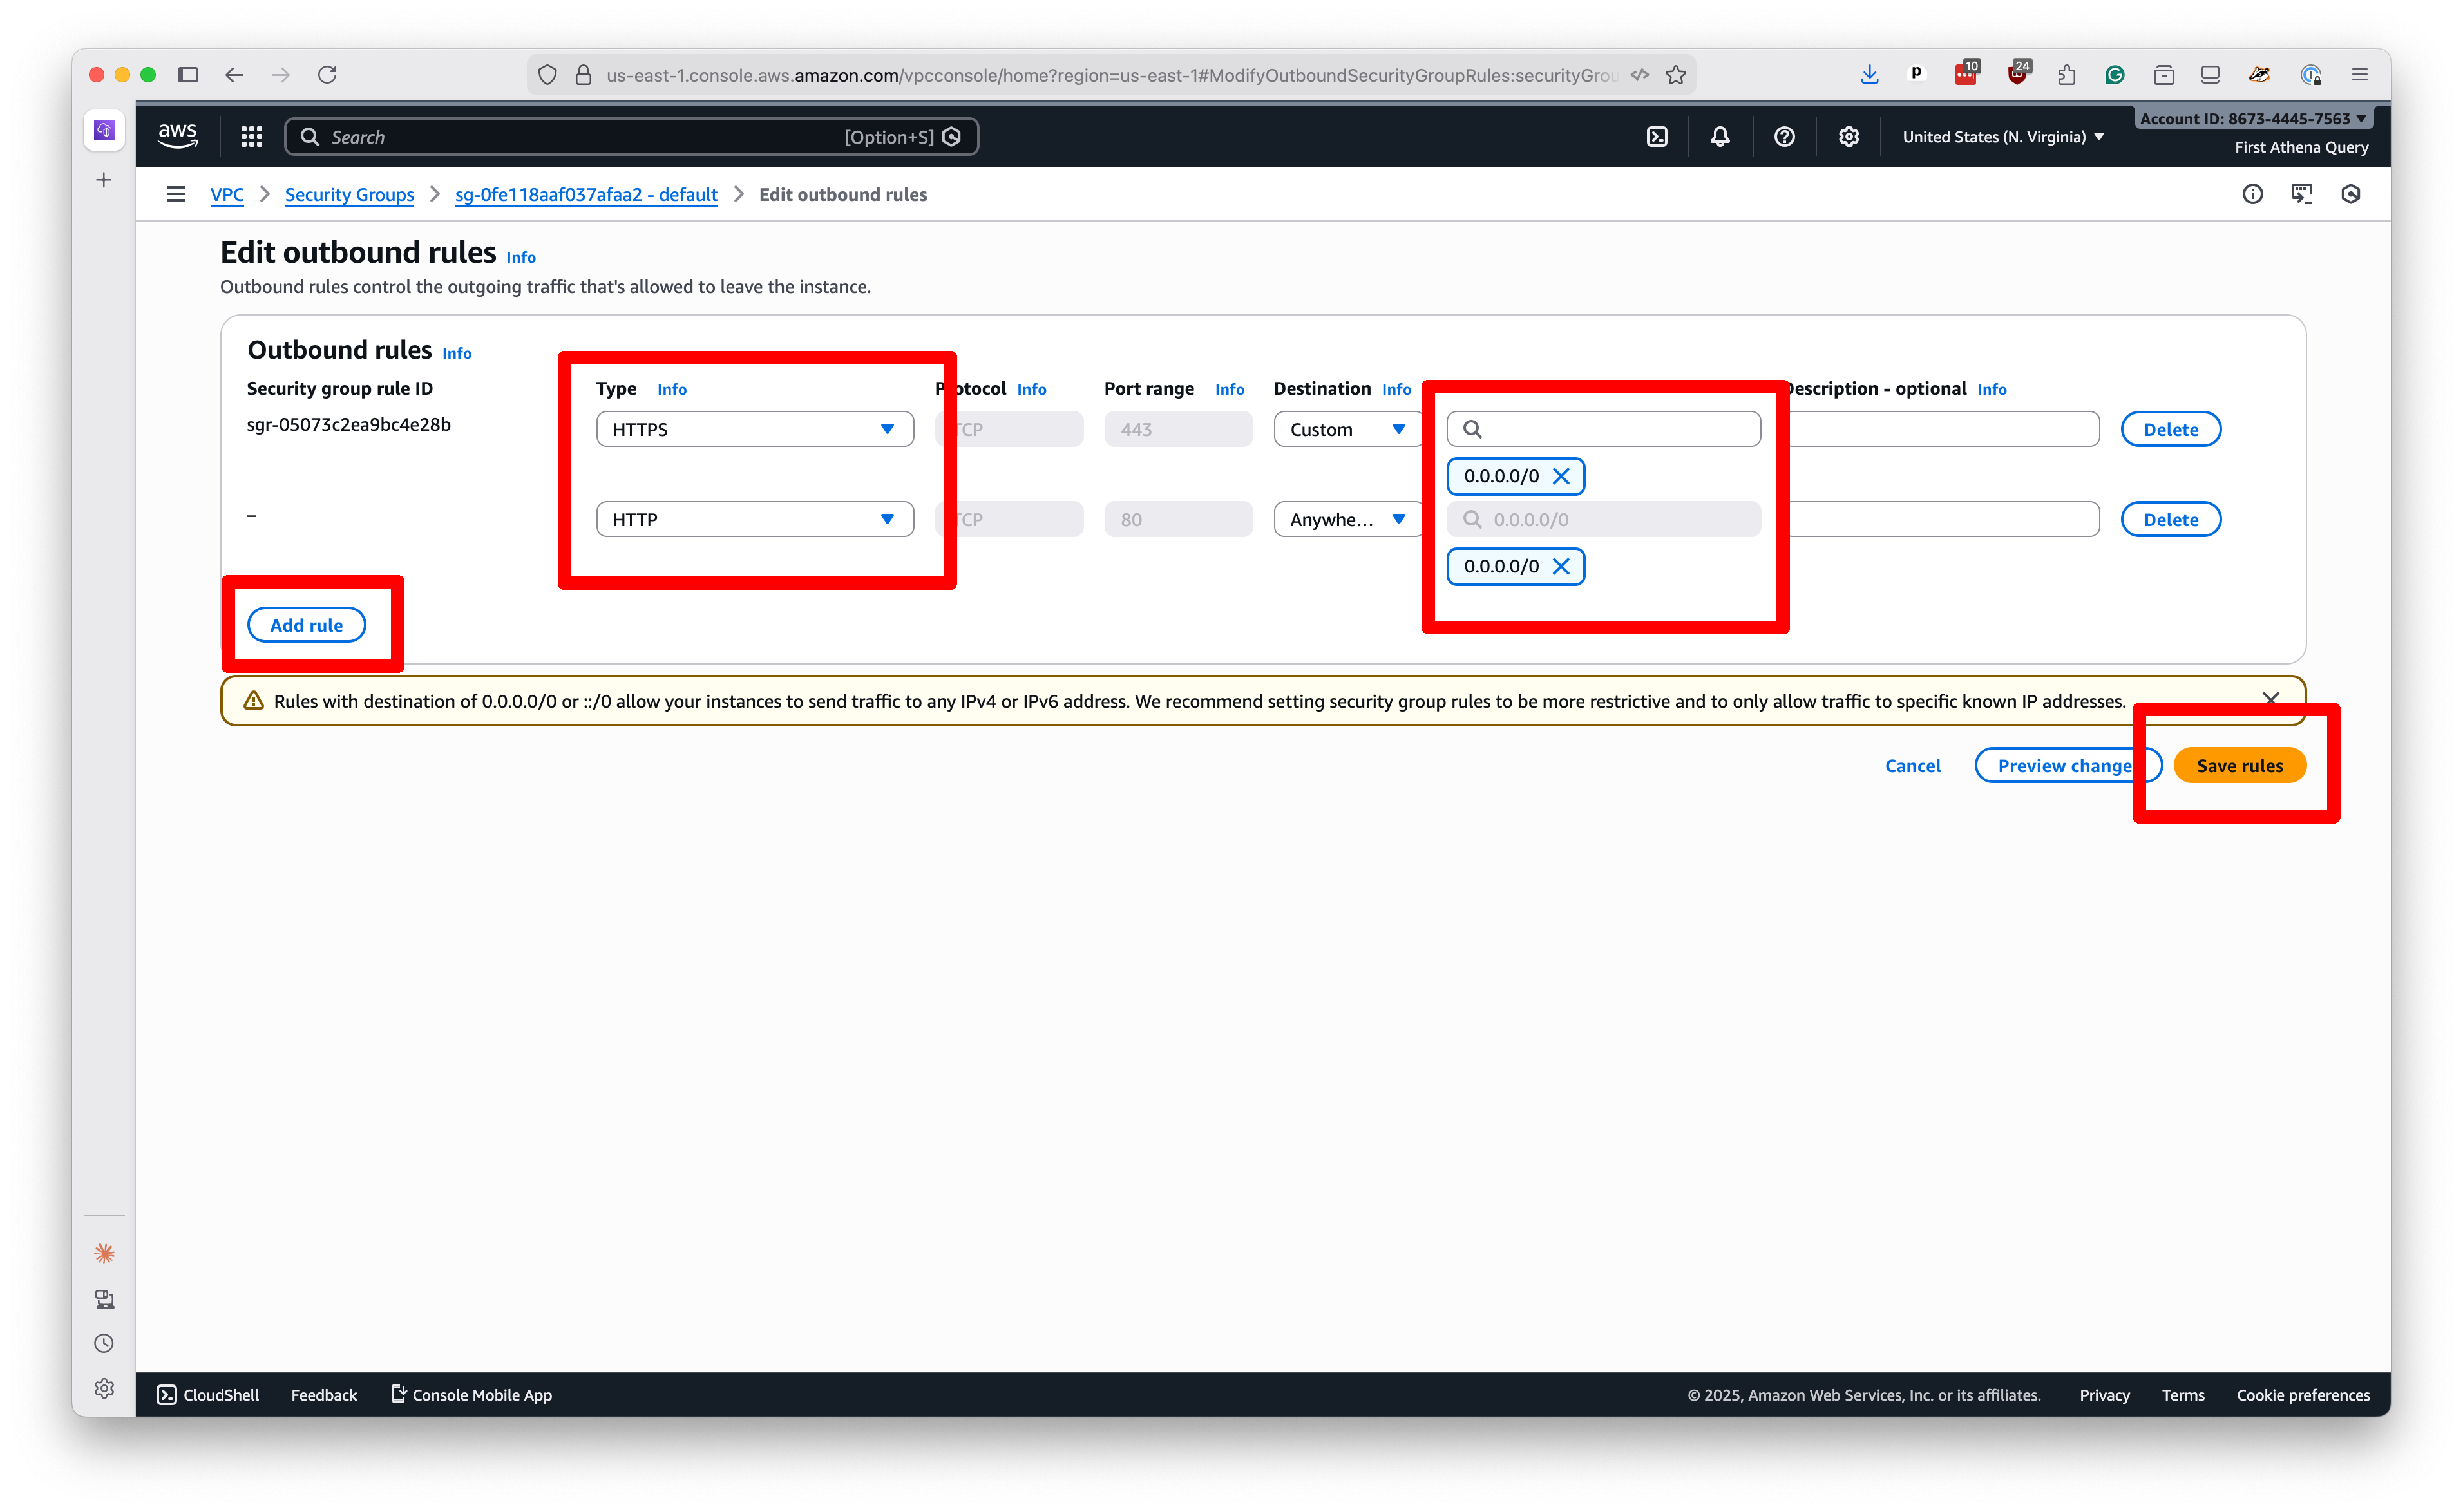
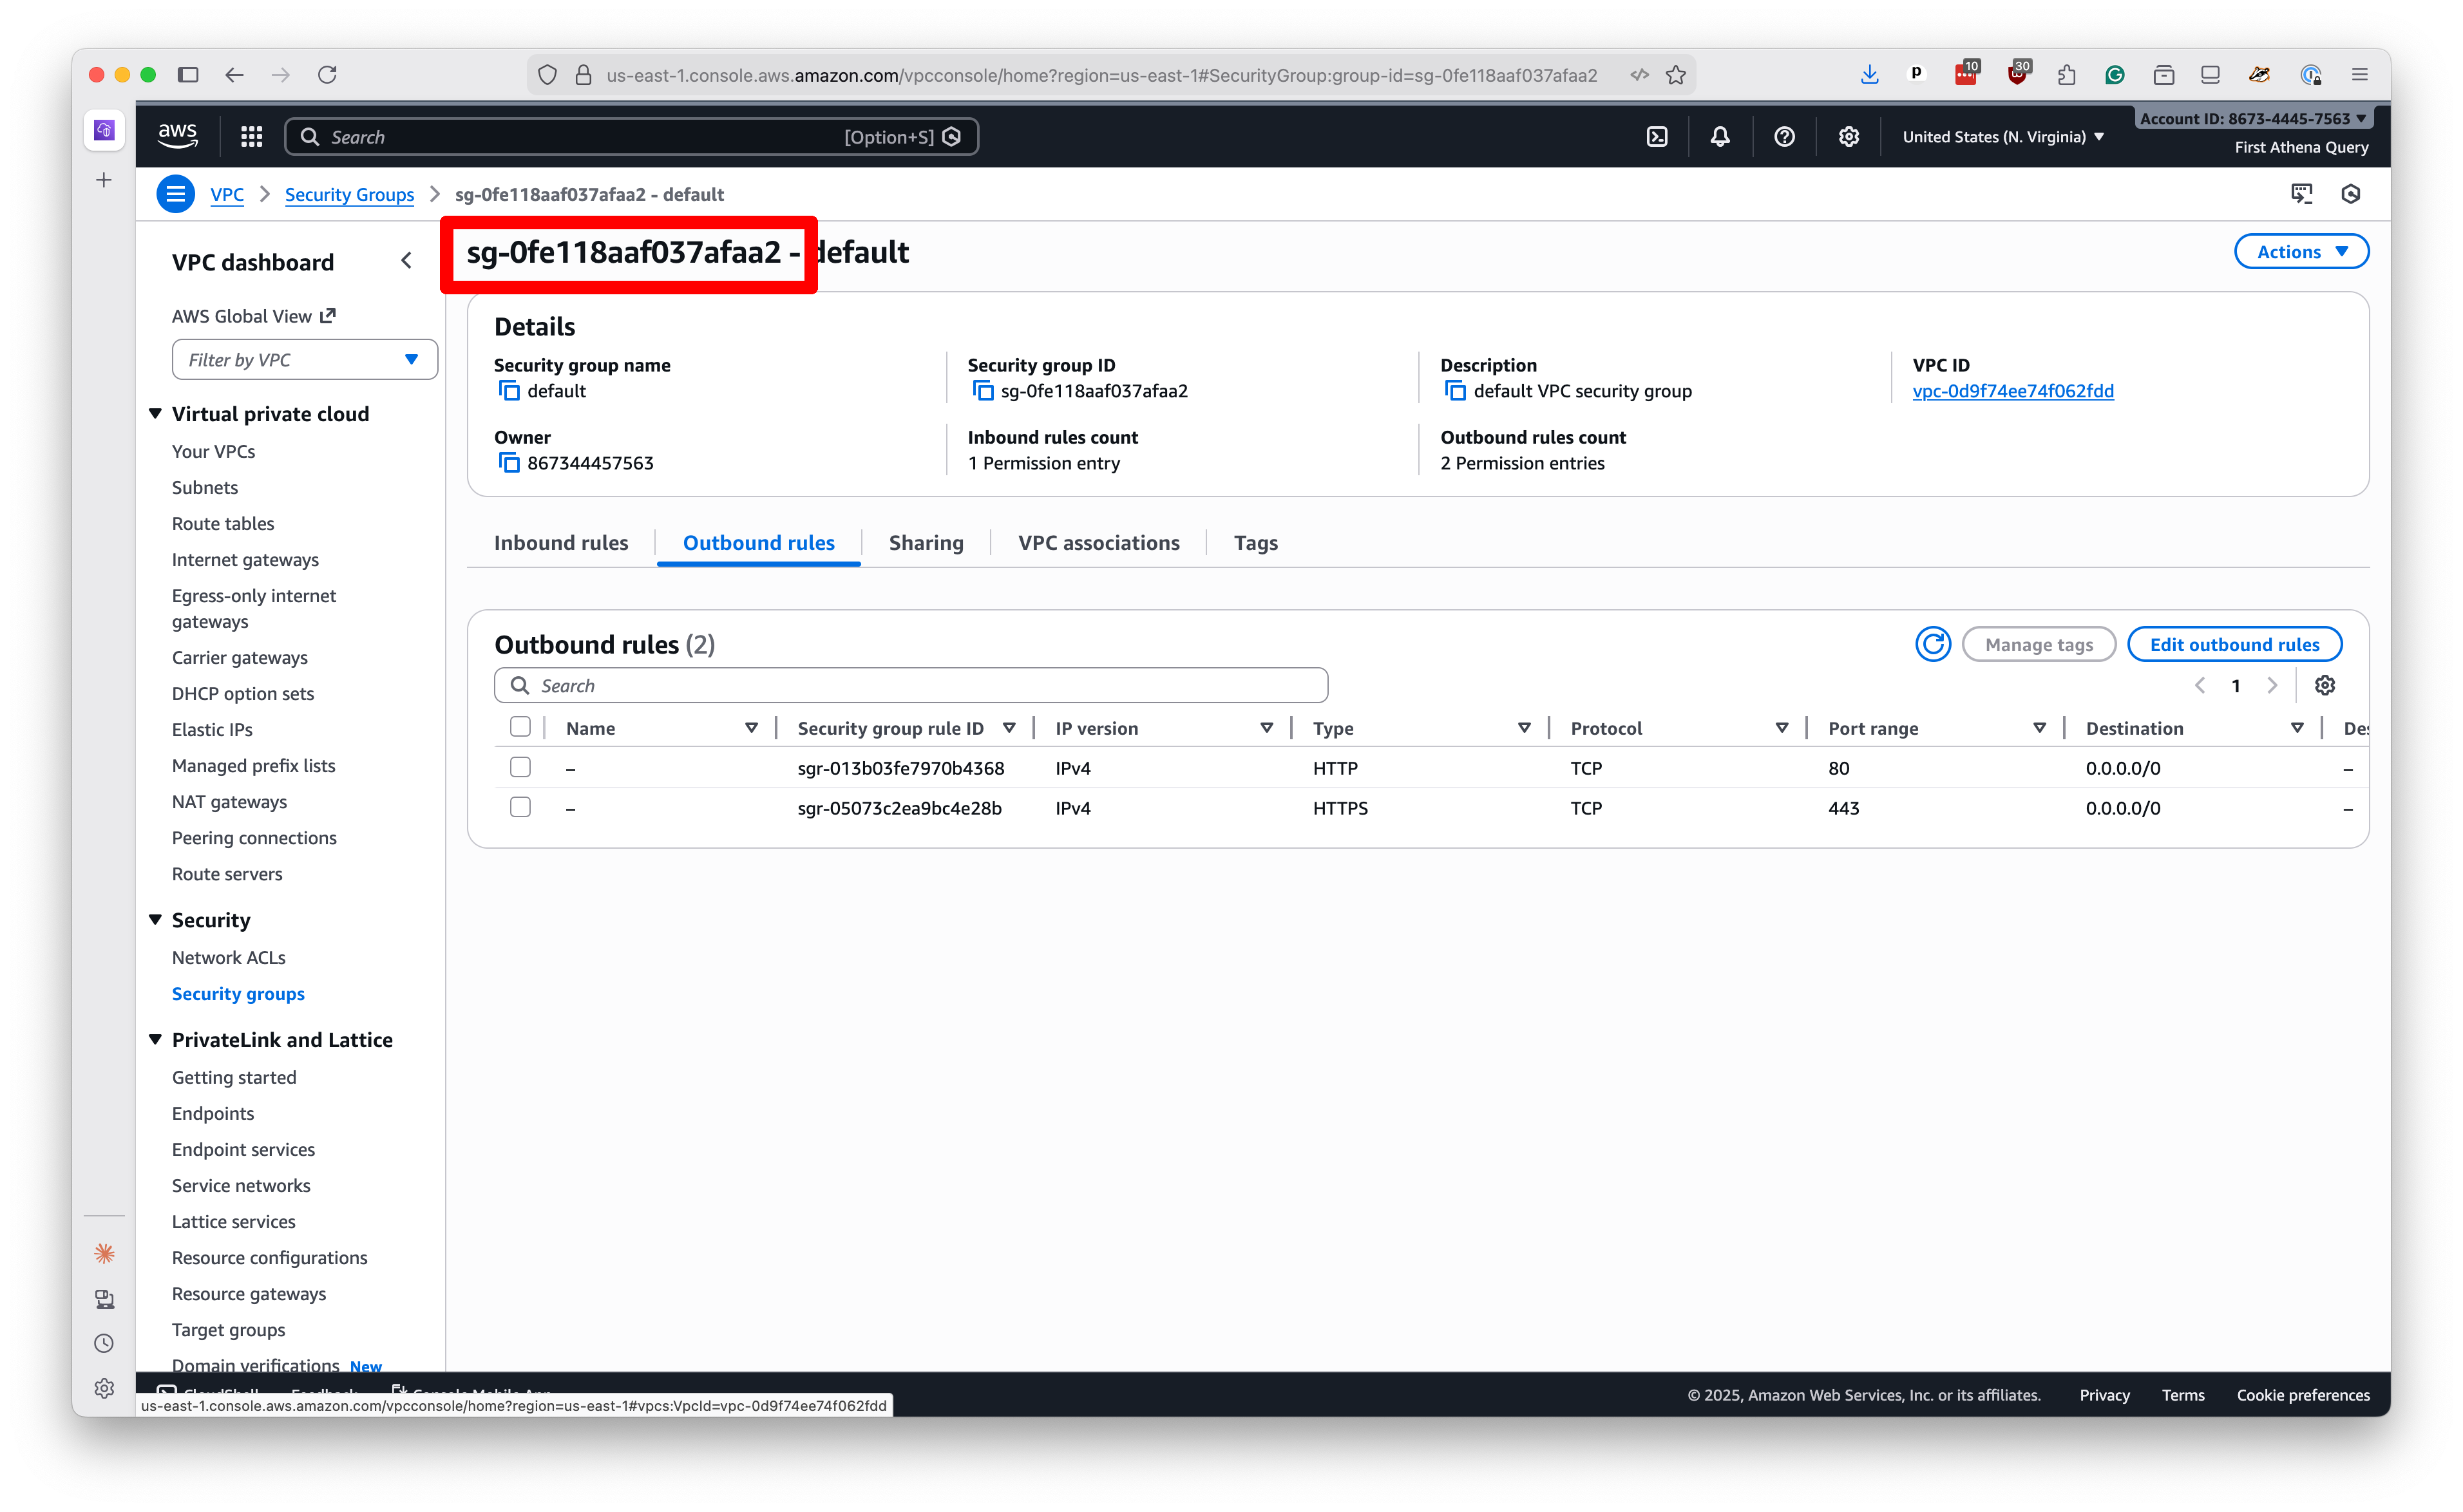
Now make sure there are rules that allow for “HTTP” traffic on port 80 and “HTTPS” traffic on port 443 to the “Custom” destination of 0.0.0.0/0, which means anywhere. If those rules are not there, click the button that says “Add rule” and put in those options. Then click “Save rules.”
Before you go we need to save the security group ID for later. You will find it at the top of the profile page. Copy and paste it to the same place you saved the subnet ID.
2.2. Introducing Amazon S3
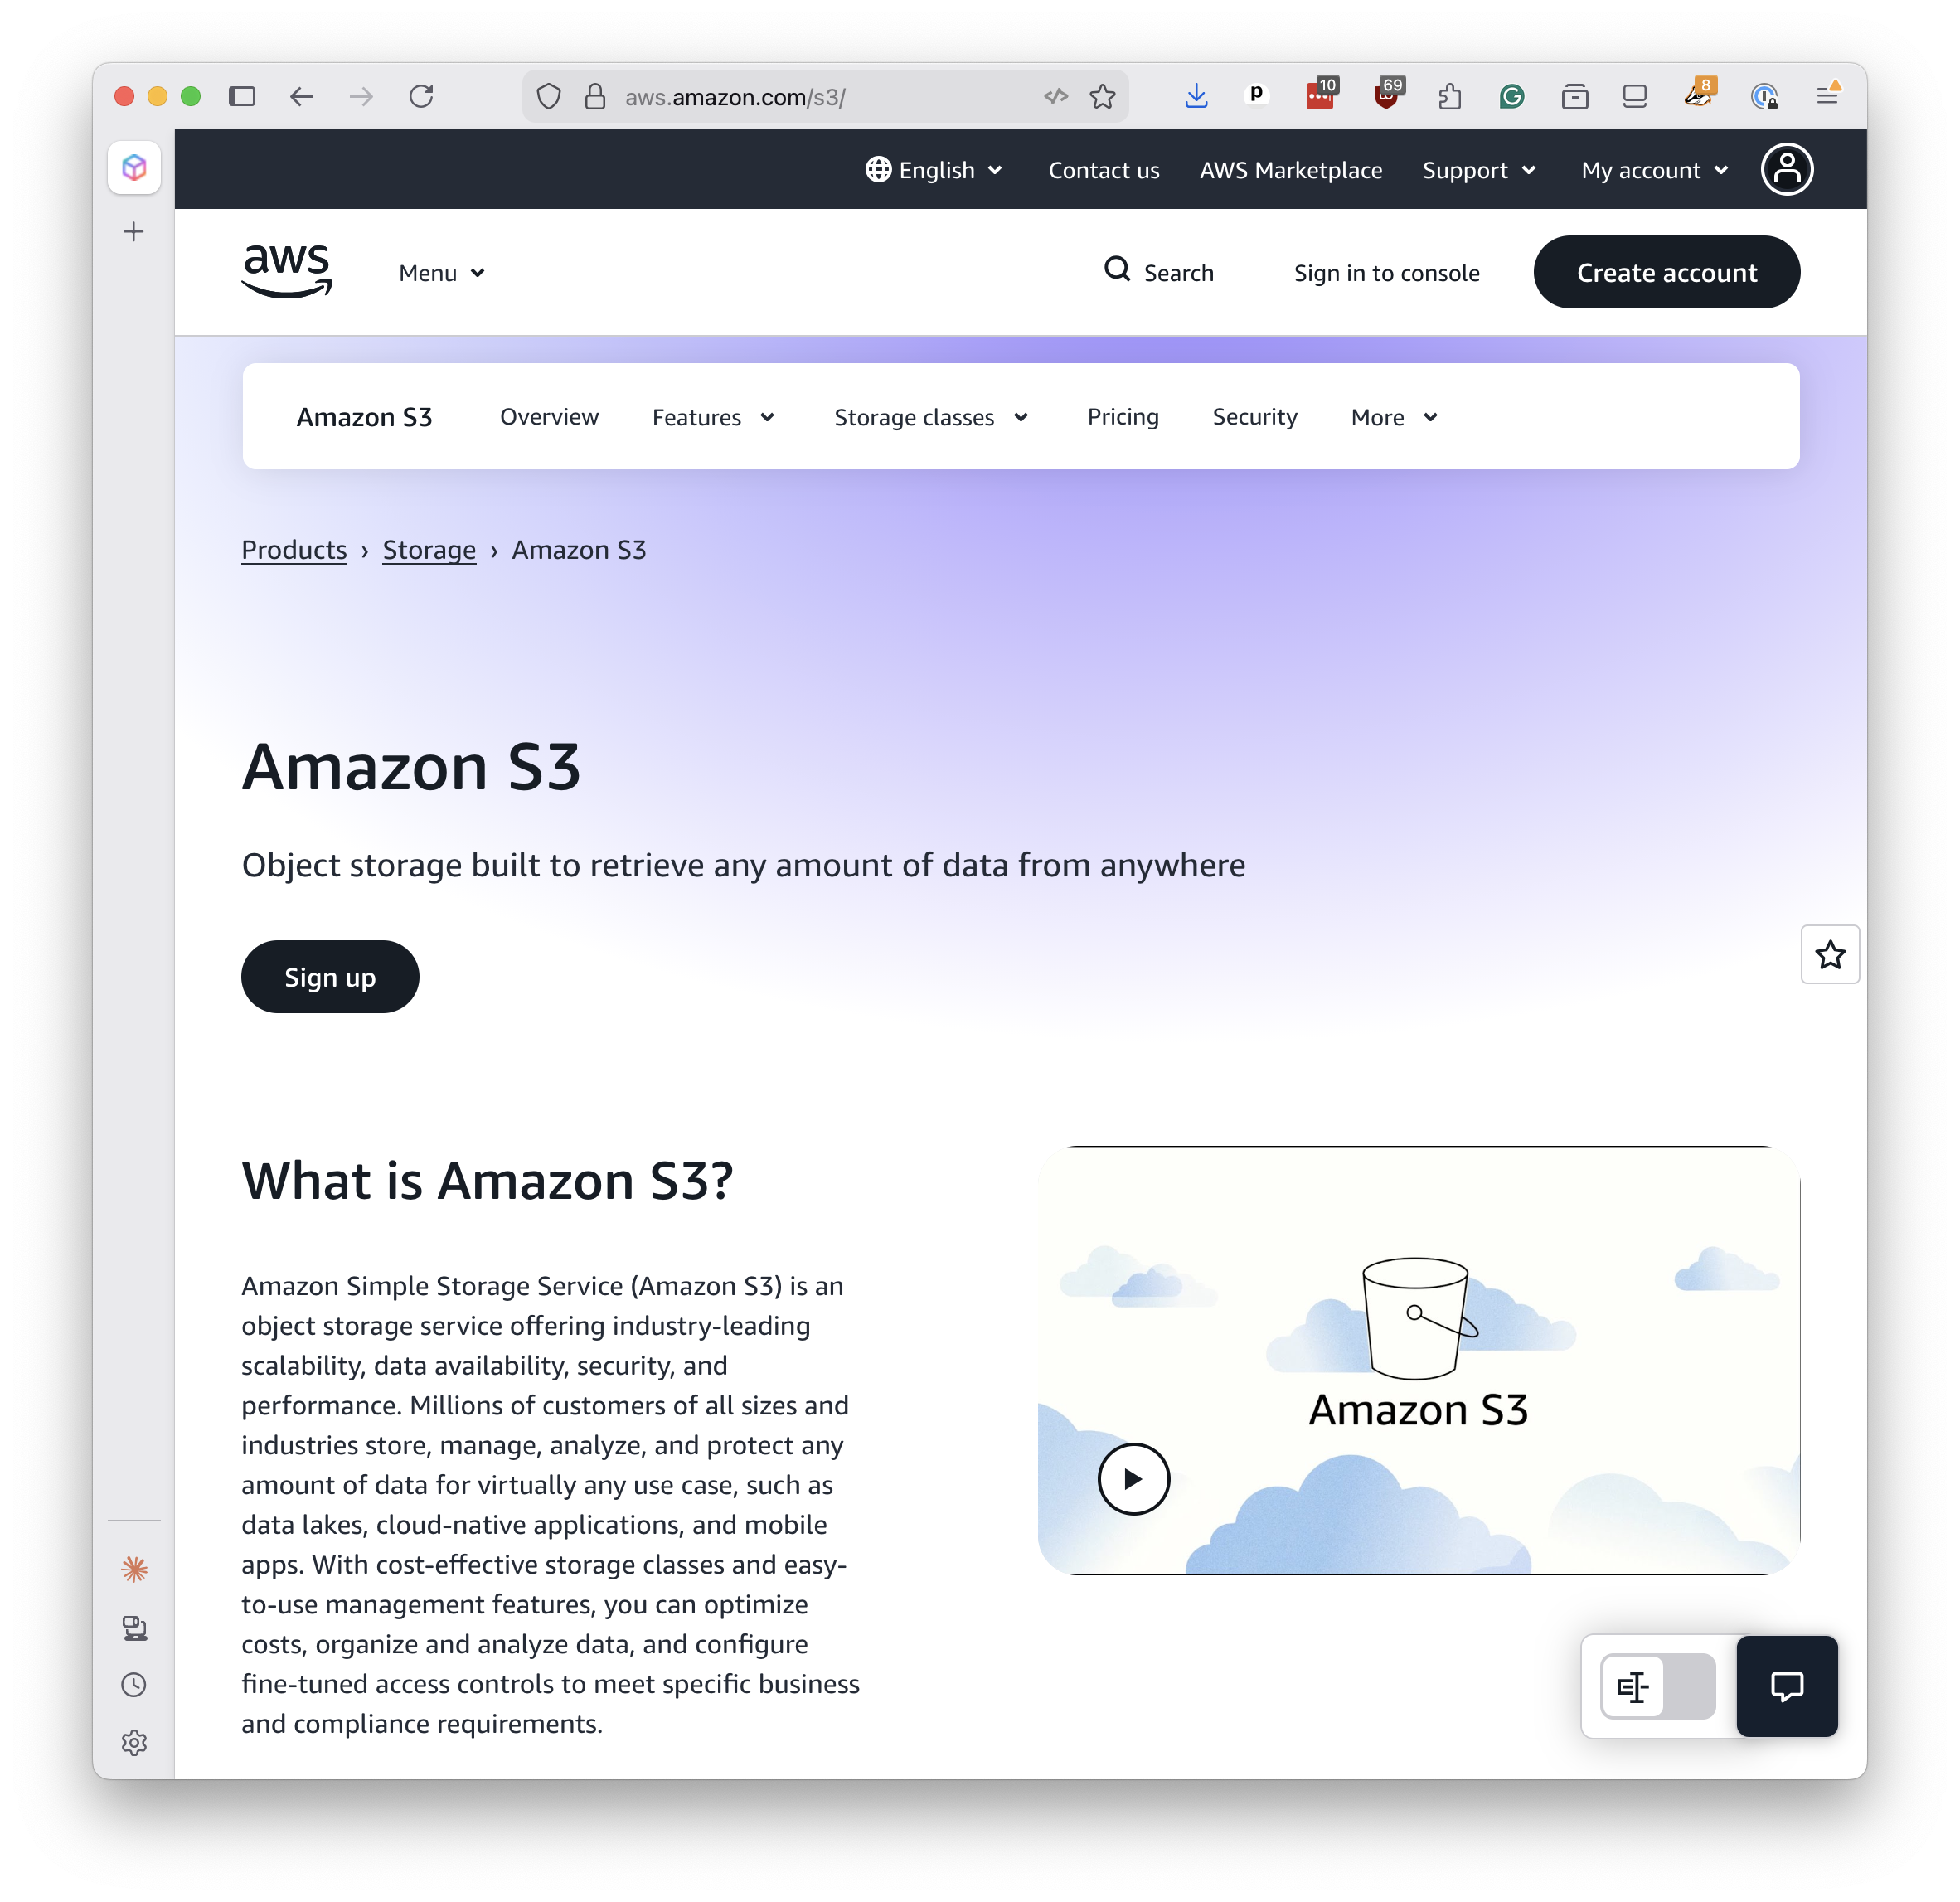
Amazon’s Simple Storage Service, commonly called S3, is AWS’s file hosting service. Think of it as a hard drive in the cloud where you can store and serve files over the web. Unlike EC2, which provides computing power, S3 simply stores files and makes them accessible via URLs.
We’ll use S3 to host our finished PMTiles files. Once uploaded, they’ll be publicly accessible and can be loaded directly into web maps without any server infrastructure.
You don’t need to do anything special to set up S3 for this tutorial. The Action we’ll use later will create a storage bucket automatically. But if you want to explore S3 on your own, you can find it by searching for “S3” in the AWS console bar.
Note
The ultimate cost to host files on S3 will depend on how much traffic your map generates. You can accelerate your tiles and reduce your costs by using a content-delivery network, or CDN, such as Cloudflare. For more information on hosting PMTiles files, see the the project’s cost calculator and deployment guide.
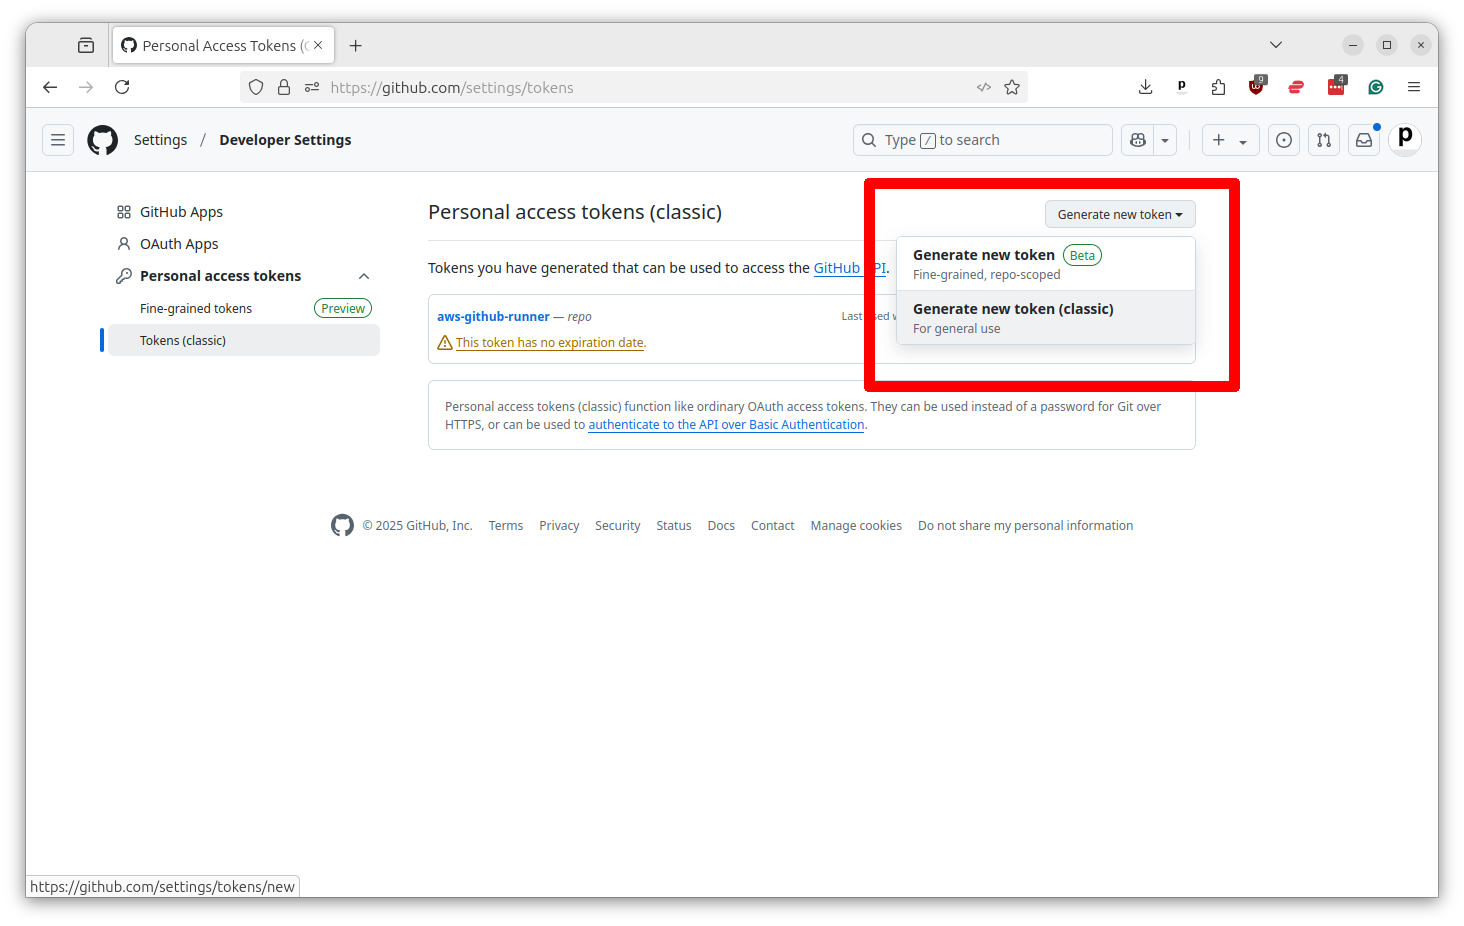
2.3. Creating a Personal Access Token
Now we need to create a Personal Access Token, or PAT, that will allow GitHub to access your EC2 servers. This is done by going to your GitHub profile page and clicking on “Settings” and then selecting the “Developer settings” link at the bottom of the left-hand menu. You’ll then want to select the “Tokens (classic)” option from under “Personal access tokens” in the left-hand menu.
You can jump there directly by visiting github.com/settings/tokens

Click on the button that says “Generate new token” and select the “classic” option.
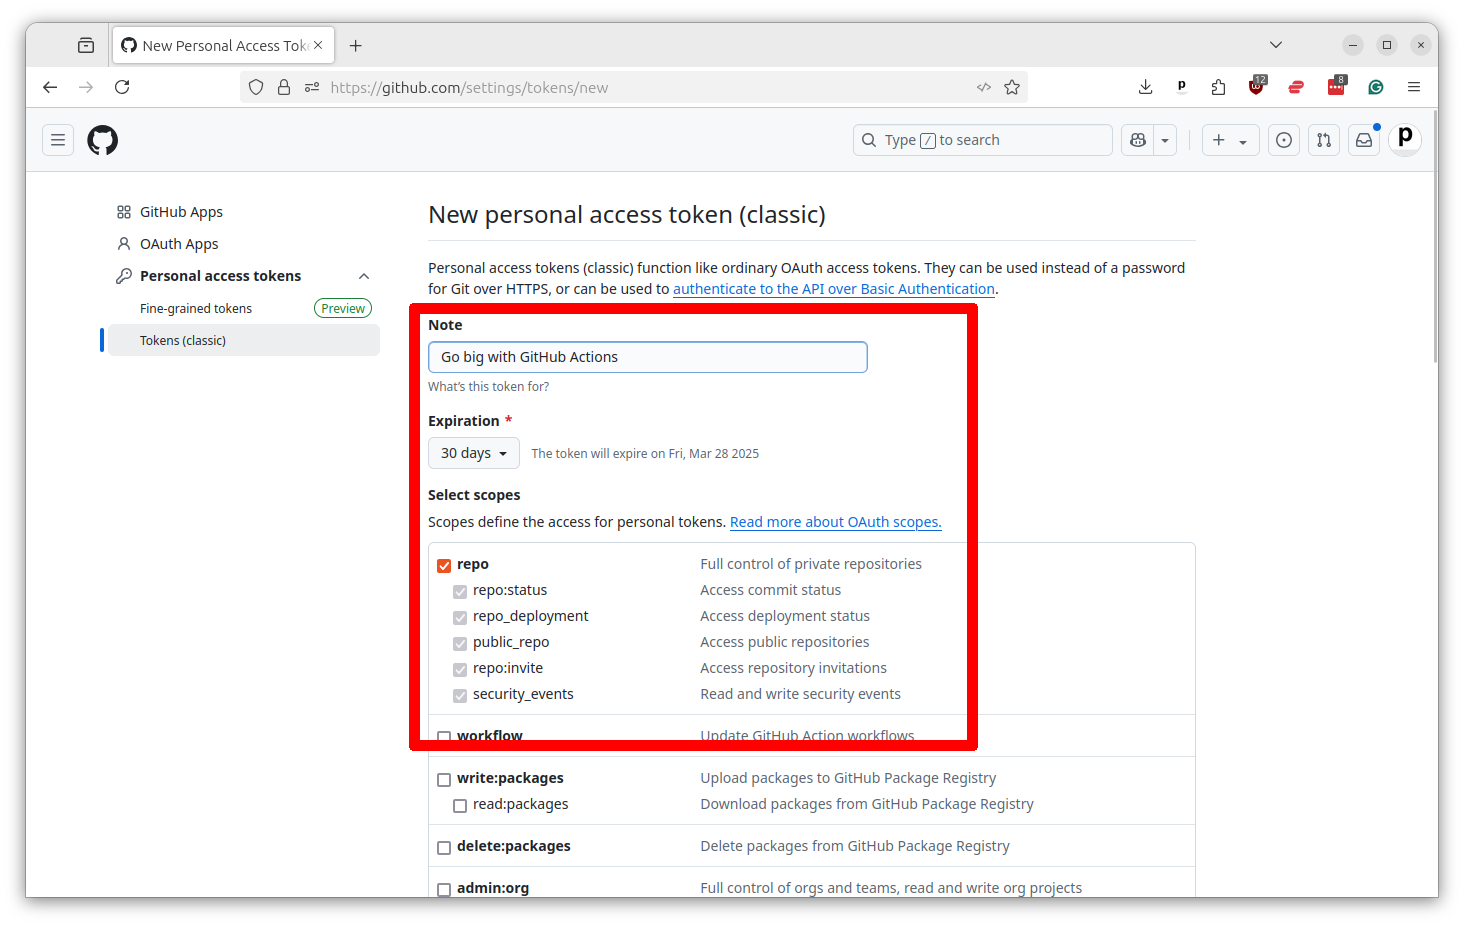
Give your token a name and then select the “repo” checkbox, which will provide the necessary permissions. If you want to use this Action for a significant time period, you should extend the expiration date beyond the default of 30 days.
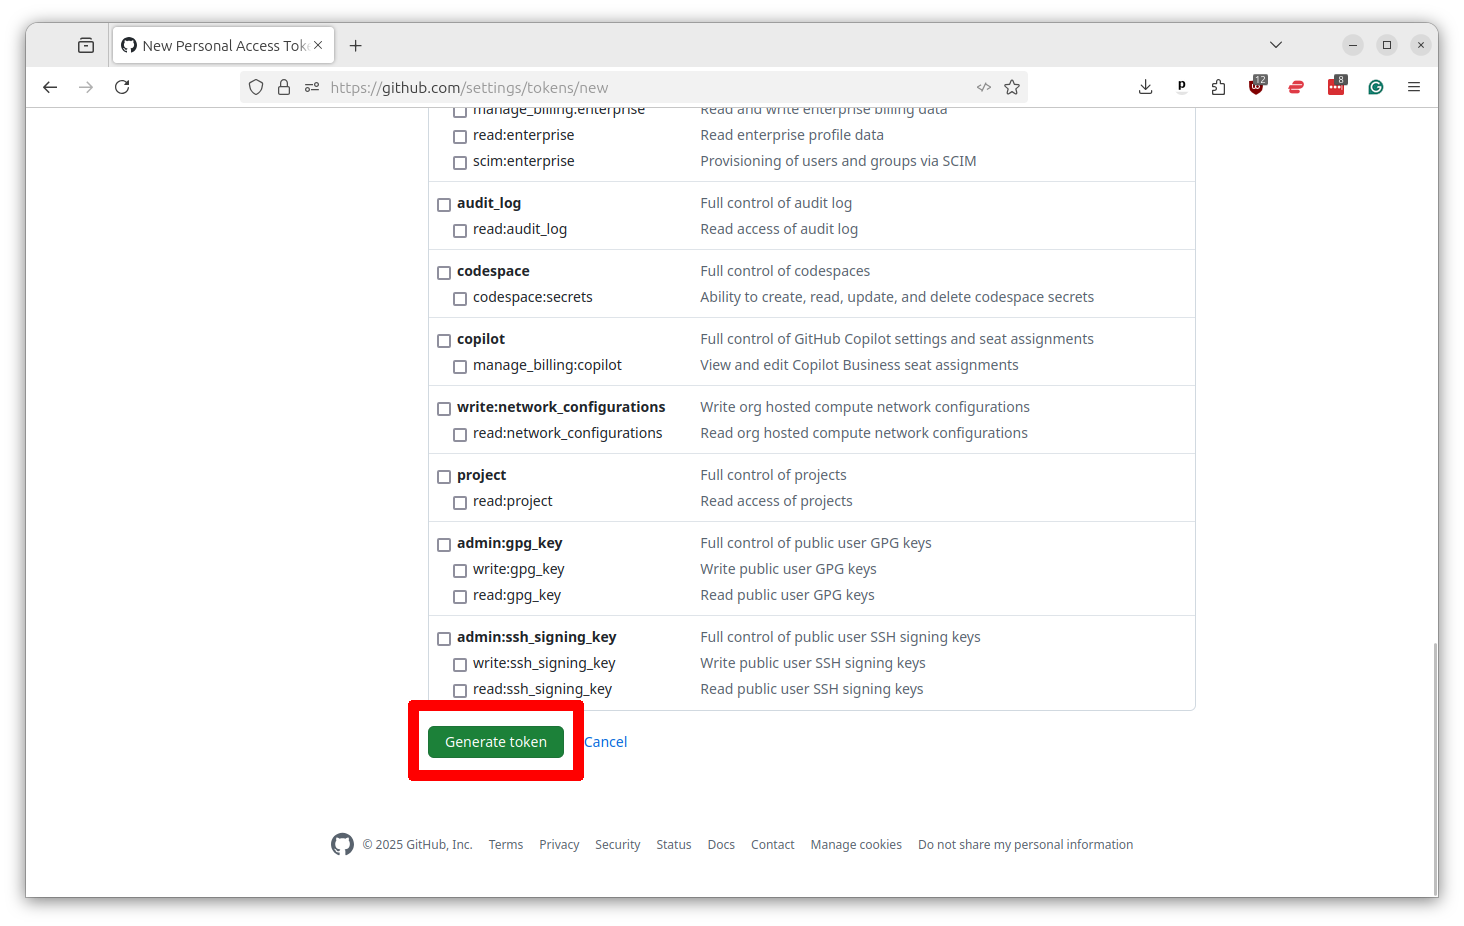
Scroll to the bottom and select “Generate token.”
That will print out your token. Copy and paste it into the same text file where you saved your other secrets. You will not be able to see it again. I’ve redacted mine in the screenshot for security.

2.4. Saving your secrets in GitHub
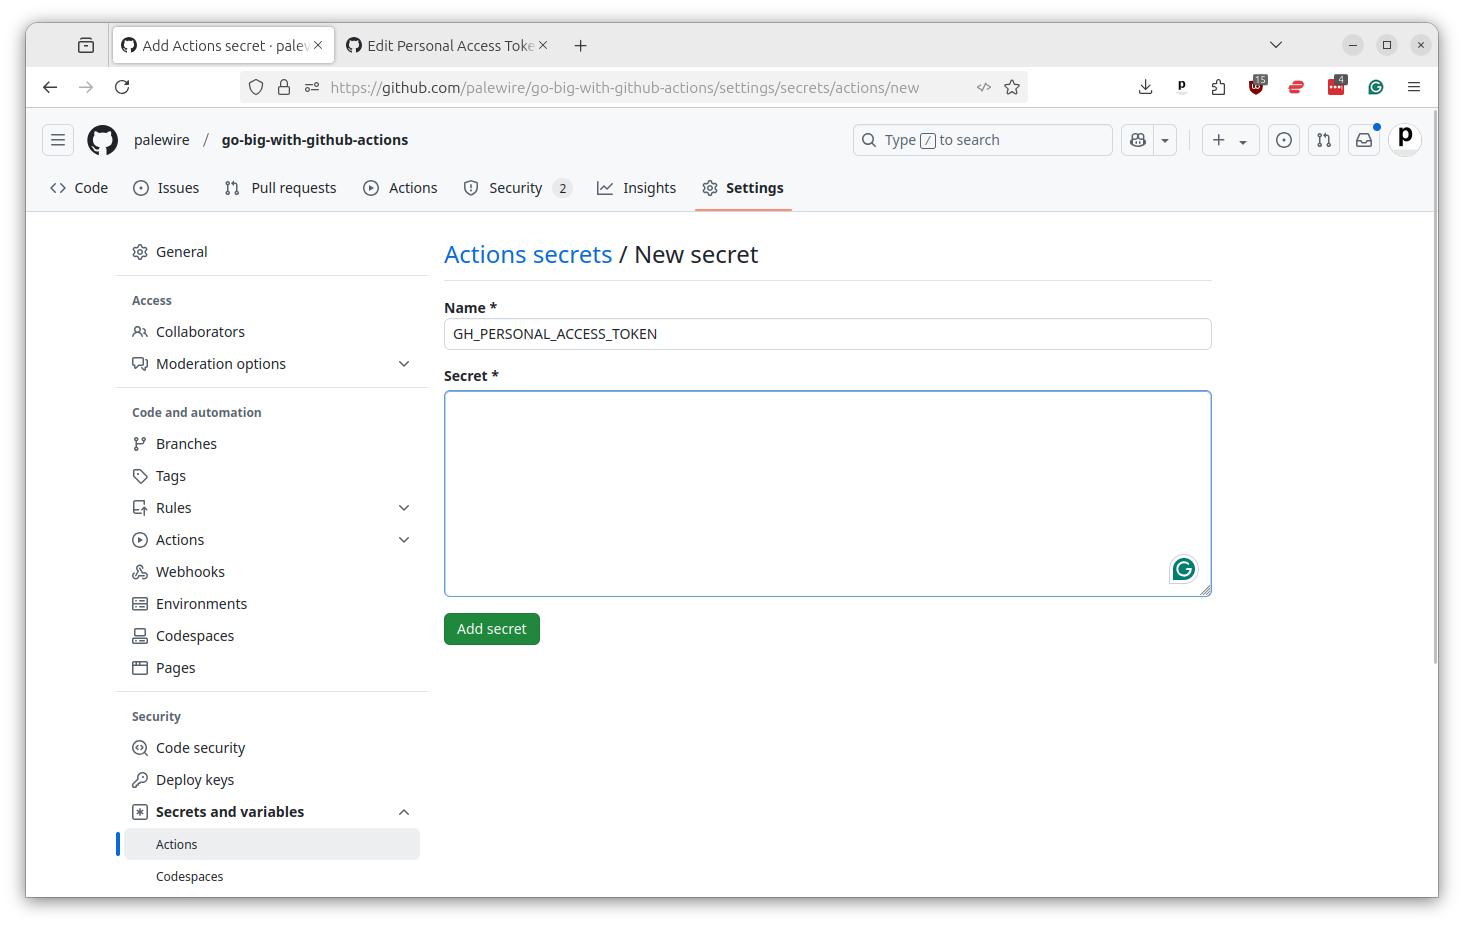
Now all of these secrets need to be saved in your repository’s settings. You can do this by going to the repository’s main page and clicking on the “Settings” tabs. Then select “Secrets and variables” from the left-hand menu and then “Actions.”
You should then see a button that says “New repository secret.” Click it.
You’ll want to add three variables, one by one, from the text file where you’ve saved your secrets.
First, the personal access token from GitHub should go in as GH_PERSONAL_ACCESS_TOKEN.
Then you should do the same thing by adding your AWS access key ID as AWS_ACCESS_KEY_ID and your AWS secret access key as AWS_SECRET_ACCESS_KEY.
After all that, you’re finally ready to run your first Action on EC2.
2.5. Creating a workflow that uses EC2
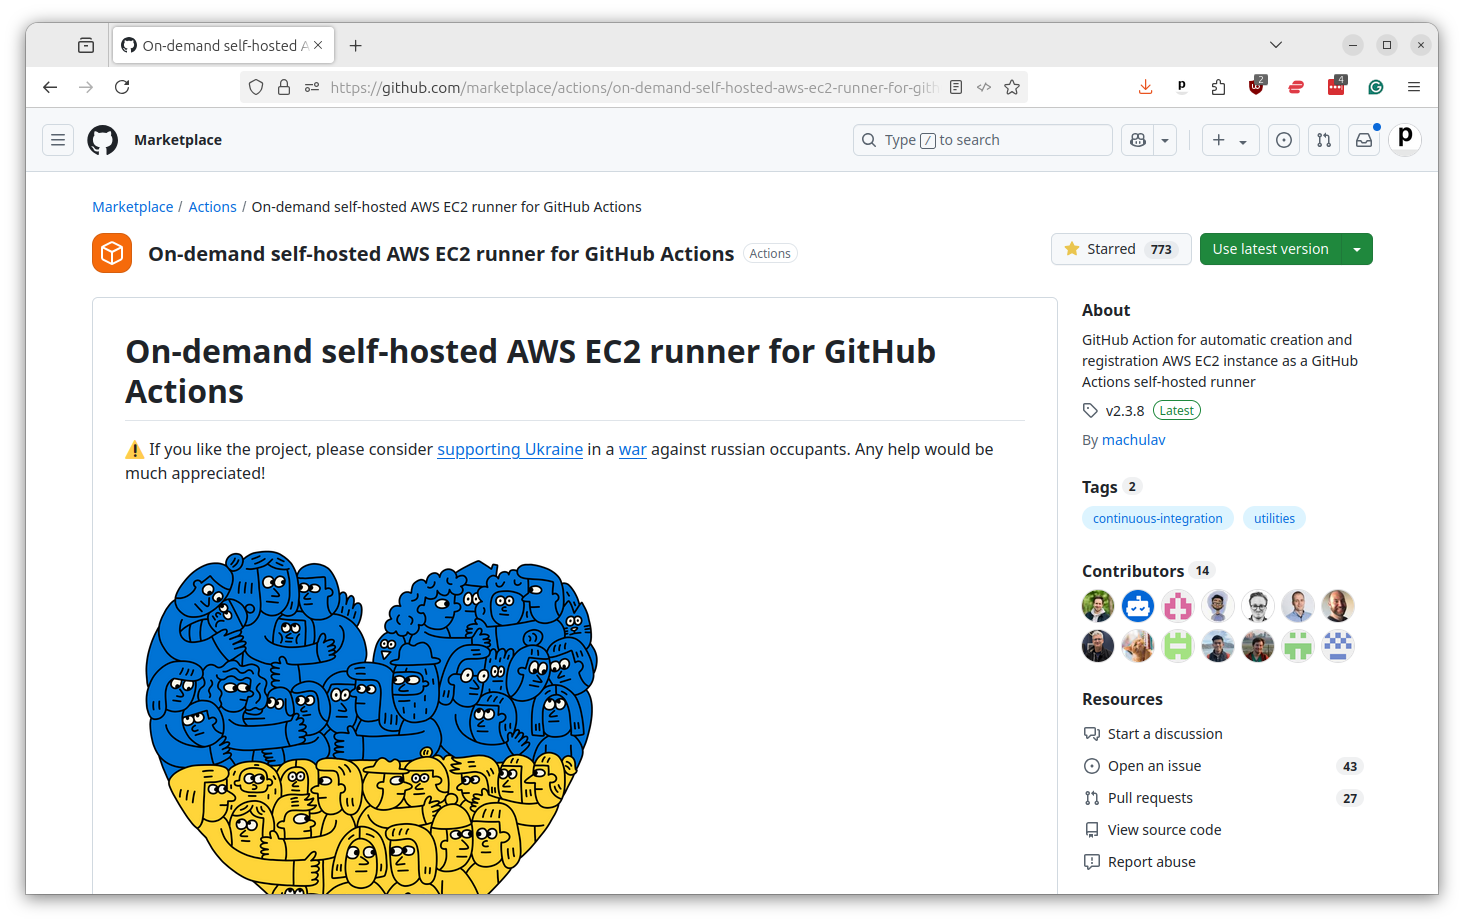
There are a number of different ways to connect external servers to Actions. We are going to use a set of shortcuts packaged up in the Actions marketplace by Volodymyr Machula.
I’ve worked through his documentation and created a template for you to start with. It’s available in this tutorial’s repository as ec2-custom-runner-example.yaml.
Here’s the full contents of the file. It might seem like a lot, but don’t worry. We’ll walk through it piece by piece.
name: "EC2 custom runner example"

on:
  workflow_dispatch:

# Customize these values for your environment
env:
  # AWS
  AWS_REGION: us-east-1
  AWS_SUBNET_ID: your-subnet-id-here
  AWS_SECURITY_GROUP_ID: your-security-group-id-here

  # EC2
  EC2_IMAGE_ID: ami-0e86e20dae9224db8   # Ubuntu 24.04 LTS
  EC2_INSTANCE_TYPE: r5d.8xlarge        # 32 vCPUs, 256 GB RAM, 2x600 GB NVMe SSD
  EC2_VOLUME_SIZE: 50                   # Root volume size in GB

jobs:
  start-runner:
    name: Start self-hosted EC2 runner
    runs-on: ubuntu-latest
    outputs:
      label: ${{ steps.start-ec2-runner.outputs.label }}
      ec2-instance-id: ${{ steps.start-ec2-runner.outputs.ec2-instance-id }}
    steps:
      - name: Configure AWS credentials
        uses: aws-actions/configure-aws-credentials@v5
        with:
          aws-access-key-id: ${{ secrets.AWS_ACCESS_KEY_ID }}
          aws-secret-access-key: ${{ secrets.AWS_SECRET_ACCESS_KEY }}
          aws-region: ${{ env.AWS_REGION }}

      - name: Start EC2 runner
        id: start-ec2-runner
        uses: machulav/ec2-github-runner@v2.4.2
        with:
          mode: start
          github-token: ${{ secrets.GH_PERSONAL_ACCESS_TOKEN }}
          ec2-image-id: ${{ env.EC2_IMAGE_ID }}
          ec2-instance-type: ${{ env.EC2_INSTANCE_TYPE }}
          ec2-volume-size: ${{ env.EC2_VOLUME_SIZE }}
          subnet-id: ${{ env.AWS_SUBNET_ID }}
          security-group-id: ${{ env.AWS_SECURITY_GROUP_ID }}
          pre-runner-script: |
            # Update system
            sudo apt-get update -y

            # Install required packages
            sudo apt-get install -y git libicu-dev

  run:
    name: Run
    needs: start-runner
    runs-on: ${{ needs.start-runner.outputs.label }}
    timeout-minutes: 240  # This is four hours. You can dial it as high as you'd like.
    steps:
      - name: Checkout
        uses: actions/checkout@v6

      # Your custom steps go here, as they would with any other Actions runner
      - name: Run
        run: echo 'Hello world'

  stop-runner:
    name: Stop self-hosted EC2 runner
    needs:
      - start-runner
      - run
    runs-on: ubuntu-latest
    if: ${{ always() }}
    steps:
      - name: Configure AWS credentials
        uses: aws-actions/configure-aws-credentials@v5
        with:
          aws-access-key-id: ${{ secrets.AWS_ACCESS_KEY_ID }}
          aws-secret-access-key: ${{ secrets.AWS_SECRET_ACCESS_KEY }}
          aws-region: ${{ env.AWS_REGION }}

      - name: Stop EC2 runner
        uses: machulav/ec2-github-runner@v2.4.2
        with:
          mode: stop
          github-token: ${{ secrets.GH_PERSONAL_ACCESS_TOKEN }}
          label: ${{ needs.start-runner.outputs.label }}
          ec2-instance-id: ${{ needs.start-runner.outputs.ec2-instance-id }}
Note
If you have never seen a file like this before, you could benefit from “Go big with GitHub Actions,” a previous course focused on the basics of GitHub’s automation system.
The key chapters for beginners are “Introducing Actions,” “Introducing YAML” and “Creating your first Action.“. If you read them, you’ll have an easier time understanding this chapter.
At the top we include the name and workflow_dispatch trigger, just like our first Action. After that you’ll see something new: the env section. That is where we define environment variables that will be used throughout the workflow.
name: "EC2 custom runner example"

on:
  workflow_dispatch:

# Customize these values for your environment
env:
  # AWS
  AWS_REGION: us-east-1
  AWS_SUBNET_ID: your-subnet-id-here
  AWS_SECURITY_GROUP_ID: your-security-group-id-here

  # EC2
  EC2_IMAGE_ID: ami-0e86e20dae9224db8   # Ubuntu 24.04 LTS
  EC2_INSTANCE_TYPE: r5d.8xlarge        # 32 vCPUs, 256 GB RAM, 2x600 GB NVMe SSD
  EC2_VOLUME_SIZE: 50                   # Root volume size in GB
You should enter the subnet ID and security group ID that you saved earlier in the AWS_SUBNET_ID and AWS_SECURITY_GROUP_ID fields.
You’ll also see the configuration options for the EC2 server, which I’ve filled with settings that will work for most Actions.
The EC2_IMAGE_ID is the unique identifier of the operating system that AWS will install on the server, which is commonly known as the AMI, which is short for Amazon Machine Image.
The EC2_INSTANCE_TYPE is the size of the server to start up. You can find the menu of available hardware on the AWS site. The EC2_VOLUME_SIZE is how much disk space you want to allocate to the server, measured in gigabytes. The default I set is 50 GB, which should be sufficient for most tasks. You can change any of these values to suit your needs.
After that, the workflow is essentially a three-step process. The first step uses a traditional Actions server to connect with AWS and fire up a new EC2 instance with your specified configuration.
This example assumes you are using a machine image based on Ubuntu 24.04 LTS. If you end up using an image of another operating system, you will need to change the pre-runner-script to install the dependencies necessary to communicate with GitHub and run Actions.
jobs:
  start-runner:
    name: Start self-hosted EC2 runner
    runs-on: ubuntu-latest
    outputs:
      label: ${{ steps.start-ec2-runner.outputs.label }}
      ec2-instance-id: ${{ steps.start-ec2-runner.outputs.ec2-instance-id }}
    steps:
      - name: Configure AWS credentials
        uses: aws-actions/configure-aws-credentials@v5
        with:
          aws-access-key-id: ${{ secrets.AWS_ACCESS_KEY_ID }}
          aws-secret-access-key: ${{ secrets.AWS_SECRET_ACCESS_KEY }}
          aws-region: ${{ env.AWS_REGION }}

      - name: Start EC2 runner
        id: start-ec2-runner
        uses: machulav/ec2-github-runner@v2.4.2
        with:
          mode: start
          github-token: ${{ secrets.GH_PERSONAL_ACCESS_TOKEN }}
          ec2-image-id: ${{ env.EC2_IMAGE_ID }}
          ec2-instance-type: ${{ env.EC2_INSTANCE_TYPE }}
          ec2-volume-size: ${{ env.EC2_VOLUME_SIZE }}
          subnet-id: ${{ env.AWS_SUBNET_ID }}
          security-group-id: ${{ env.AWS_SECURITY_GROUP_ID }}
          pre-runner-script: |
            # Update system
            sudo apt-get update -y

            # Install required packages
            sudo apt-get install -y git libicu-dev
The second step will then be run inside the custom EC2 server, not in one of GitHub’s servers. You can see that because the runs-on line is set to use the label provided by the first step.
The timeout-minutes line sets how long this job can run before it is automatically terminated. I’ve set it to 240 minutes, or four hours, but could run the server for as long as you’re willing to pay for it, one of the advantages of using your own hardware.
Finally, the steps section is where you put in the commands you want to run on your custom server, as you would in any other Actions workflow. In this case, I’ve just included a simple “Hello world” command after checking out the repository.
  run:
    name: Run
    needs: start-runner
    runs-on: ${{ needs.start-runner.outputs.label }}  # Provided by step one.
    timeout-minutes: 240  # This is four hours. You can dial it as high as you'd like.
    steps:
      - name: Checkout
        uses: actions/checkout@v6

      # Your custom steps go here, as they would with any other Actions runner
      - name: Run
        run: echo 'Hello world'
If you wanted to take on more sophisticated tasks in your custom server, you could add additional steps there that could do things like install Python or another programming language, fire up a database or run a series of scripts.
And then the third step is to shut down the server when you’re finished. Because of the if configuration option, it will run whether the job succeeds or not.
  stop-runner:
    name: Stop self-hosted EC2 runner
    needs:
      - start-runner
      - run
    runs-on: ubuntu-latest
    if: ${{ always() }}
    steps:
      - name: Configure AWS credentials
        uses: aws-actions/configure-aws-credentials@v5
        with:
          aws-access-key-id: ${{ secrets.AWS_ACCESS_KEY_ID }}
          aws-secret-access-key: ${{ secrets.AWS_SECRET_ACCESS_KEY }}
          aws-region: ${{ env.AWS_REGION }}

      - name: Stop EC2 runner
        uses: machulav/ec2-github-runner@v2.4.2
        with:
          mode: stop
          github-token: ${{ secrets.GH_PERSONAL_ACCESS_TOKEN }}
          label: ${{ needs.start-runner.outputs.label }}
          ec2-instance-id: ${{ needs.start-runner.outputs.ec2-instance-id }}
Note
The if clause is very important. Why? Because if you forget to shut down the server, it will keep running and racking up charges. AWS charges by the hour, so if you leave a server running unmonitored you could soon end up with a hefty bill.
It’s a good idea to routinely check in on the AWS console to make sure you don’t have any orphaned servers running. You can do that by going to the EC2 panel and selecting “Instances” from the left-hand menu. Any leftover servers can be terminated from there.
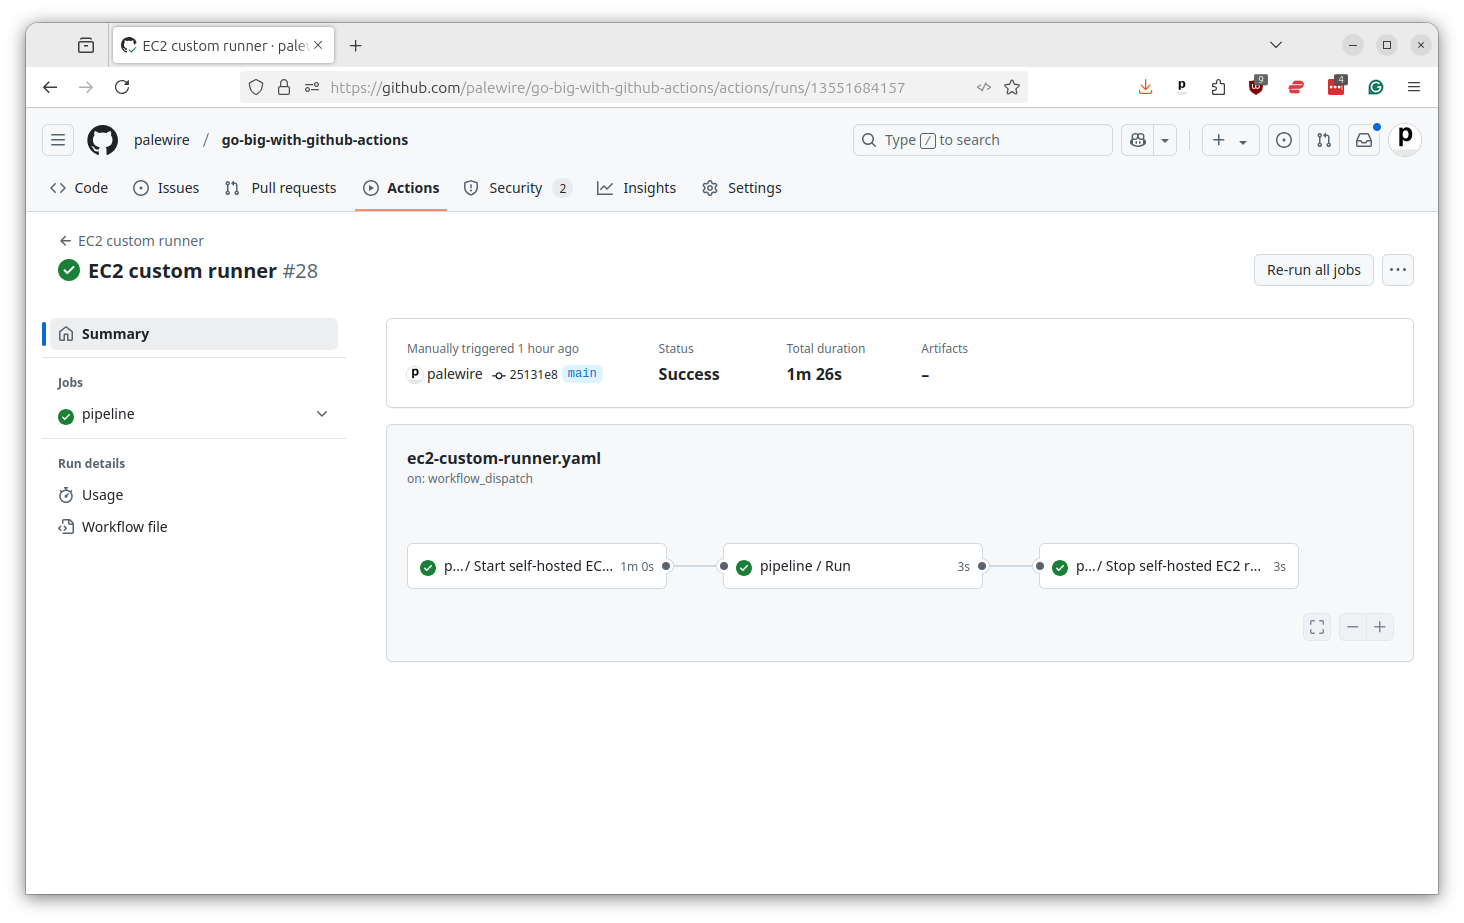
You could copy that complete file into your repository’s .github/workflows directory alongside your other Actions. Once you’ve edited the file to include your configuration options and runner scripts, you can commit it to your repository and call it from the Actions tab like any other workflow. You’ll see it execute as a three-step process, just like our YAML config suggests, with the second step happening over on EC2.
And that’s it. You now have a custom EC2 runner that can be used to run any command you want on whatever server you want for as long as you want. Next we’ll put it to work building map tiles.