3. Creating your first Action
This chapter will walk you through creating a repository hosted in GitHub and creating your first Action.
3.1. Get started on GitHub
If you already have a GitHub account, please log in. If you do not have one, please create one on github.com and use it to log in to the site.
Once you are logged into GitHub, create a new repository by clicking on the “New” button at the top-left corner or simply click this link: github.com/new.
Now, fill in a name for your new repository. A good example would be go-big-with-github-actions. Make sure your repository is public, which will allow us to access an important feature later in the class.
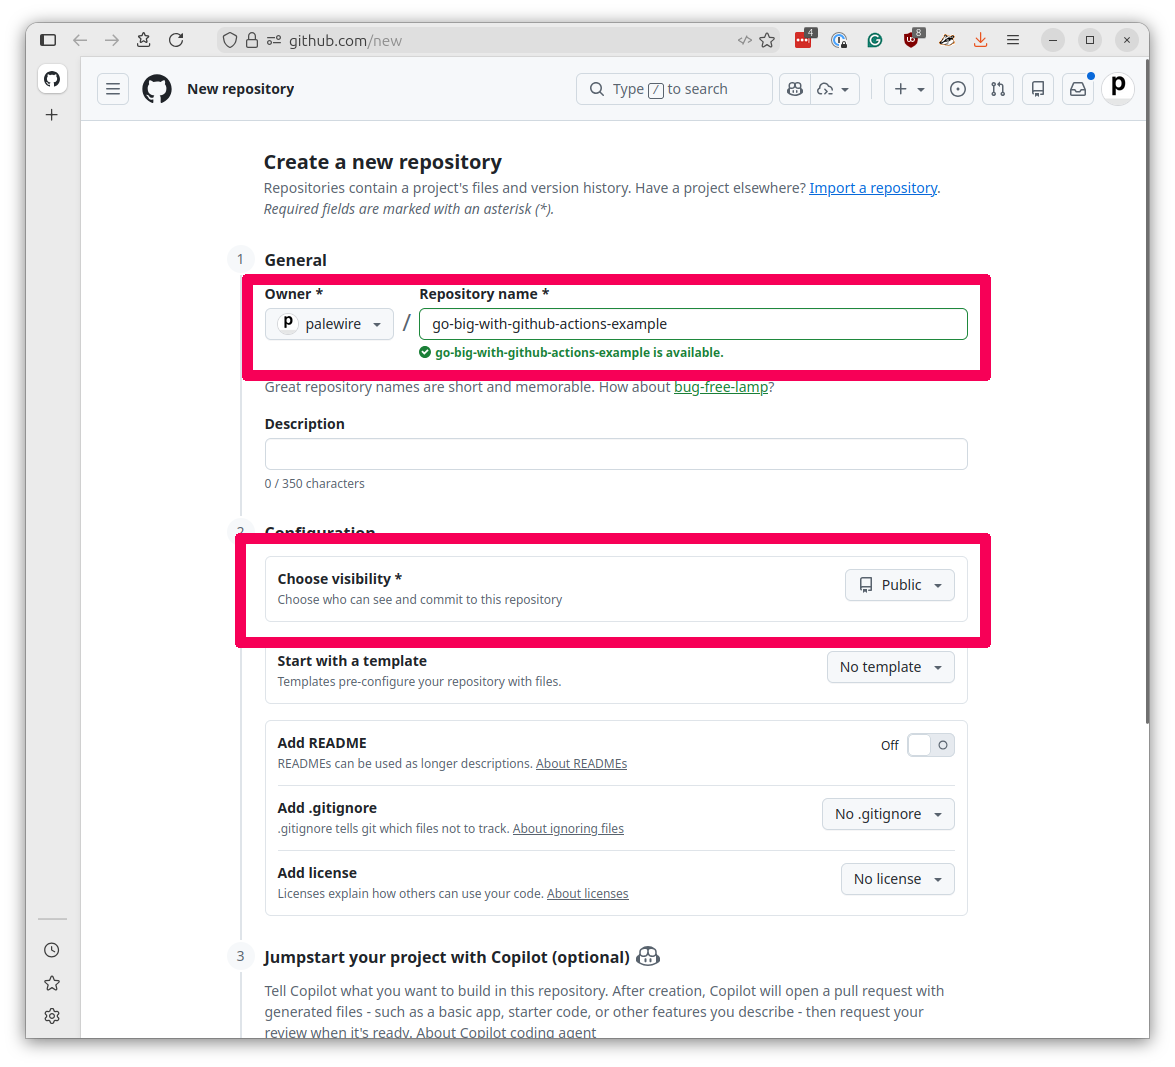
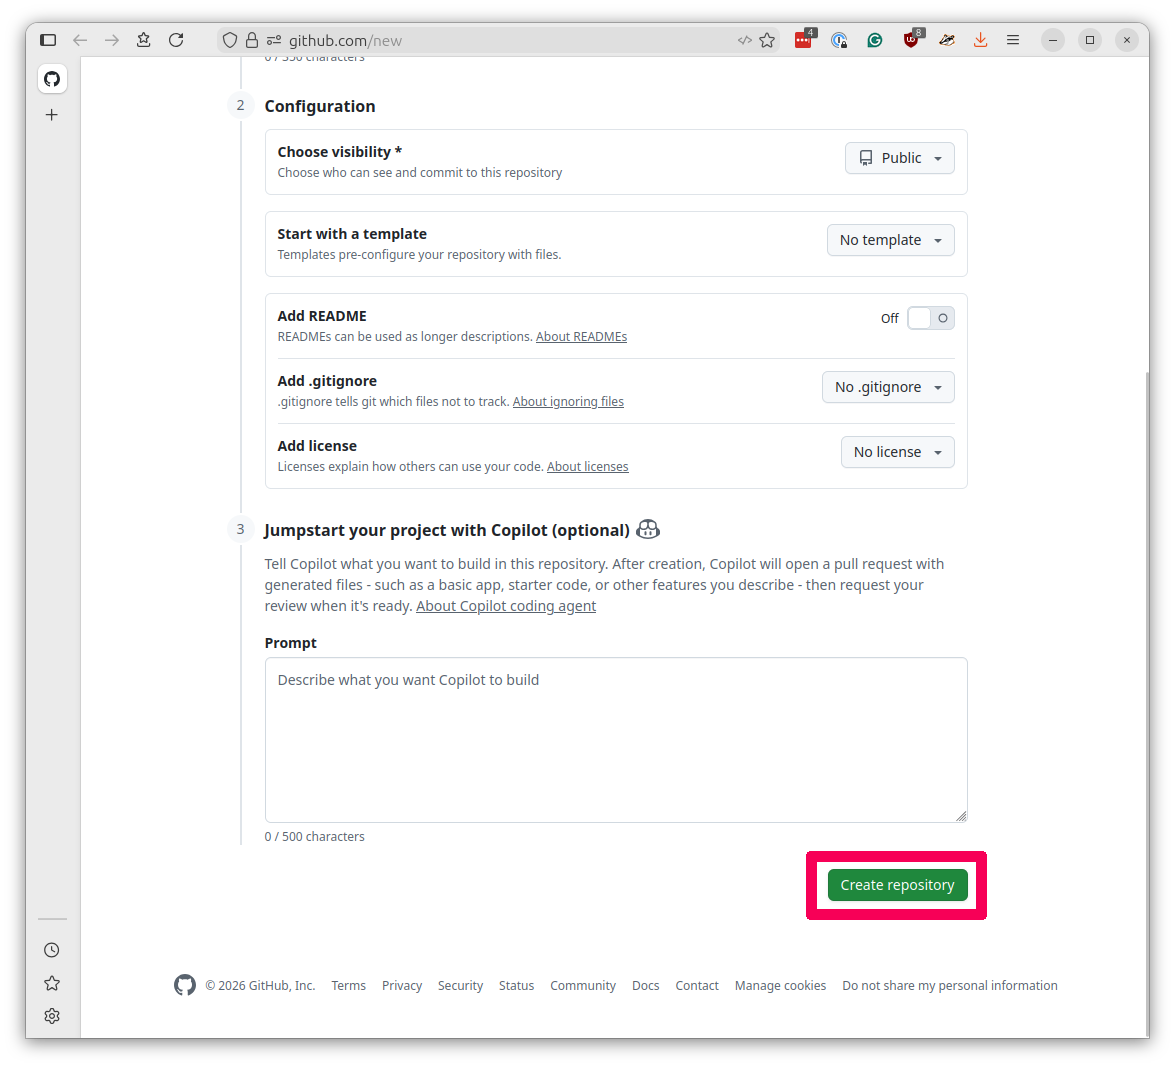
Click on the “Create repository” button at the bottom of the form.
3.2. Create a simple Action
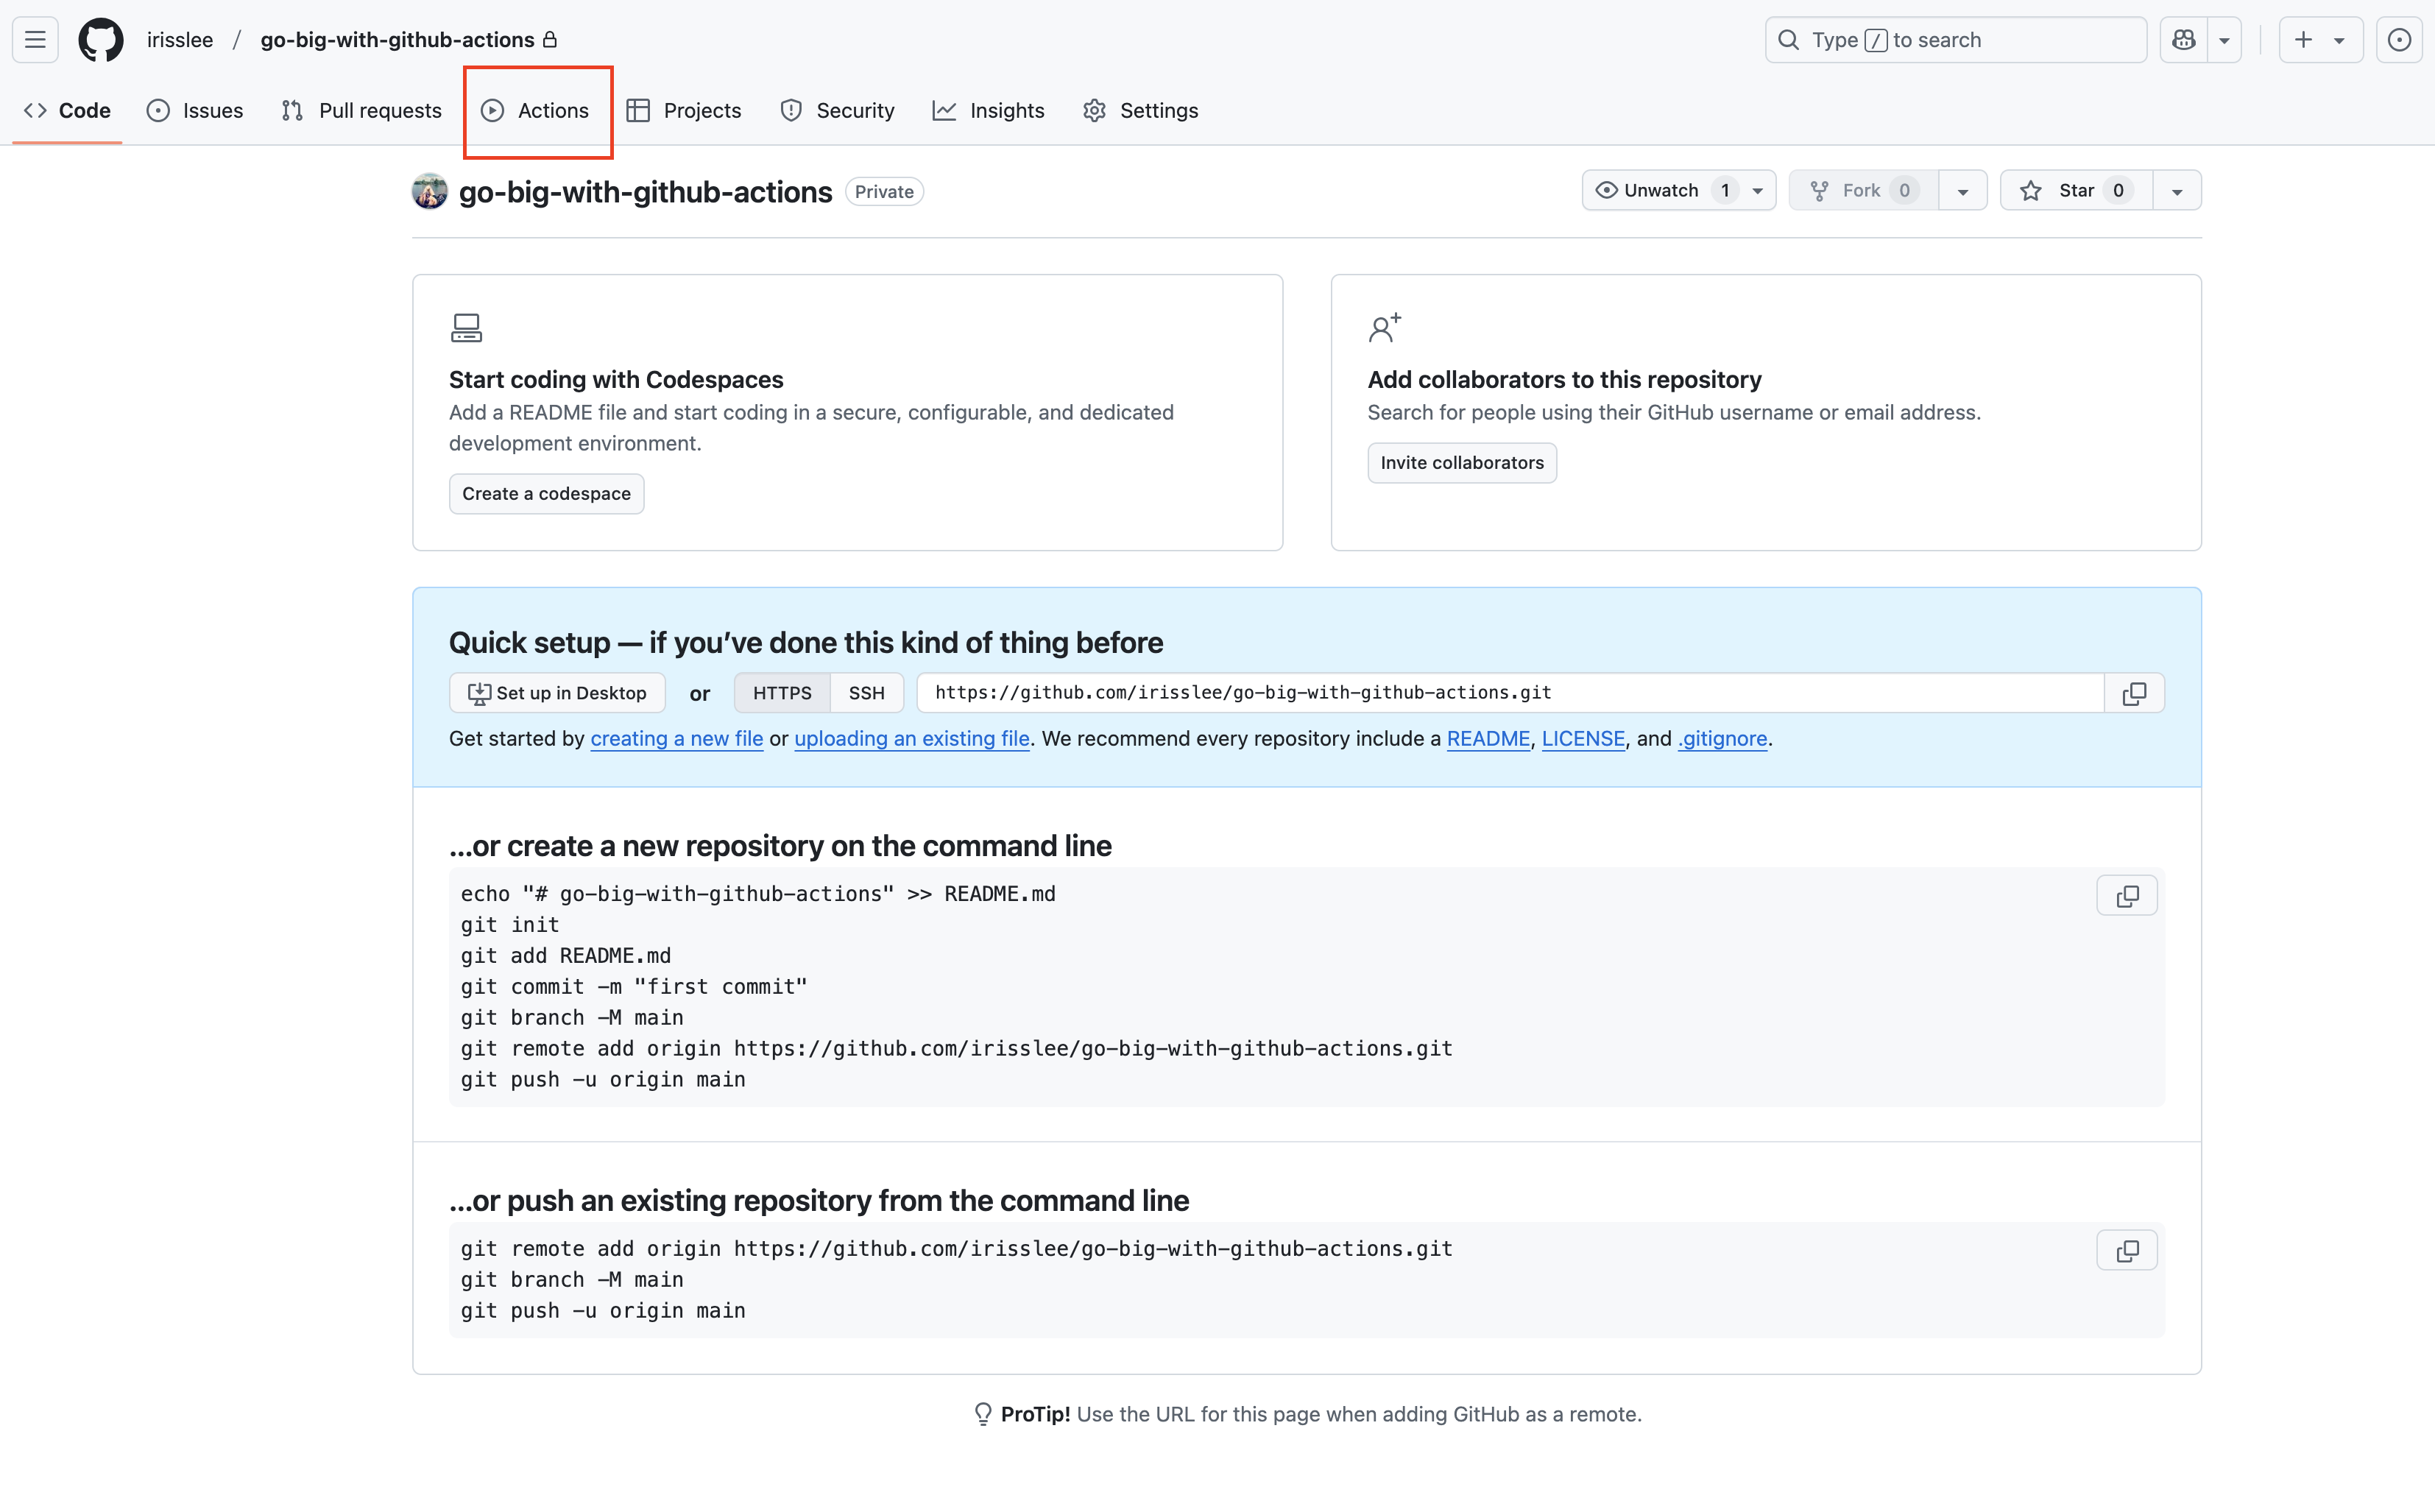
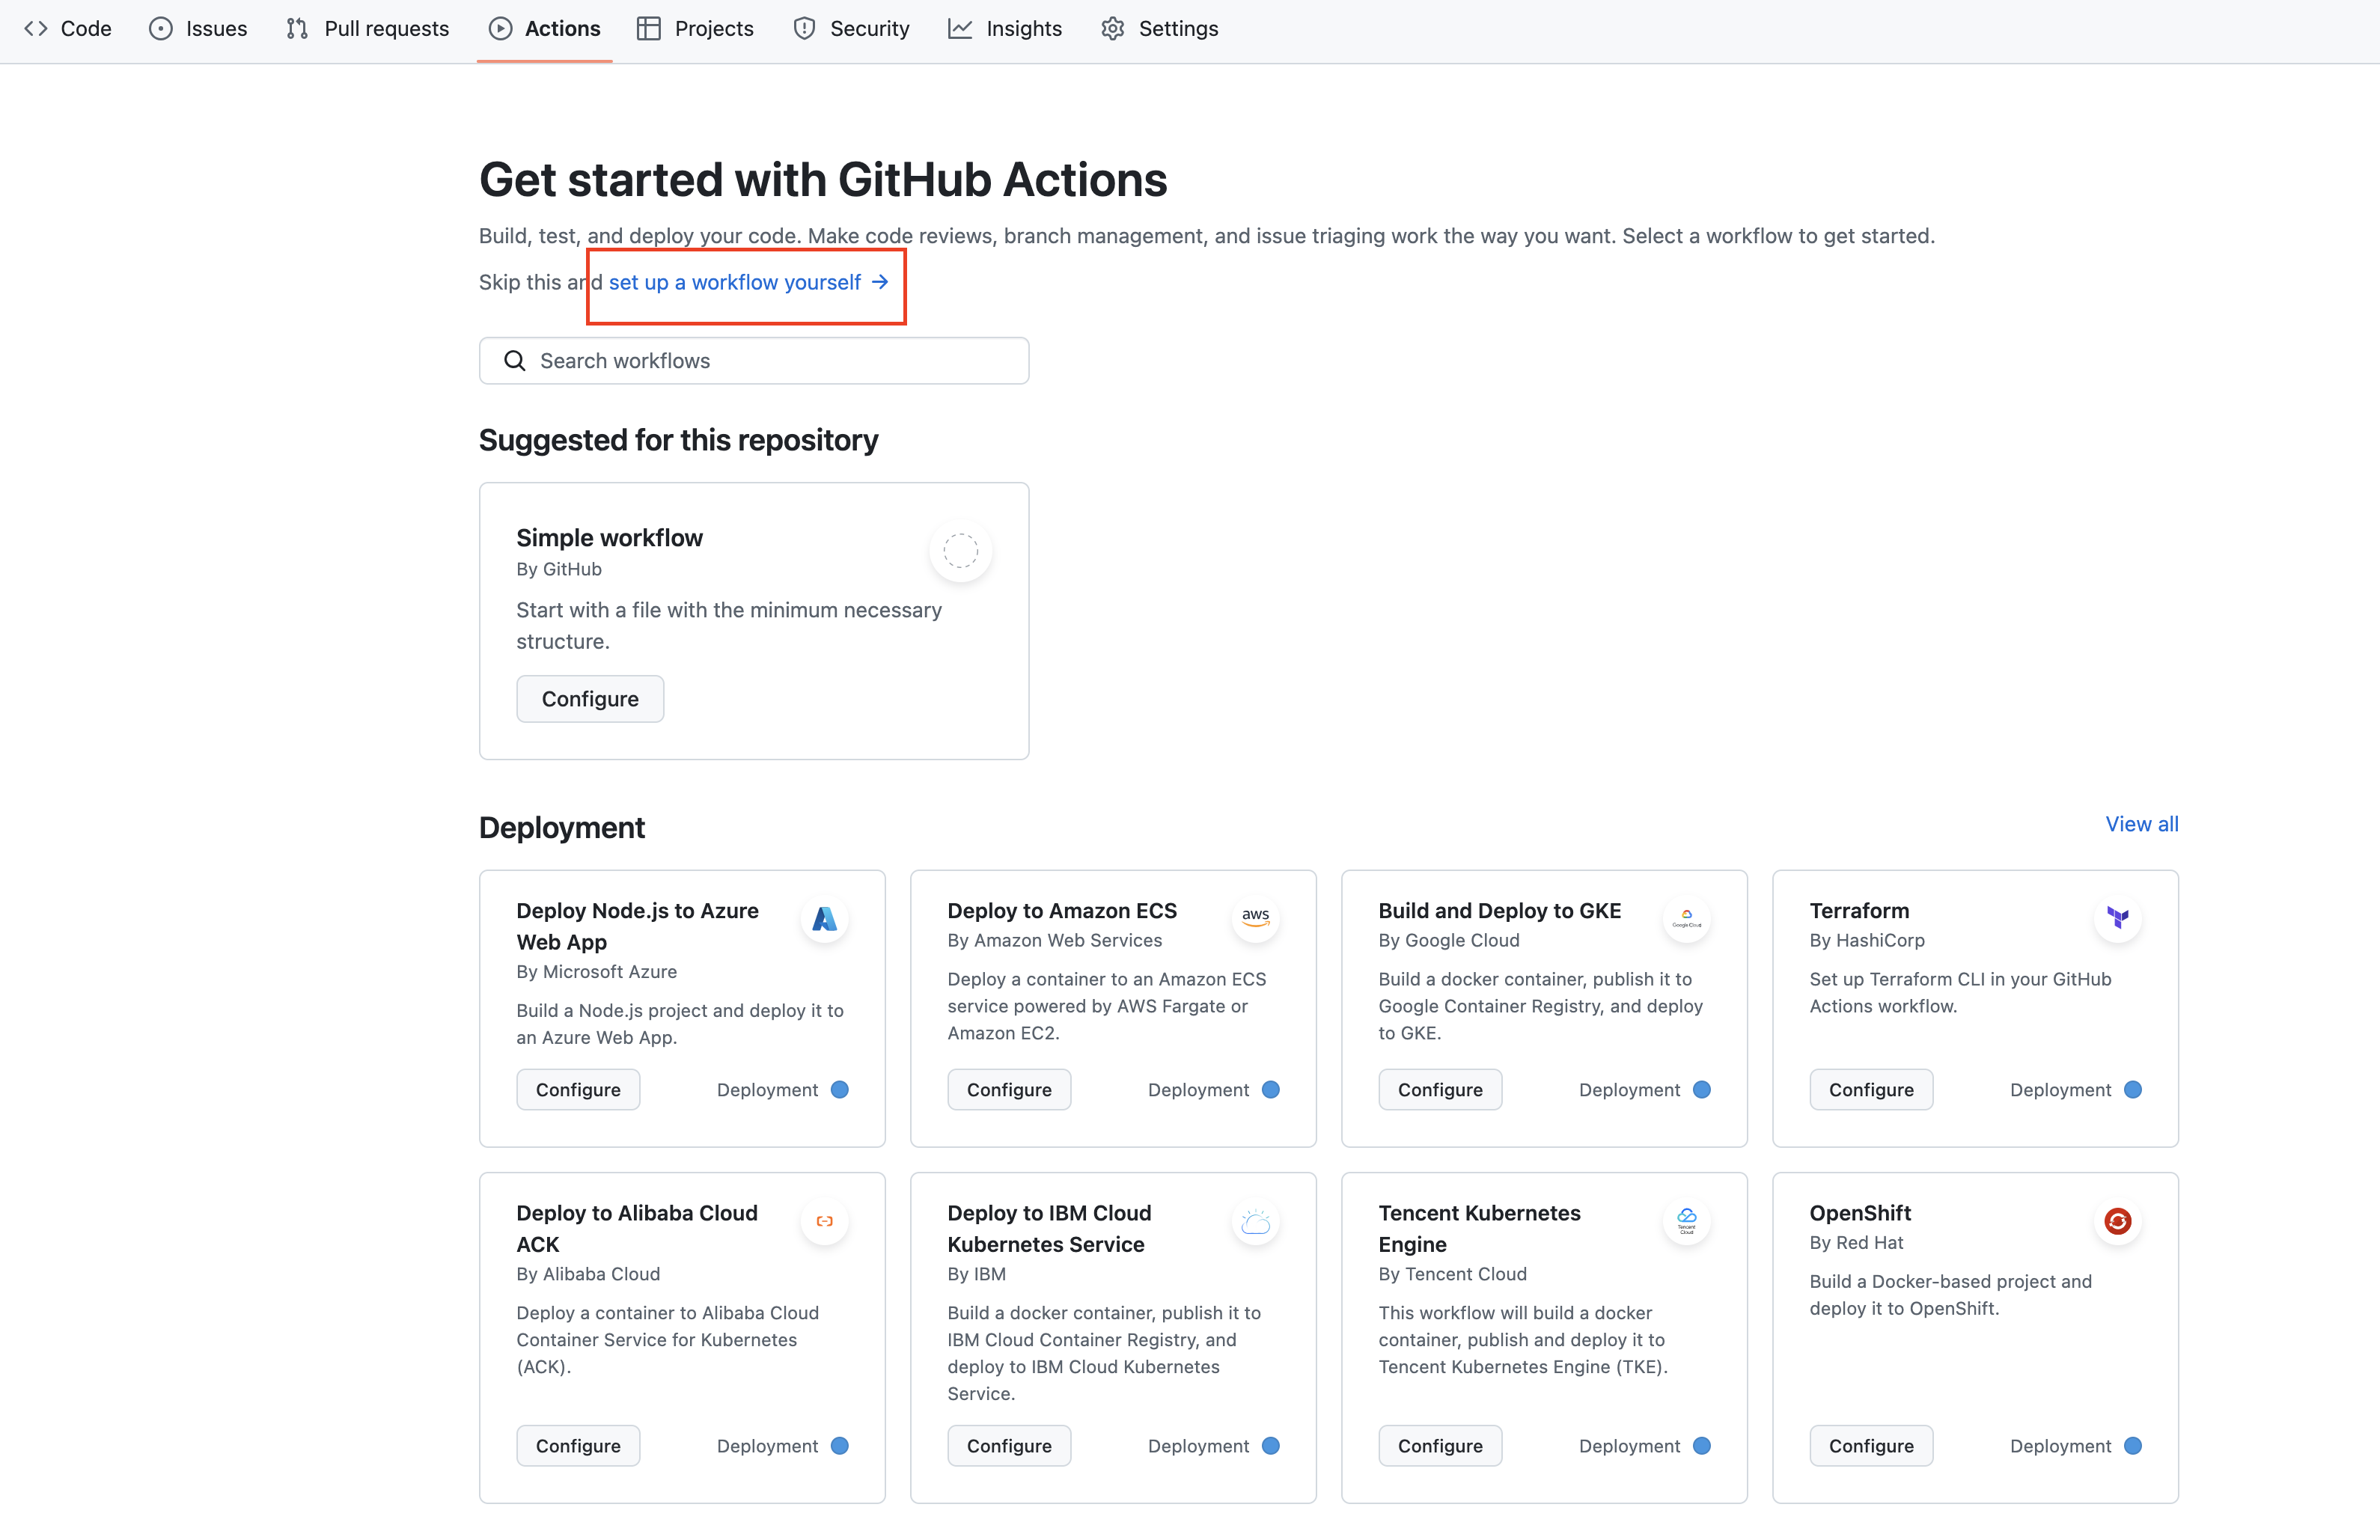
Navigate to your repository’s homepage in the browser. Click on the “Actions” tab, which will take you to a page where you can create, manage and monitor your Actions.
Scroll down the page. You will see that GitHub offers a menu of templates for common automation tasks. For our first Action, we will click “set up a workflow yourself” link near the top of the page.
Note
The terms action, workflow, job and task and yaml are often used interchangeably by GitHub Actions users to refer to these configuration files.
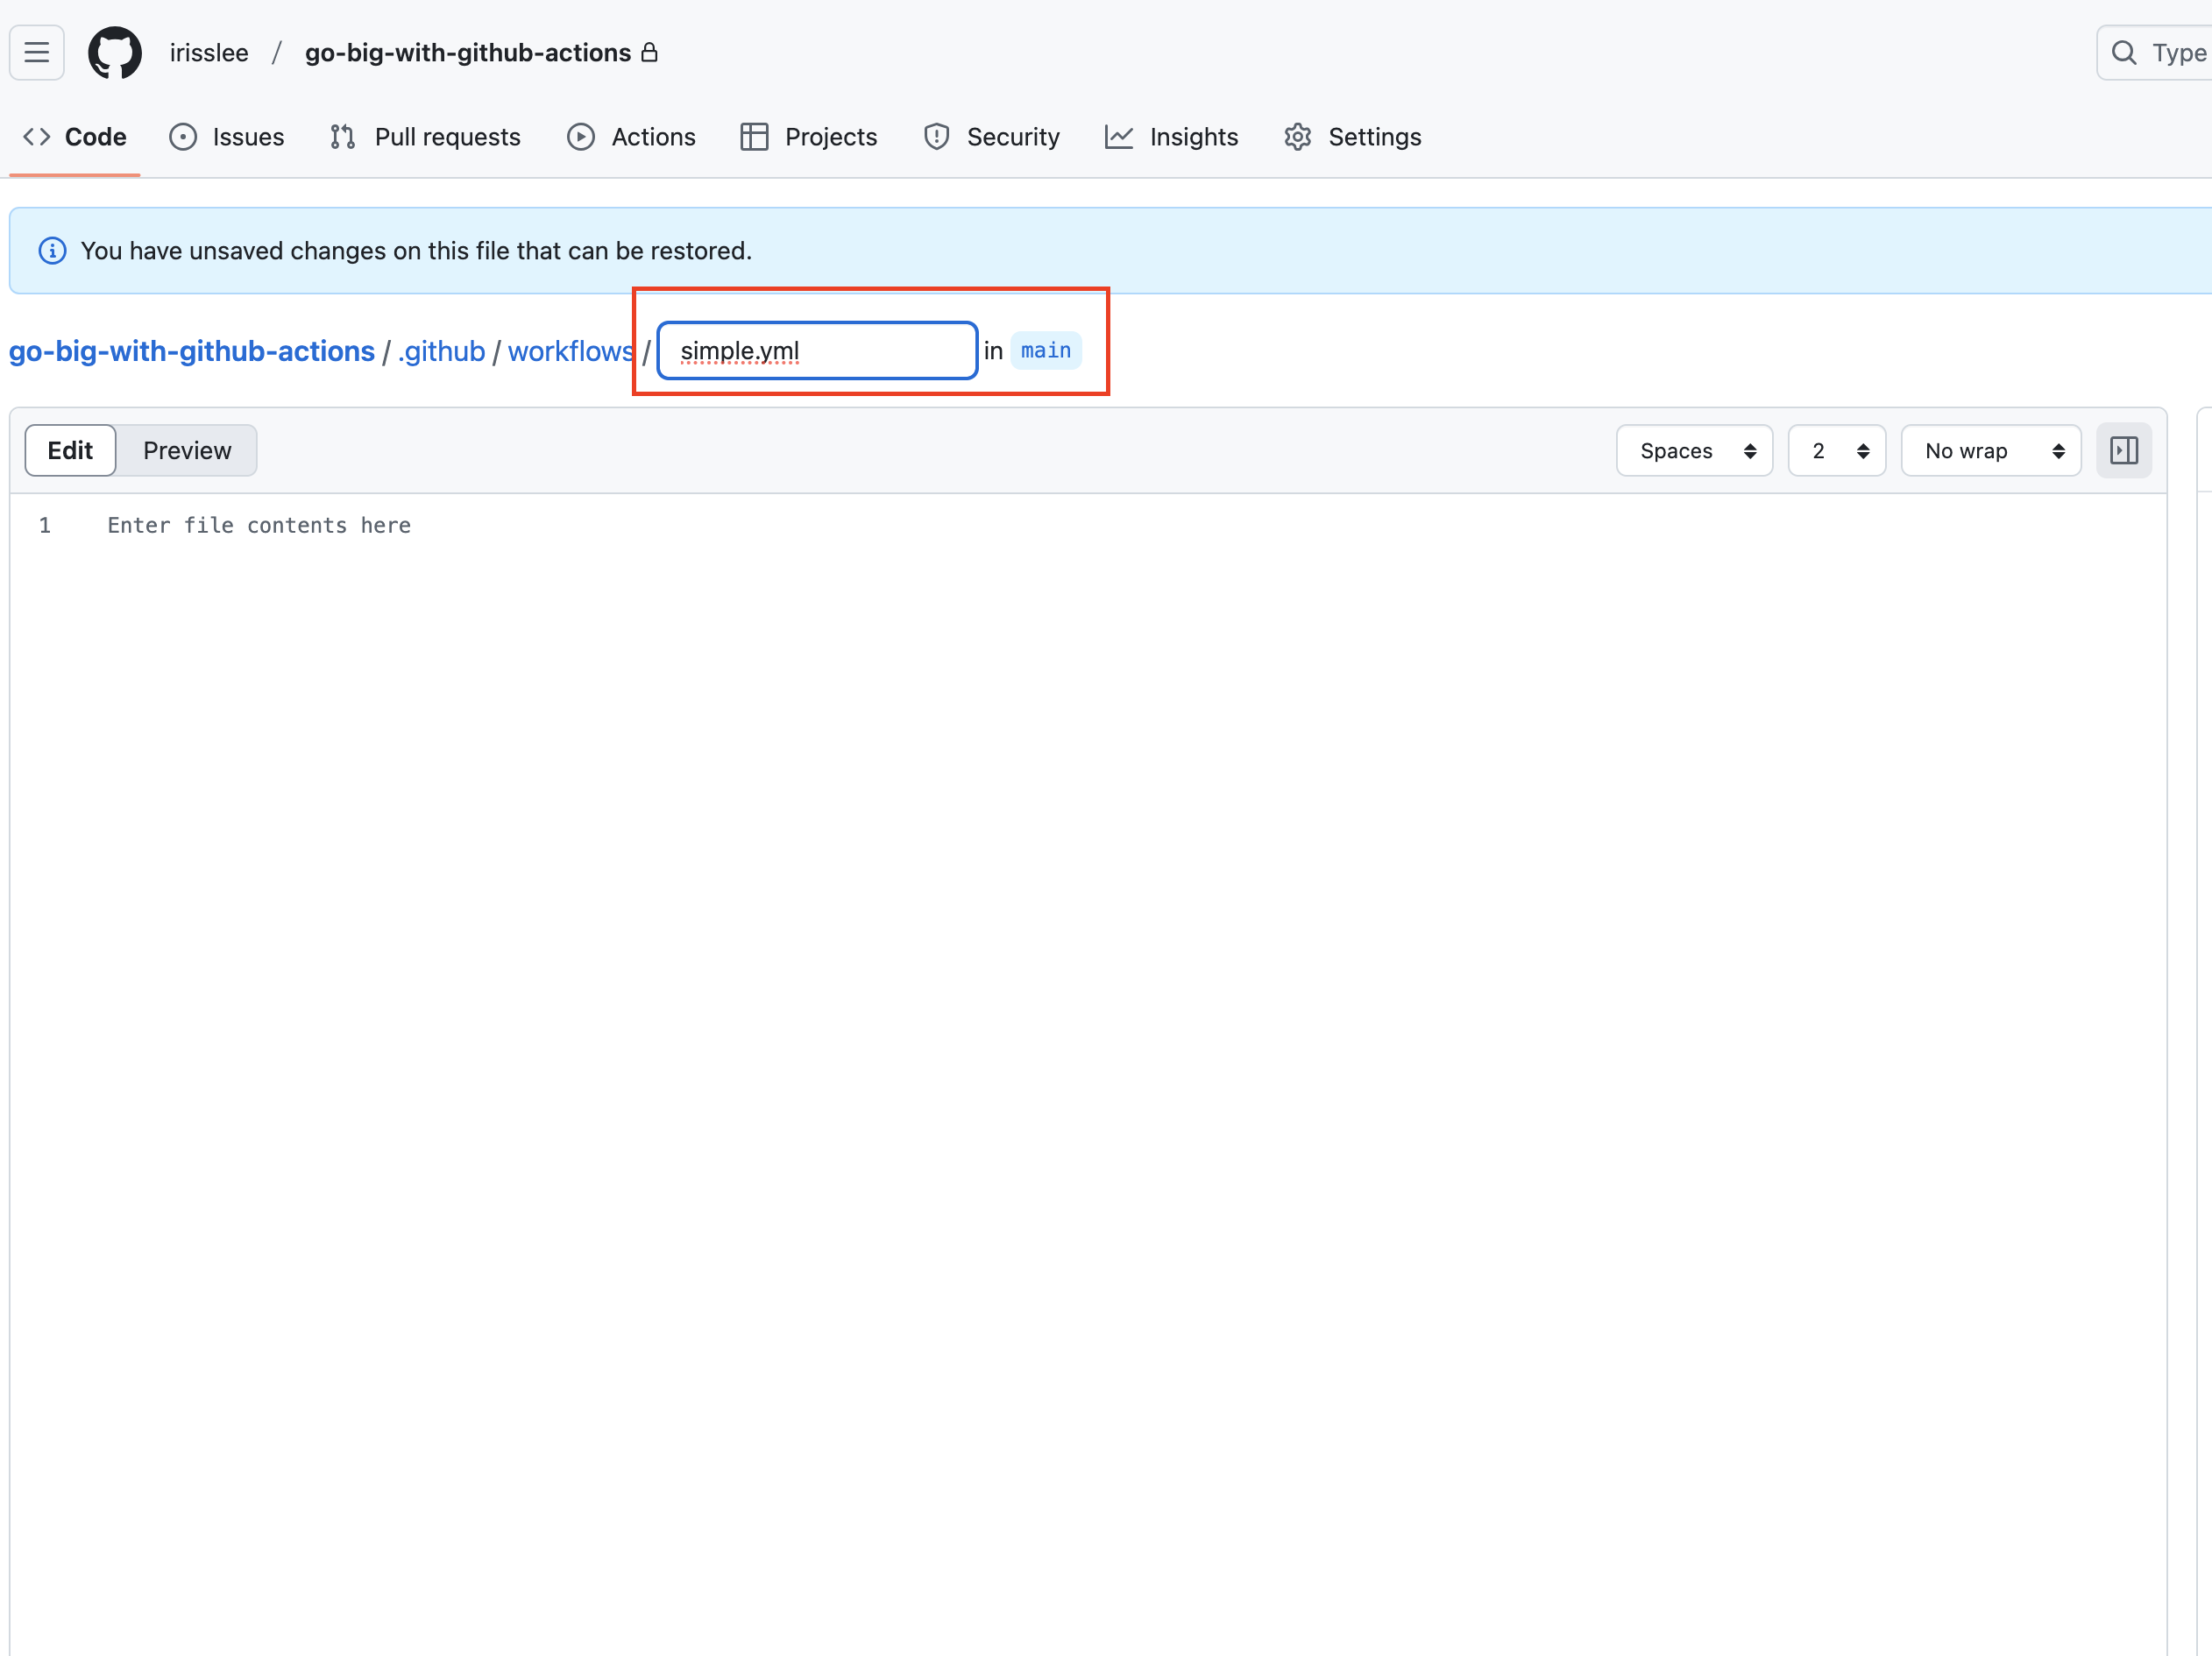
This will open up an editor inside of your browser, which is another one of the features offered by GitHub.
Let’s start by renaming the file to simple.yaml in the box above the editor. This will be the name of your first Action file.
Note
We will be editing our files inside of GitHub using our browser in this manner throughout the tutorial. If you’re already a GitHub expert and you’d prefer to clone your repo and use a code editor instead, please feel free to do so. Just make sure to push your changes back to GitHub as you go.
3.3. Start your workflow
First, we will name our Action by adding the following line at the top of the file.
name: First Action
You will notice a red squiggly underline beneath your code. This means that GitHub sees something wrong with your workflow. When you hover over the squiggly line, a hint will appear. Here we see it says “Missing required root key on.”
Let’s take the hint and add another line under name.
on:
  workflow_dispatch:
They keyword on is used to determine when the Action file will run. When it is configured with workflow_dispatch, the Action can be run manually from the monitoring panel.
Note
You can read more about different options for configuring on in GitHub’s documentation.
Now let’s tell our workflow what we want it to do.
Copy and paste the below code under workflow_dispatch:.
jobs:
  hello:
    name: Say Hello
    runs-on: ubuntu-latest
    steps:
      name: Hello world
      run: echo "Hello world"
Be mindful of indentation and uneven syntax. The red squiggly marks will give you hints if there’s anything wrong with your file.
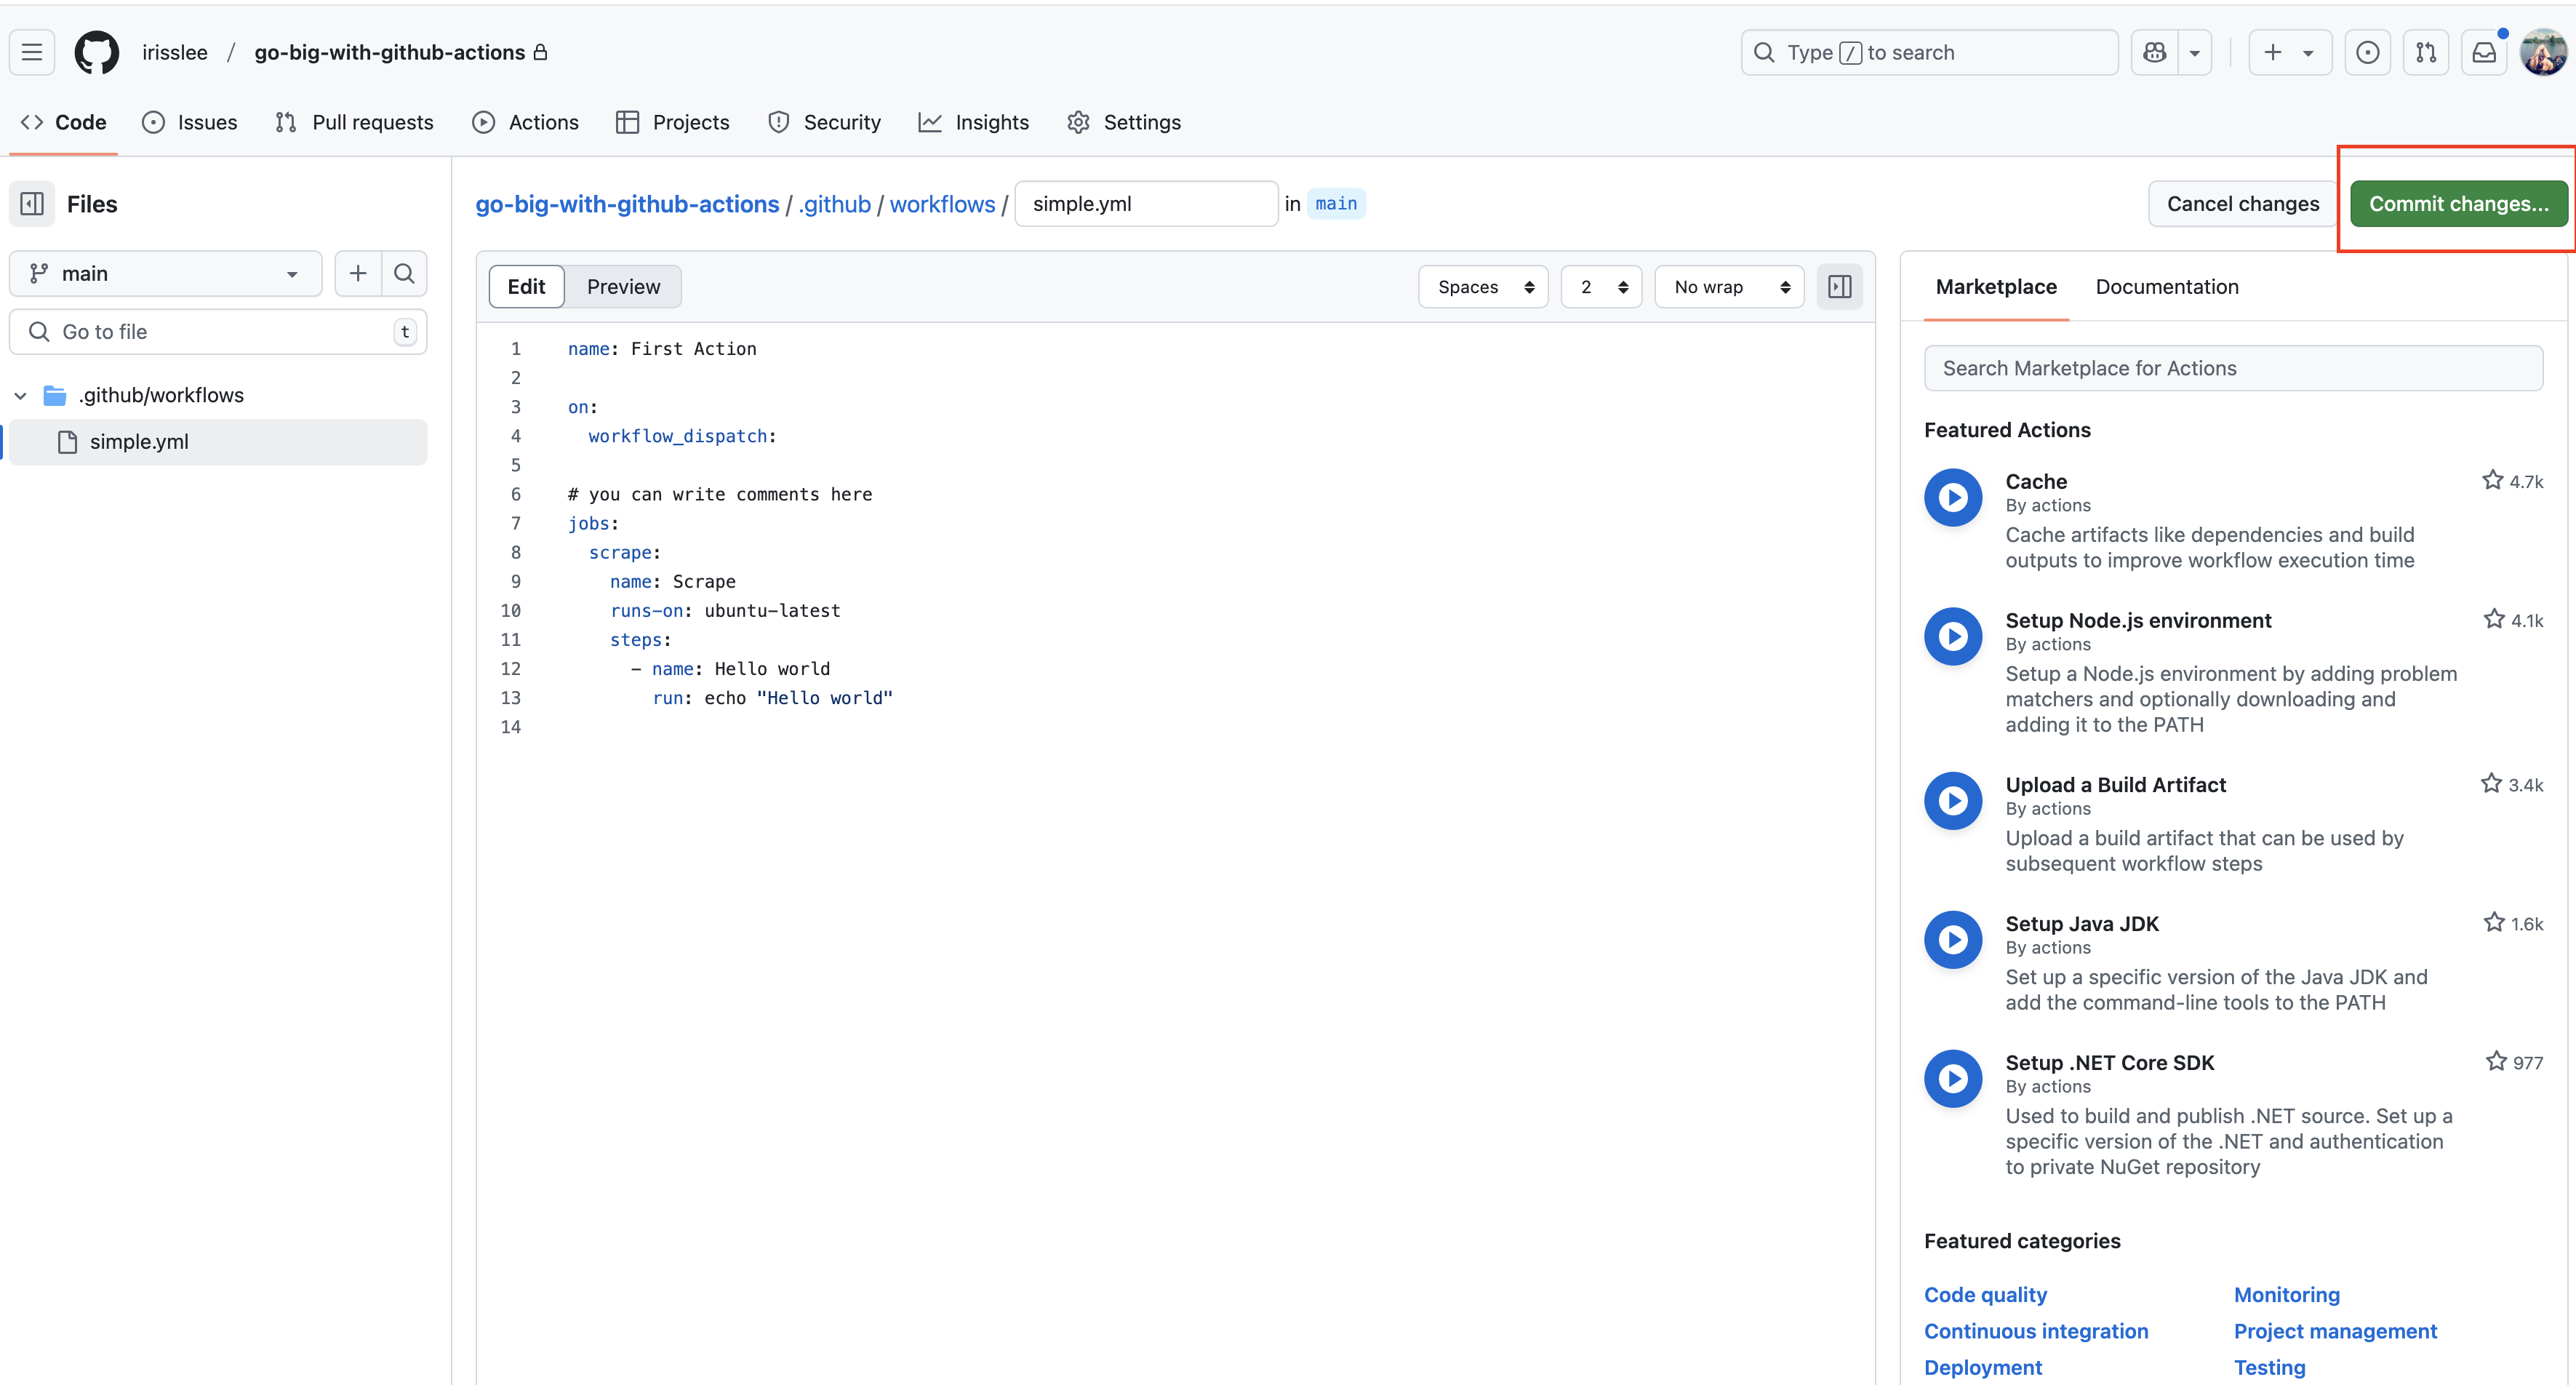
Your workflow file should now look something like this:
name: First Action

on:
  workflow_dispatch:

jobs:
  hello:
    name: Say Hello
    runs-on: ubuntu-latest
    steps:
      - name: Hello world
        run: echo "Hello world"
A workflow run consists of one or more jobs, which can run sequentially or in parallel depending on your configuration. In this simple case we only have a single job called hello.
name: First Action

on:
  workflow_dispatch:

jobs:
  hello:
    name: Say Hello
    runs-on: ubuntu-latest
    steps:
      - name: Hello world
        run: echo "Hello world"
For each job, you will need to choose what kind of server to use. In our case, we selected an Ubuntu Linux runner. You can also choose MacOS or Windows.
name: First Action

on:
  workflow_dispatch:

jobs:
  hello:
    name: Say Hello
    runs-on: ubuntu-latest
    steps:
      - name: Hello world
        run: echo "Hello world"
Each job then runs as many steps as you want to layout as a list. Give each task a name and tell it what to do. In our case, we are simply printing out “Hello world” to the console using the built-in echo command.
name: First Action

on:
  workflow_dispatch:

jobs:
  hello:
    name: Say Hello
    runs-on: ubuntu-latest
    steps:
      - name: Hello world
        run: echo "Hello world"
Now save your file to the repository by clicking on the green “Commit changes” button in the top-right corner.
In GitHub, all workflow files are saved under .github > workflows folder. Your first commit has created the folder and saved your first workflow for you. When you are ready to add more workflows, you should add them to this folder as well.
If you need to edit this first file again, simply click into the file and click the pencil icon on the top right corner.
3.4. Run your action
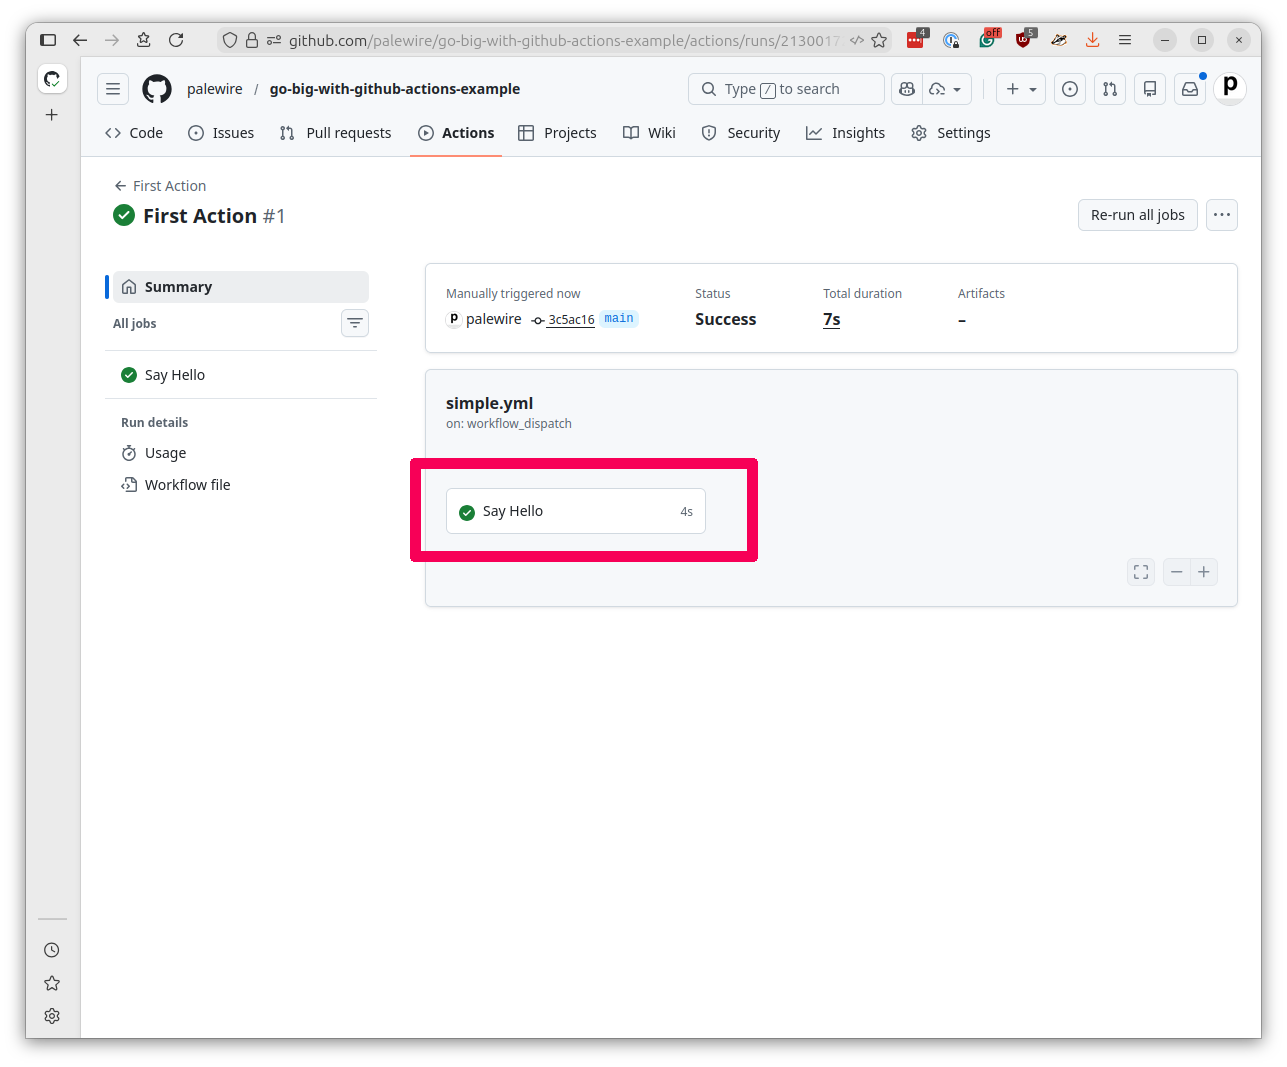
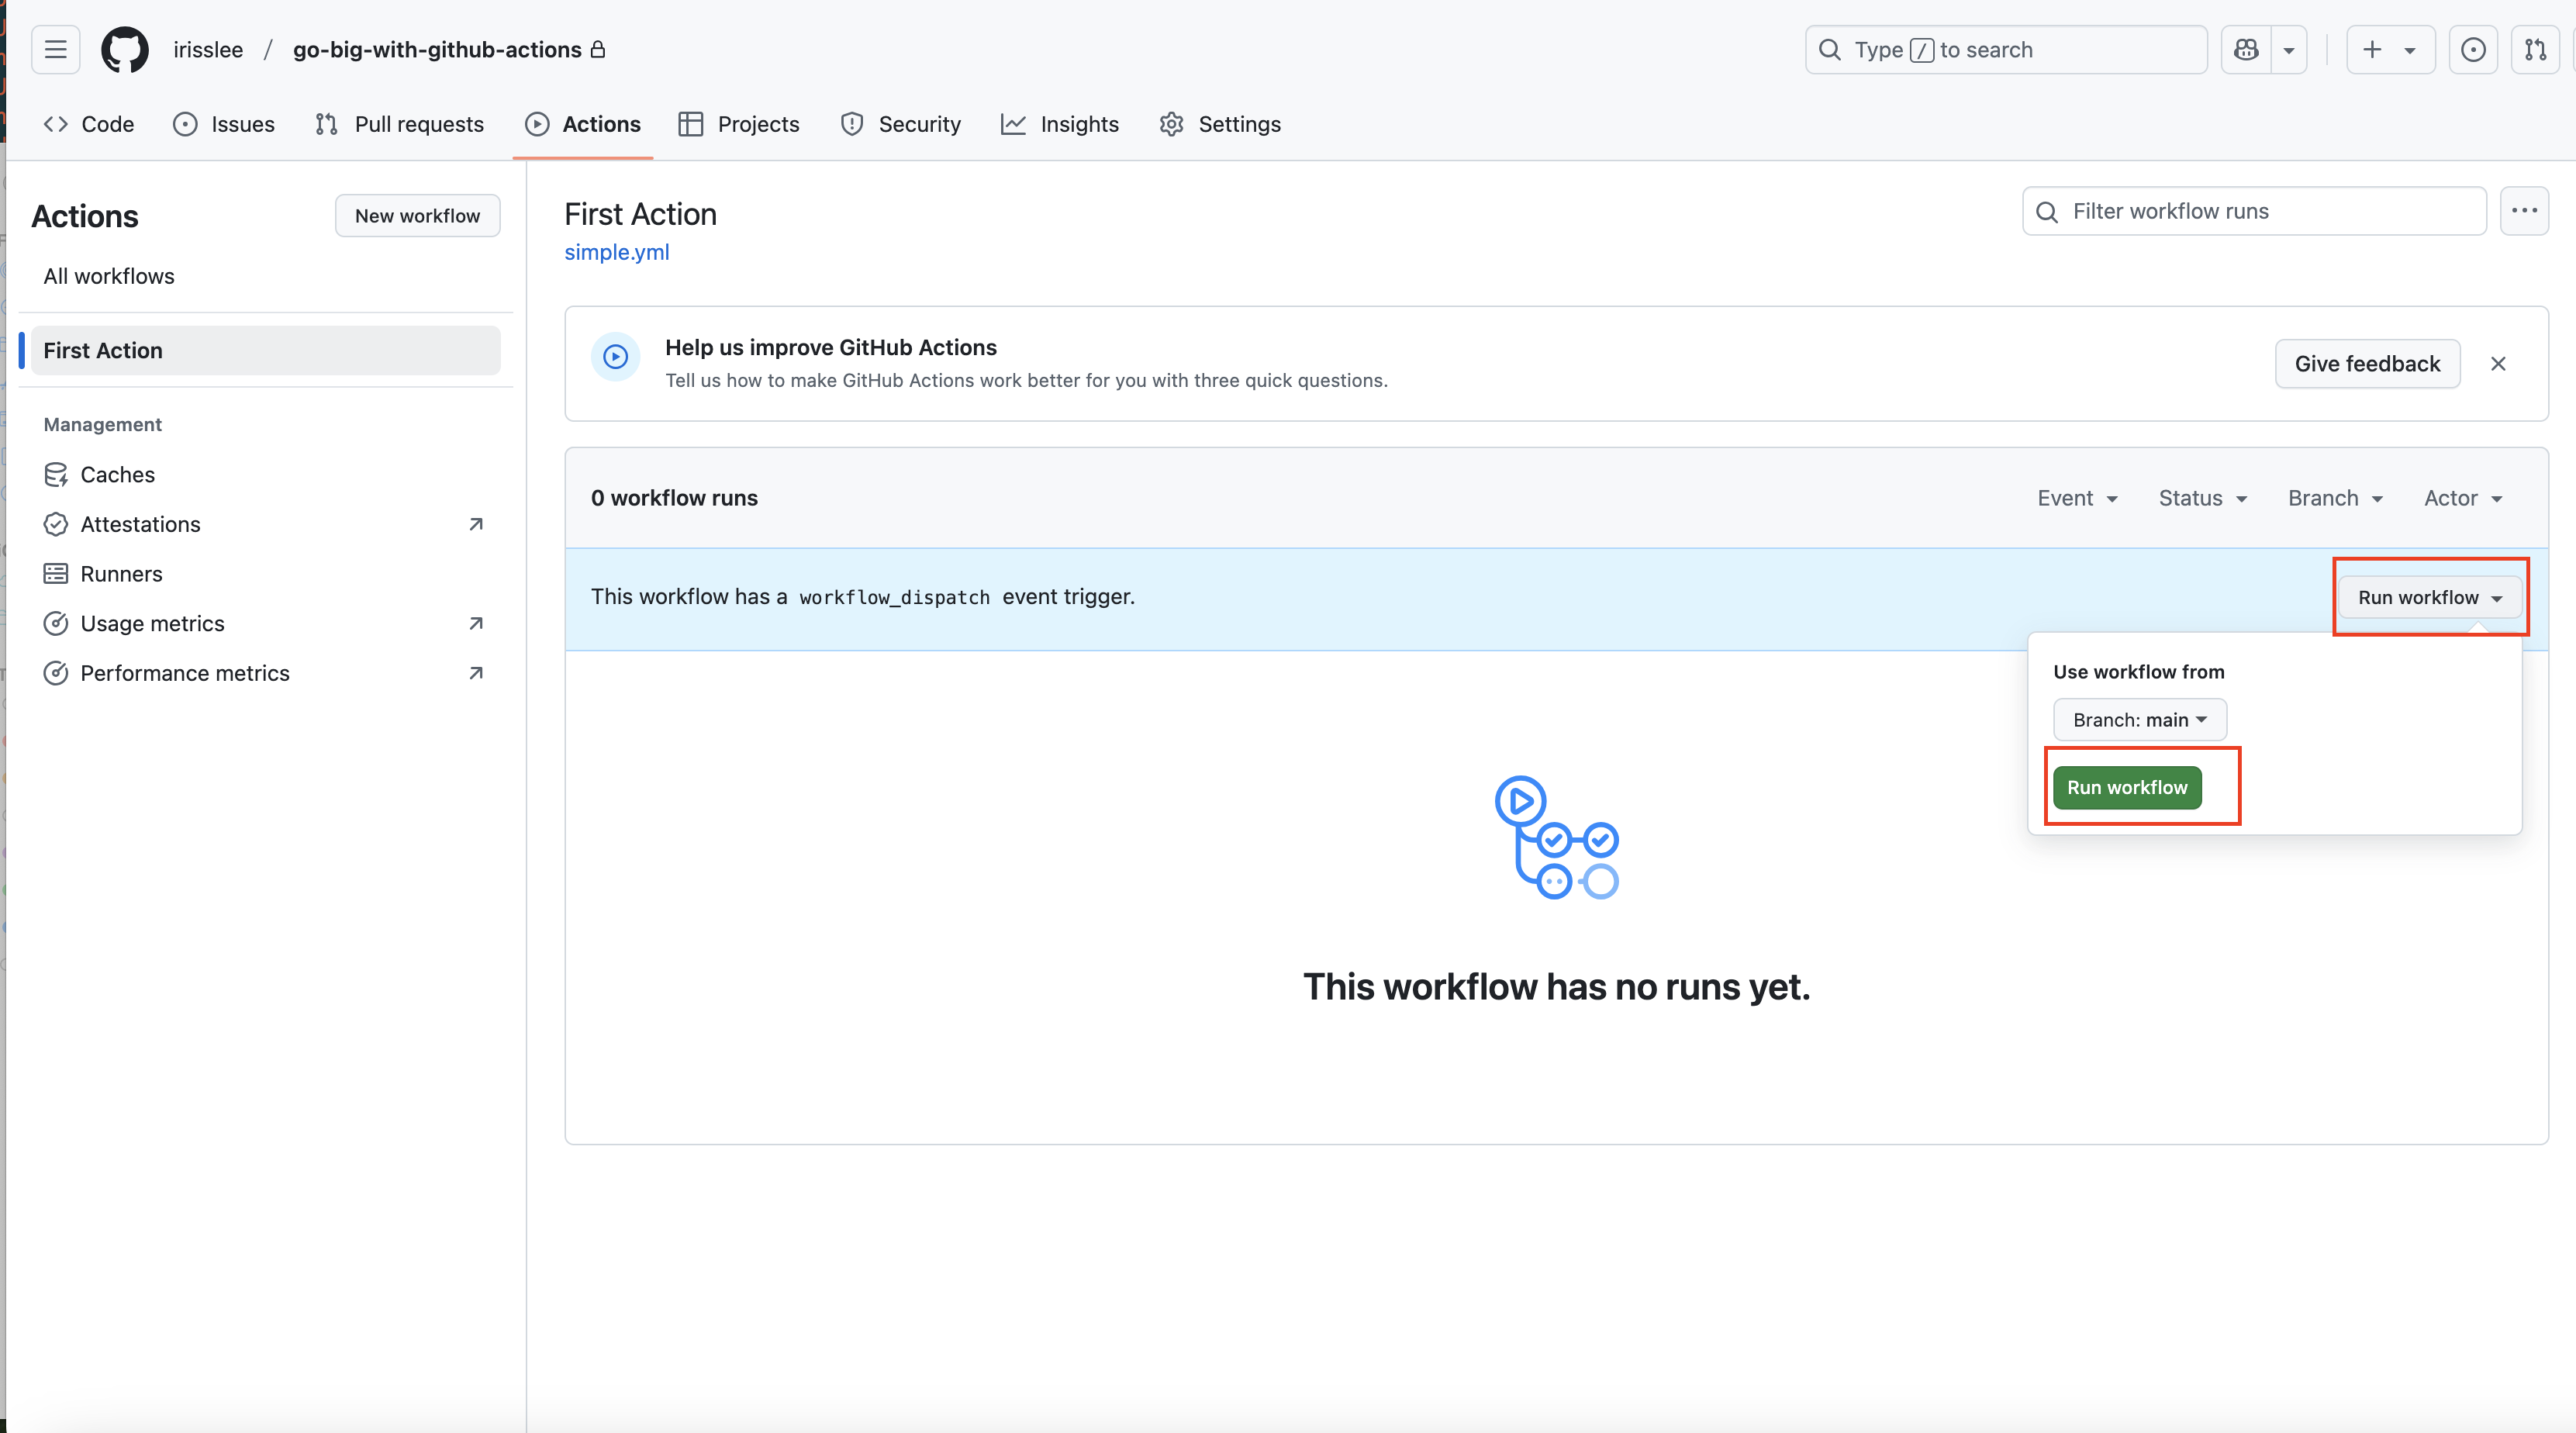
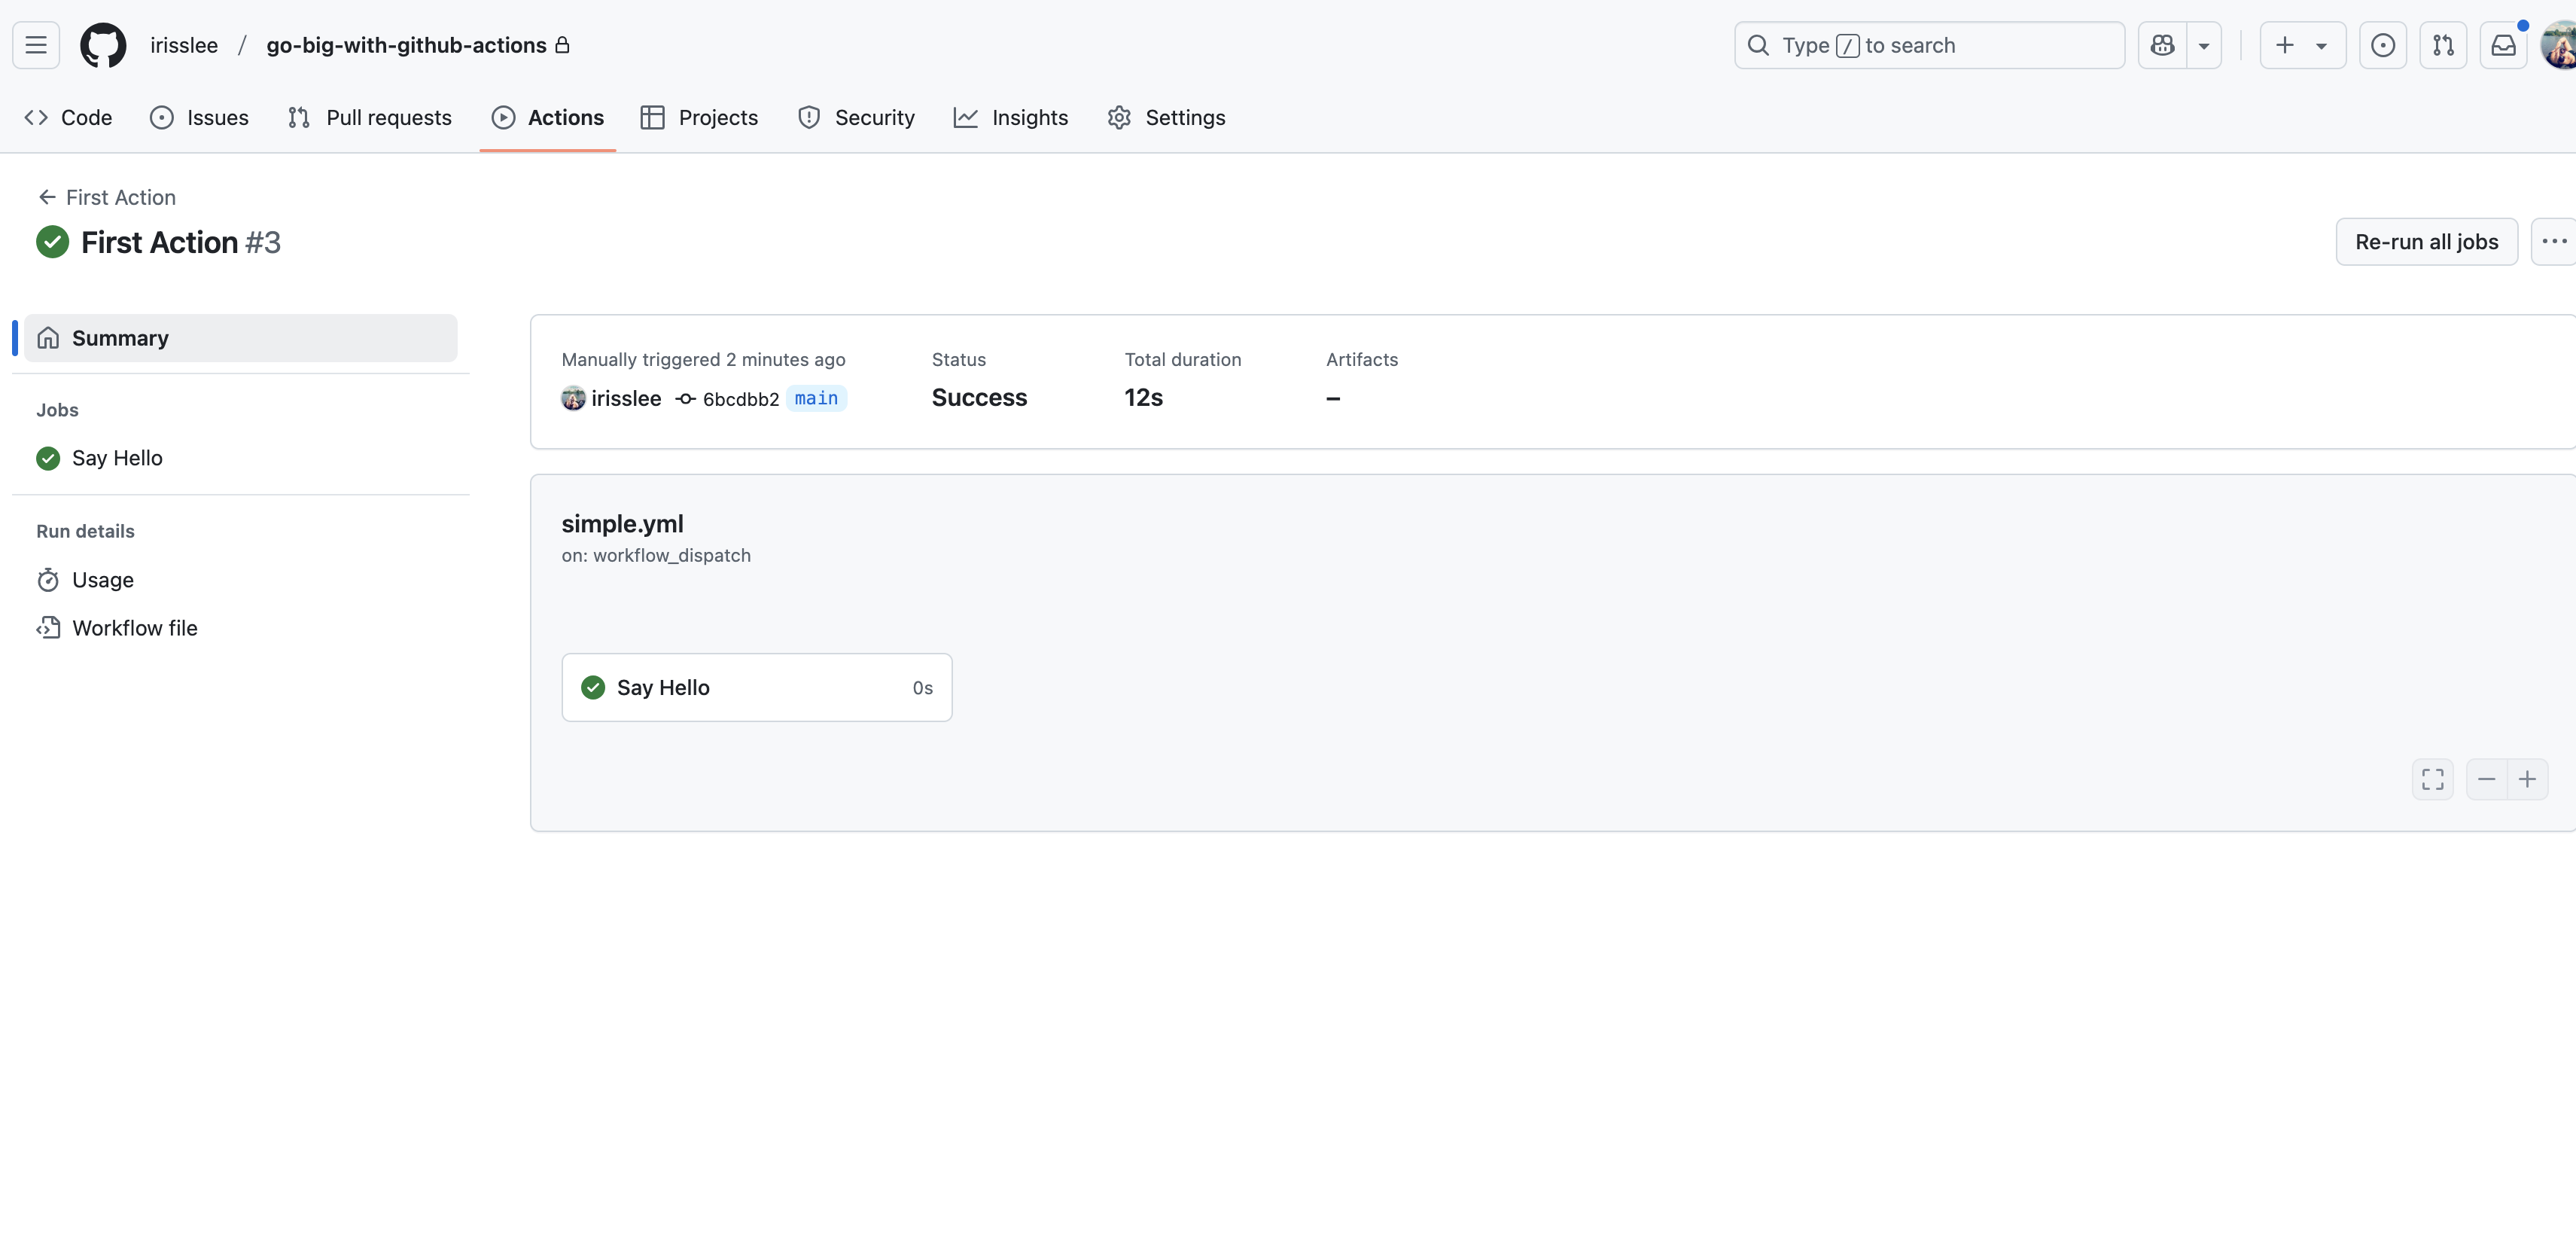
Go back to your “Actions” tab in the repository. You will see that your workflow is now available in the left rail. Click on its name there. Then go to the right corner where you will see a dropdown called “Run workflow.” Click the second, green “Run workflow” button it presents in a dropdown to kickstart your first job.

Refresh your browser. Once your Action has been completed, you will see a green checkmark to the left. Clicking on the completed action will show you what job just ran. Click on the job and open up the steps within workflow to see the output.