6. Deploying data dashboards
You can use Actions to do more than pull things in. You can also use it to push data out via email, Slack, social media or a website.
Examples we’ve worked on or admired include:
The private monitoring dashboard for the Reuters system that drafts hundreds of automated charts each week.
A crowdsourced dictionary of campaign-finance jargon at moneyinpolitics.wtf
A regularly updating database of amateur radio satellites
A continually updating study of which news organizations block AI spiders
An RSS feed of the latest mobile alerts sent by the Washington Post
The latest ensemble forecast for COVID-19 from the U.S. Centers for Disease Control and Prevention
A range of social media bots that post selections from public data sources
In this chapter, we’ll show how to schedule an Action to share data using another powerful GitHub tool: GitHub Pages.
GitHub Pages is a free service that will host files in a GitHub repository as a public website. Yes, free.
Many people use Pages to publish their blogs, portfolios and other personal websites. However, it can also be used for any app that only requires flat files like HTML, CSS, and JavaScript to run.
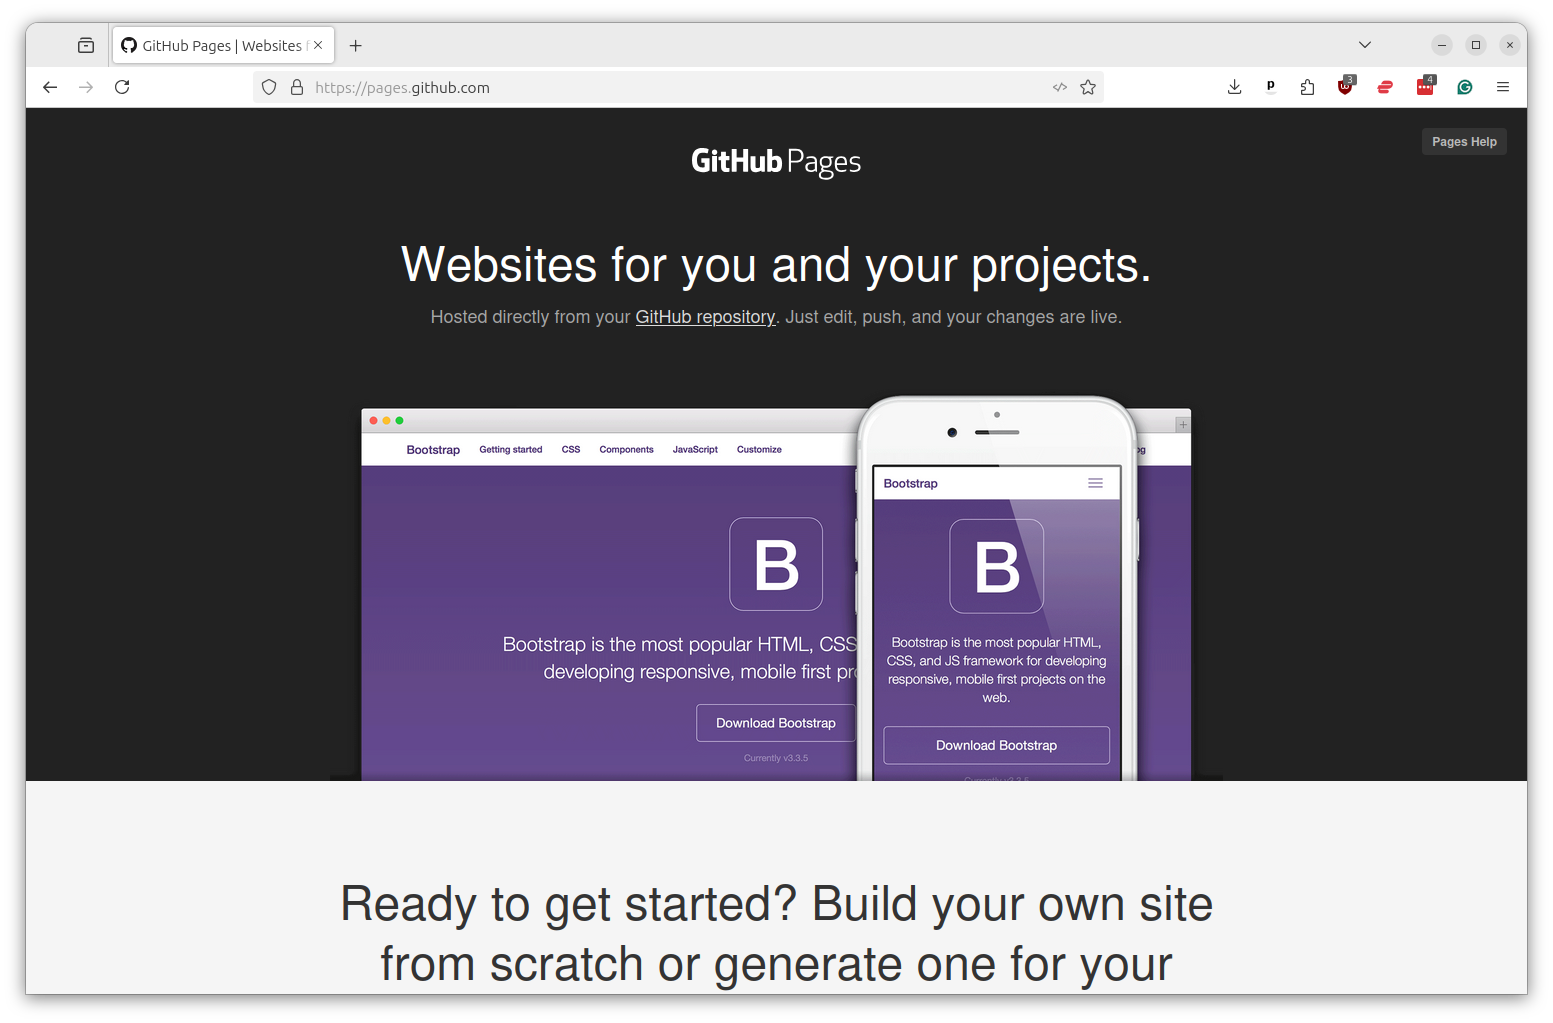
Data journalists can use Pages to share the information they collect with their coworkers, peers and even the general public. When combined with Actions and an automated data-gathering routine, Pages can be used to create live dashboards that regularly update with fresh data.
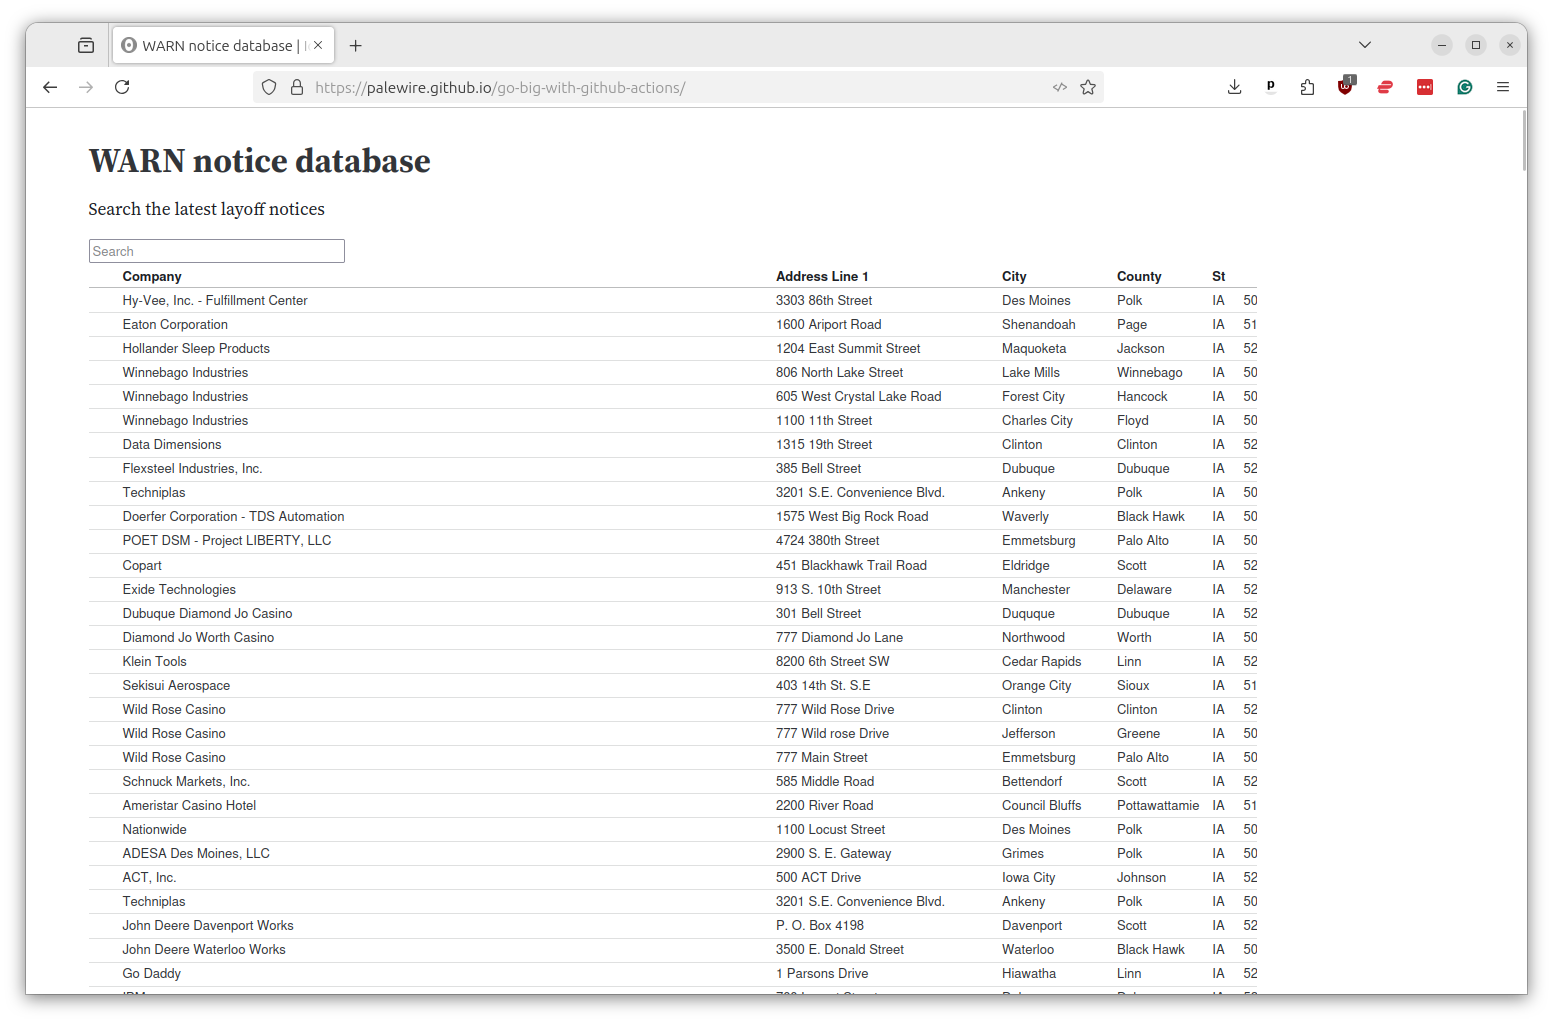
We’ll do that now by integrating the WARN notices we’ve scraped in previous chapters into a simple search.
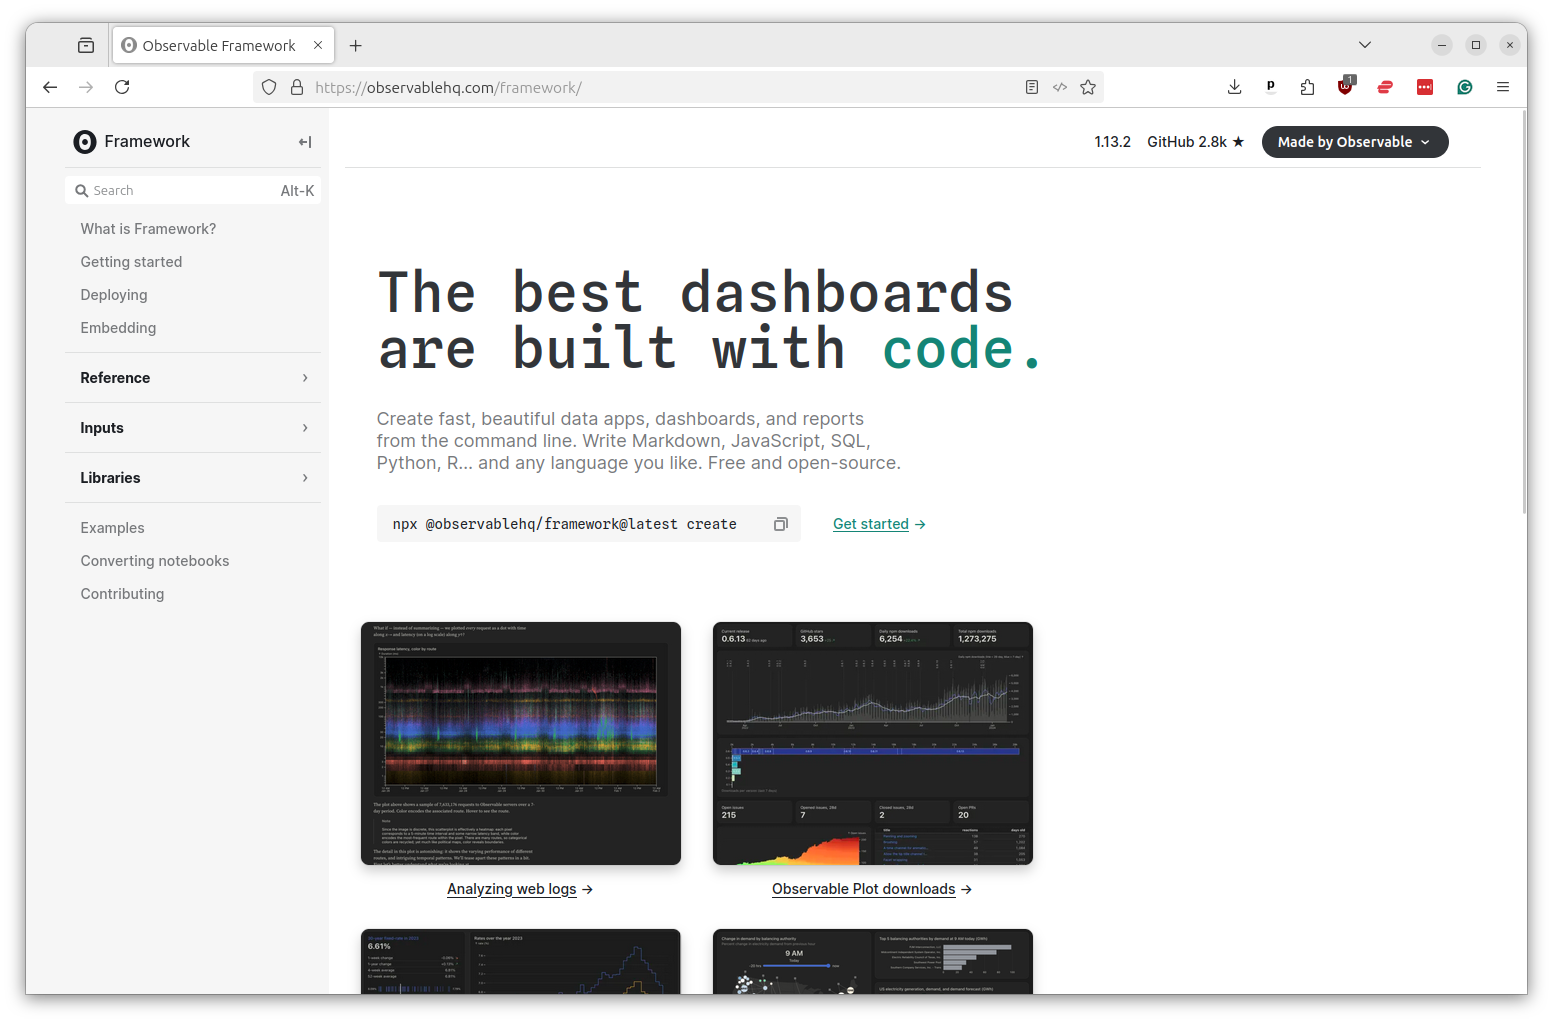
We will build the app using Observable Framework, an elegant JavaScript system for creating dashboards that was pioneered at a company run by a former data journalist.
Sidenote
If you’re interested in learning more about Framework, you should consult Observable’s documentation or follow the tutorial for journalists we’ve published on GitHub.
We don’t have time to go into the details of how to build a full Observable app here, so I’ve prepared a ready-to-serve folder of code that you should download from GitHub.
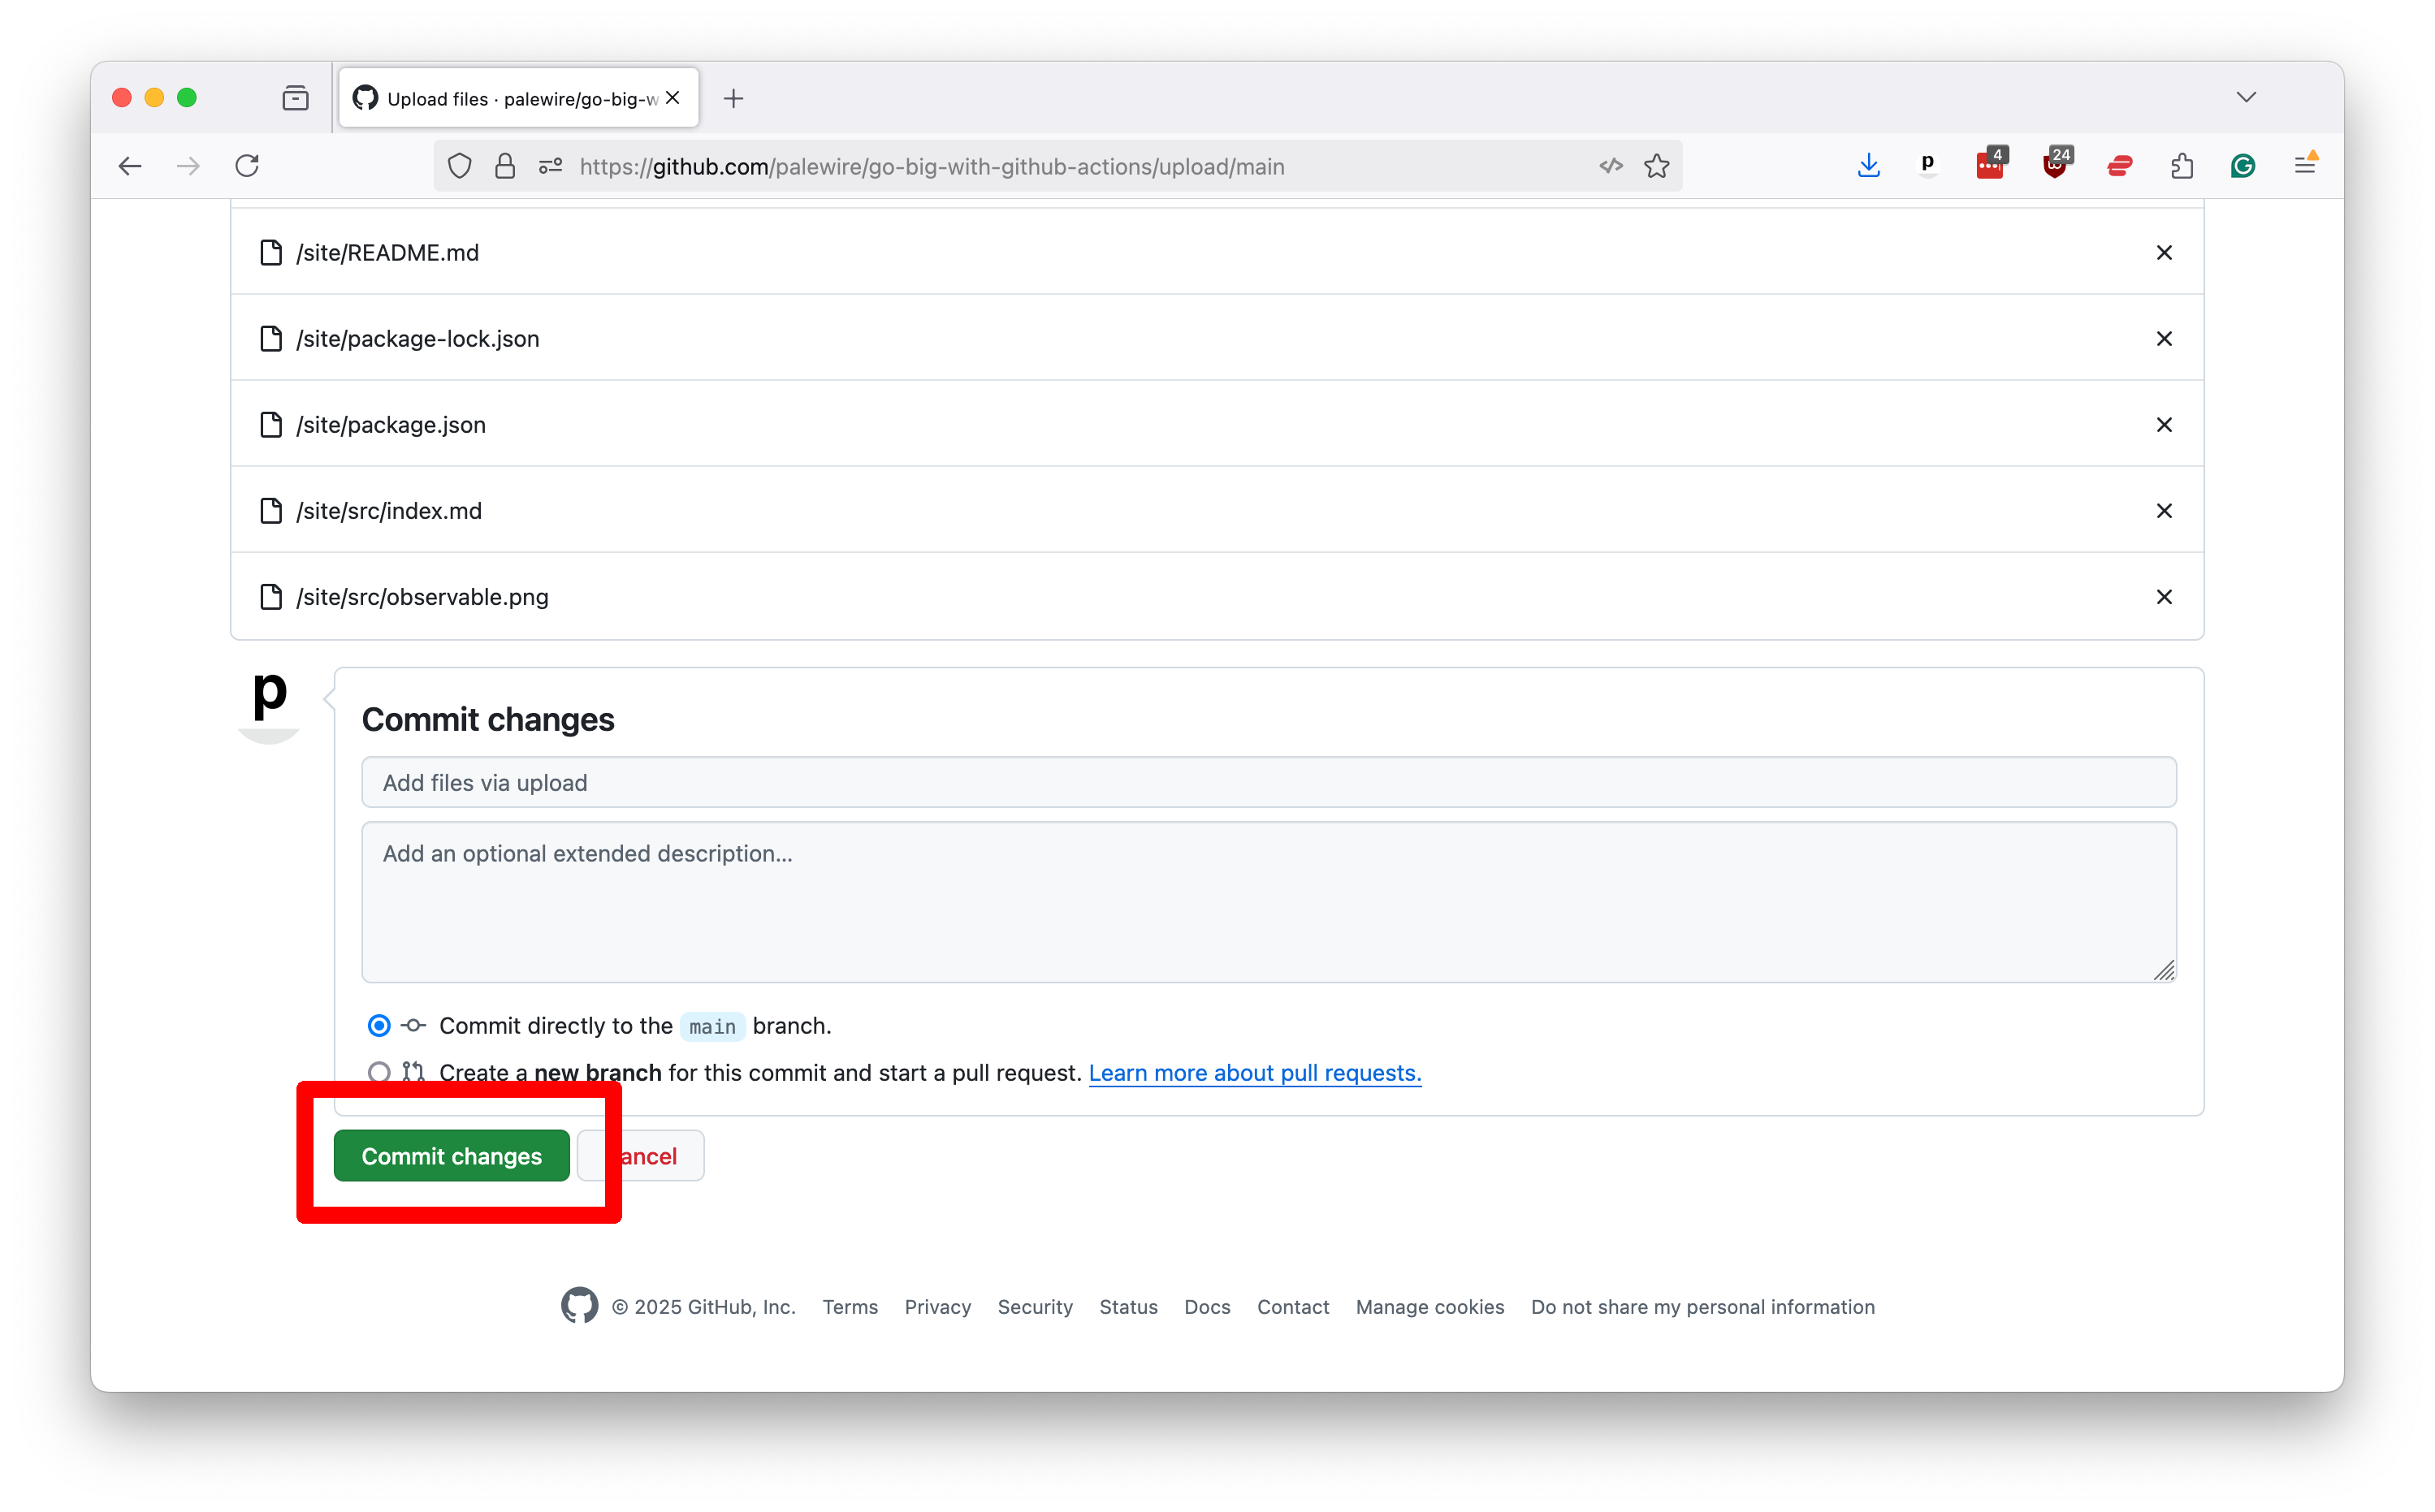
Click that link to retrieve our zipfile. Unzip it in your downloads folder. Now return to your repository’s homepage and select “Upload files” from the “Add file” dropdown menu in the toolbar.
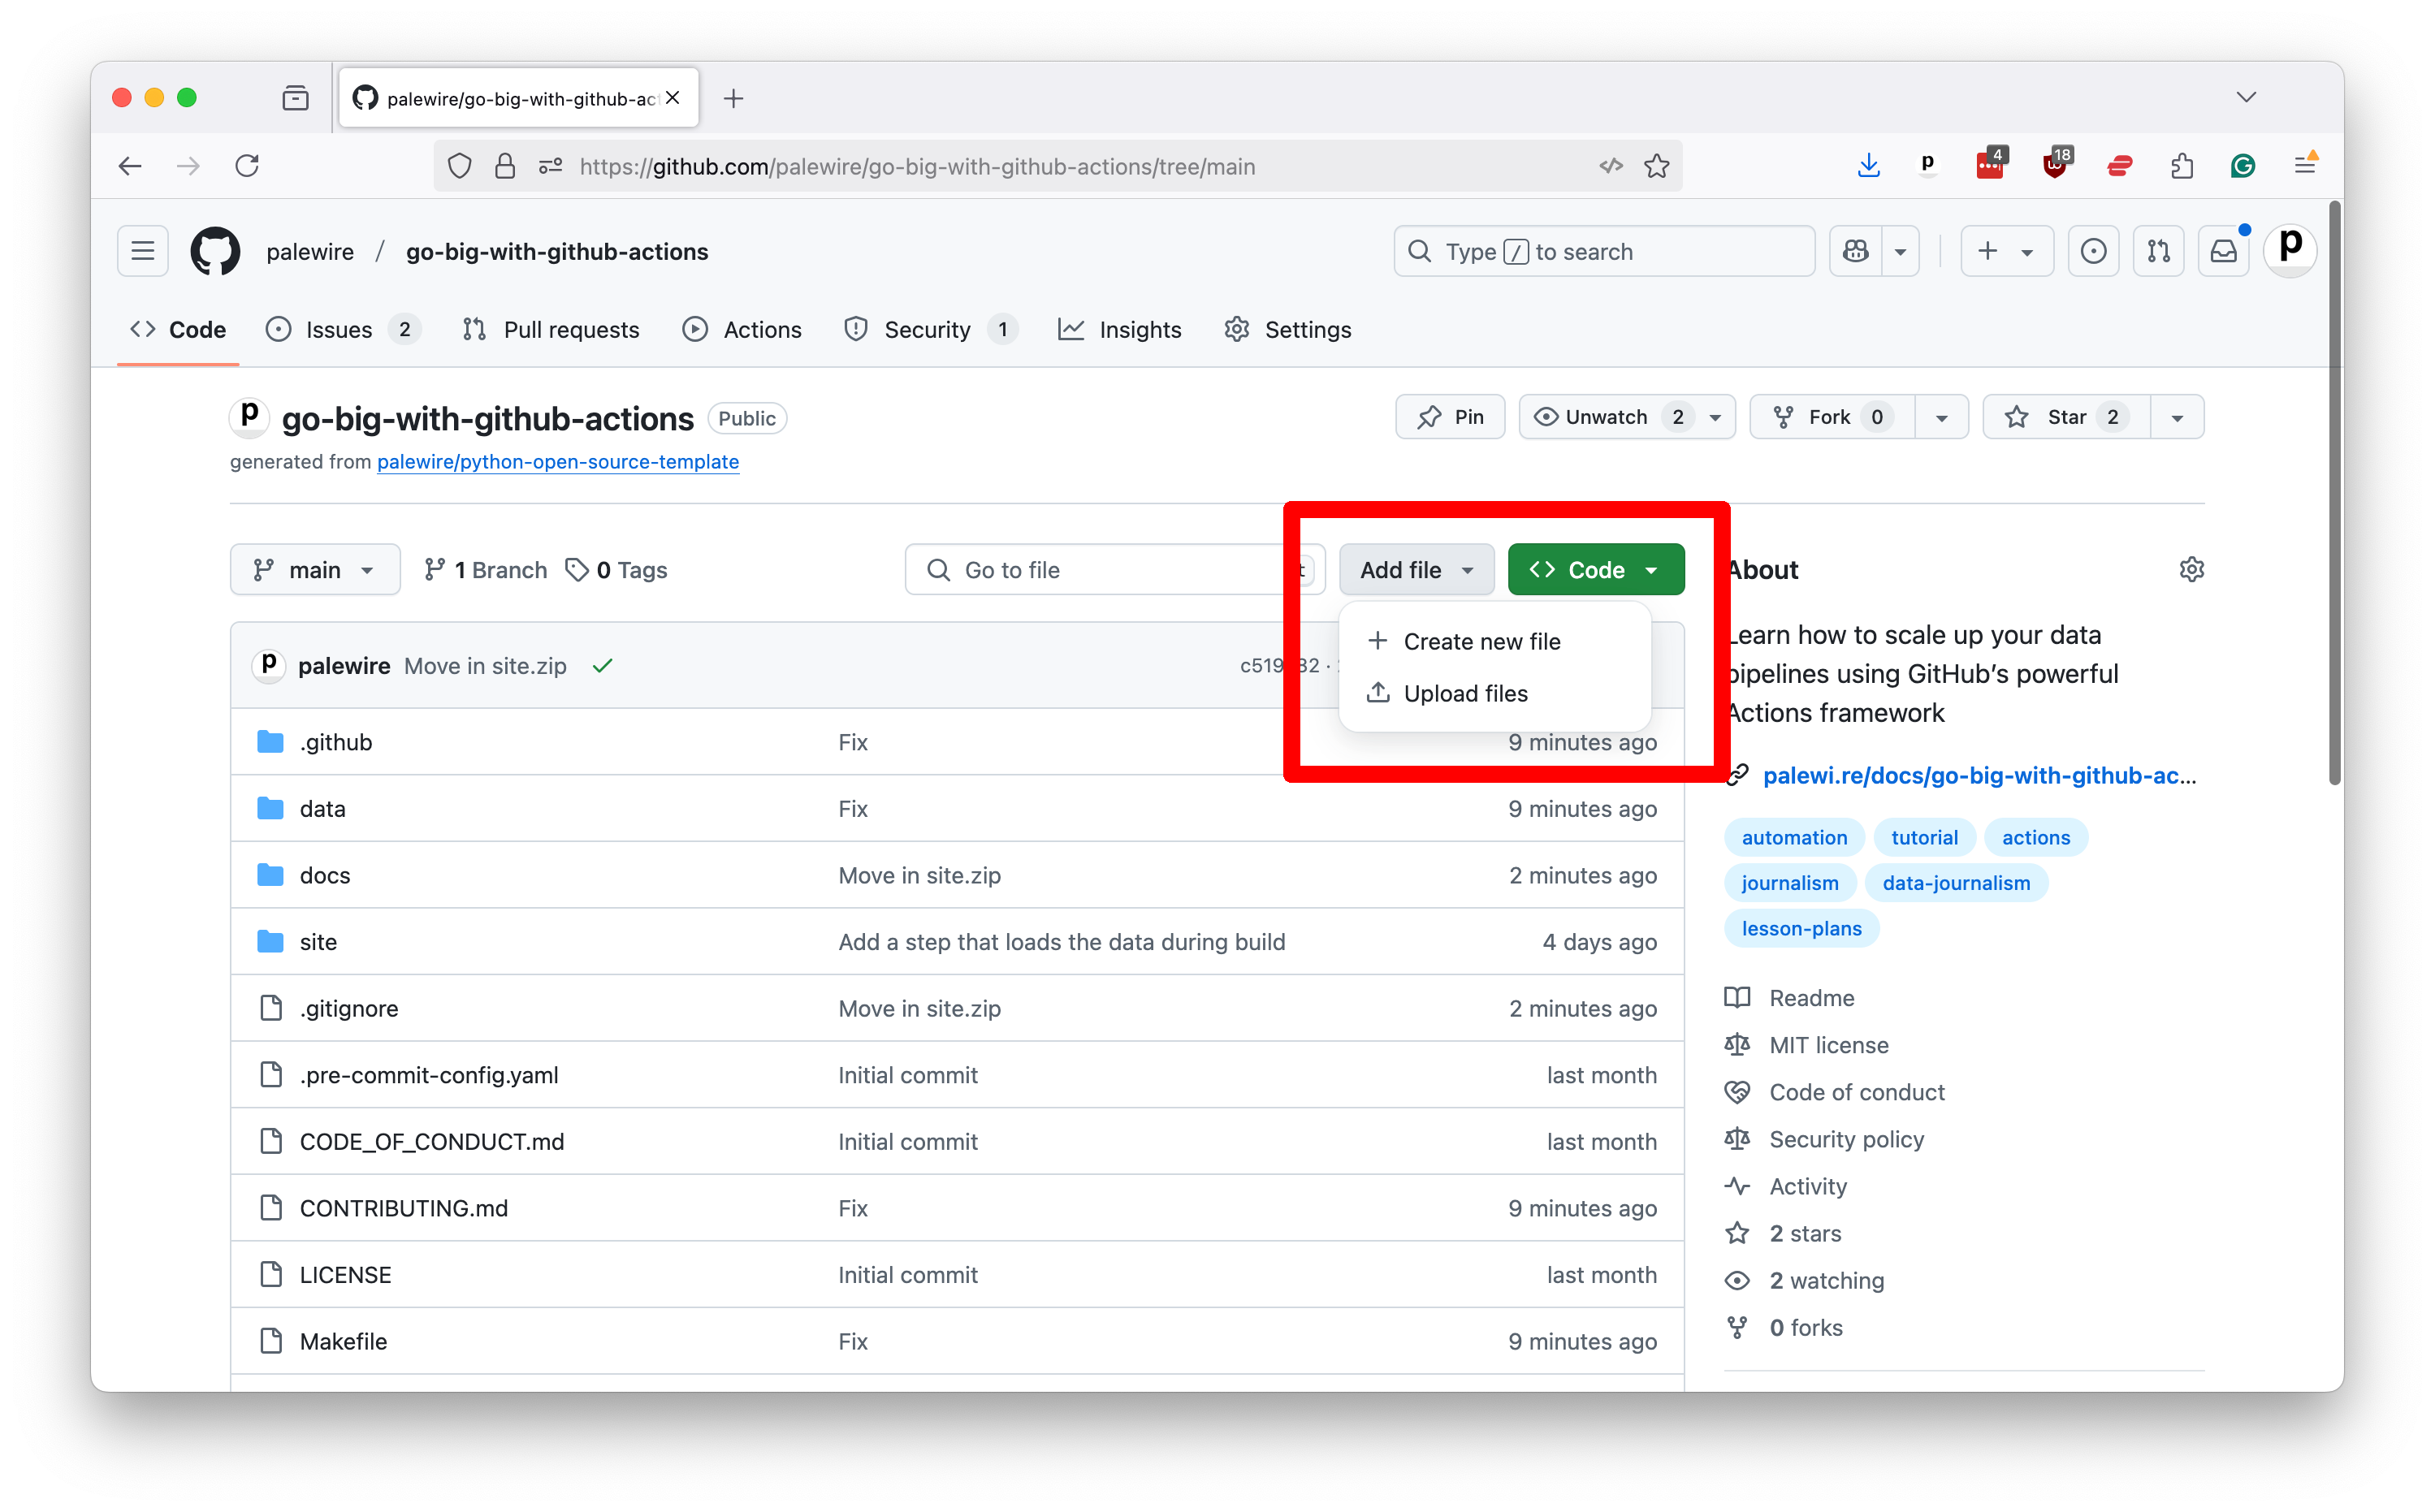
Now drag the unzipped site folder and drop it in the zone that GitHub presents.
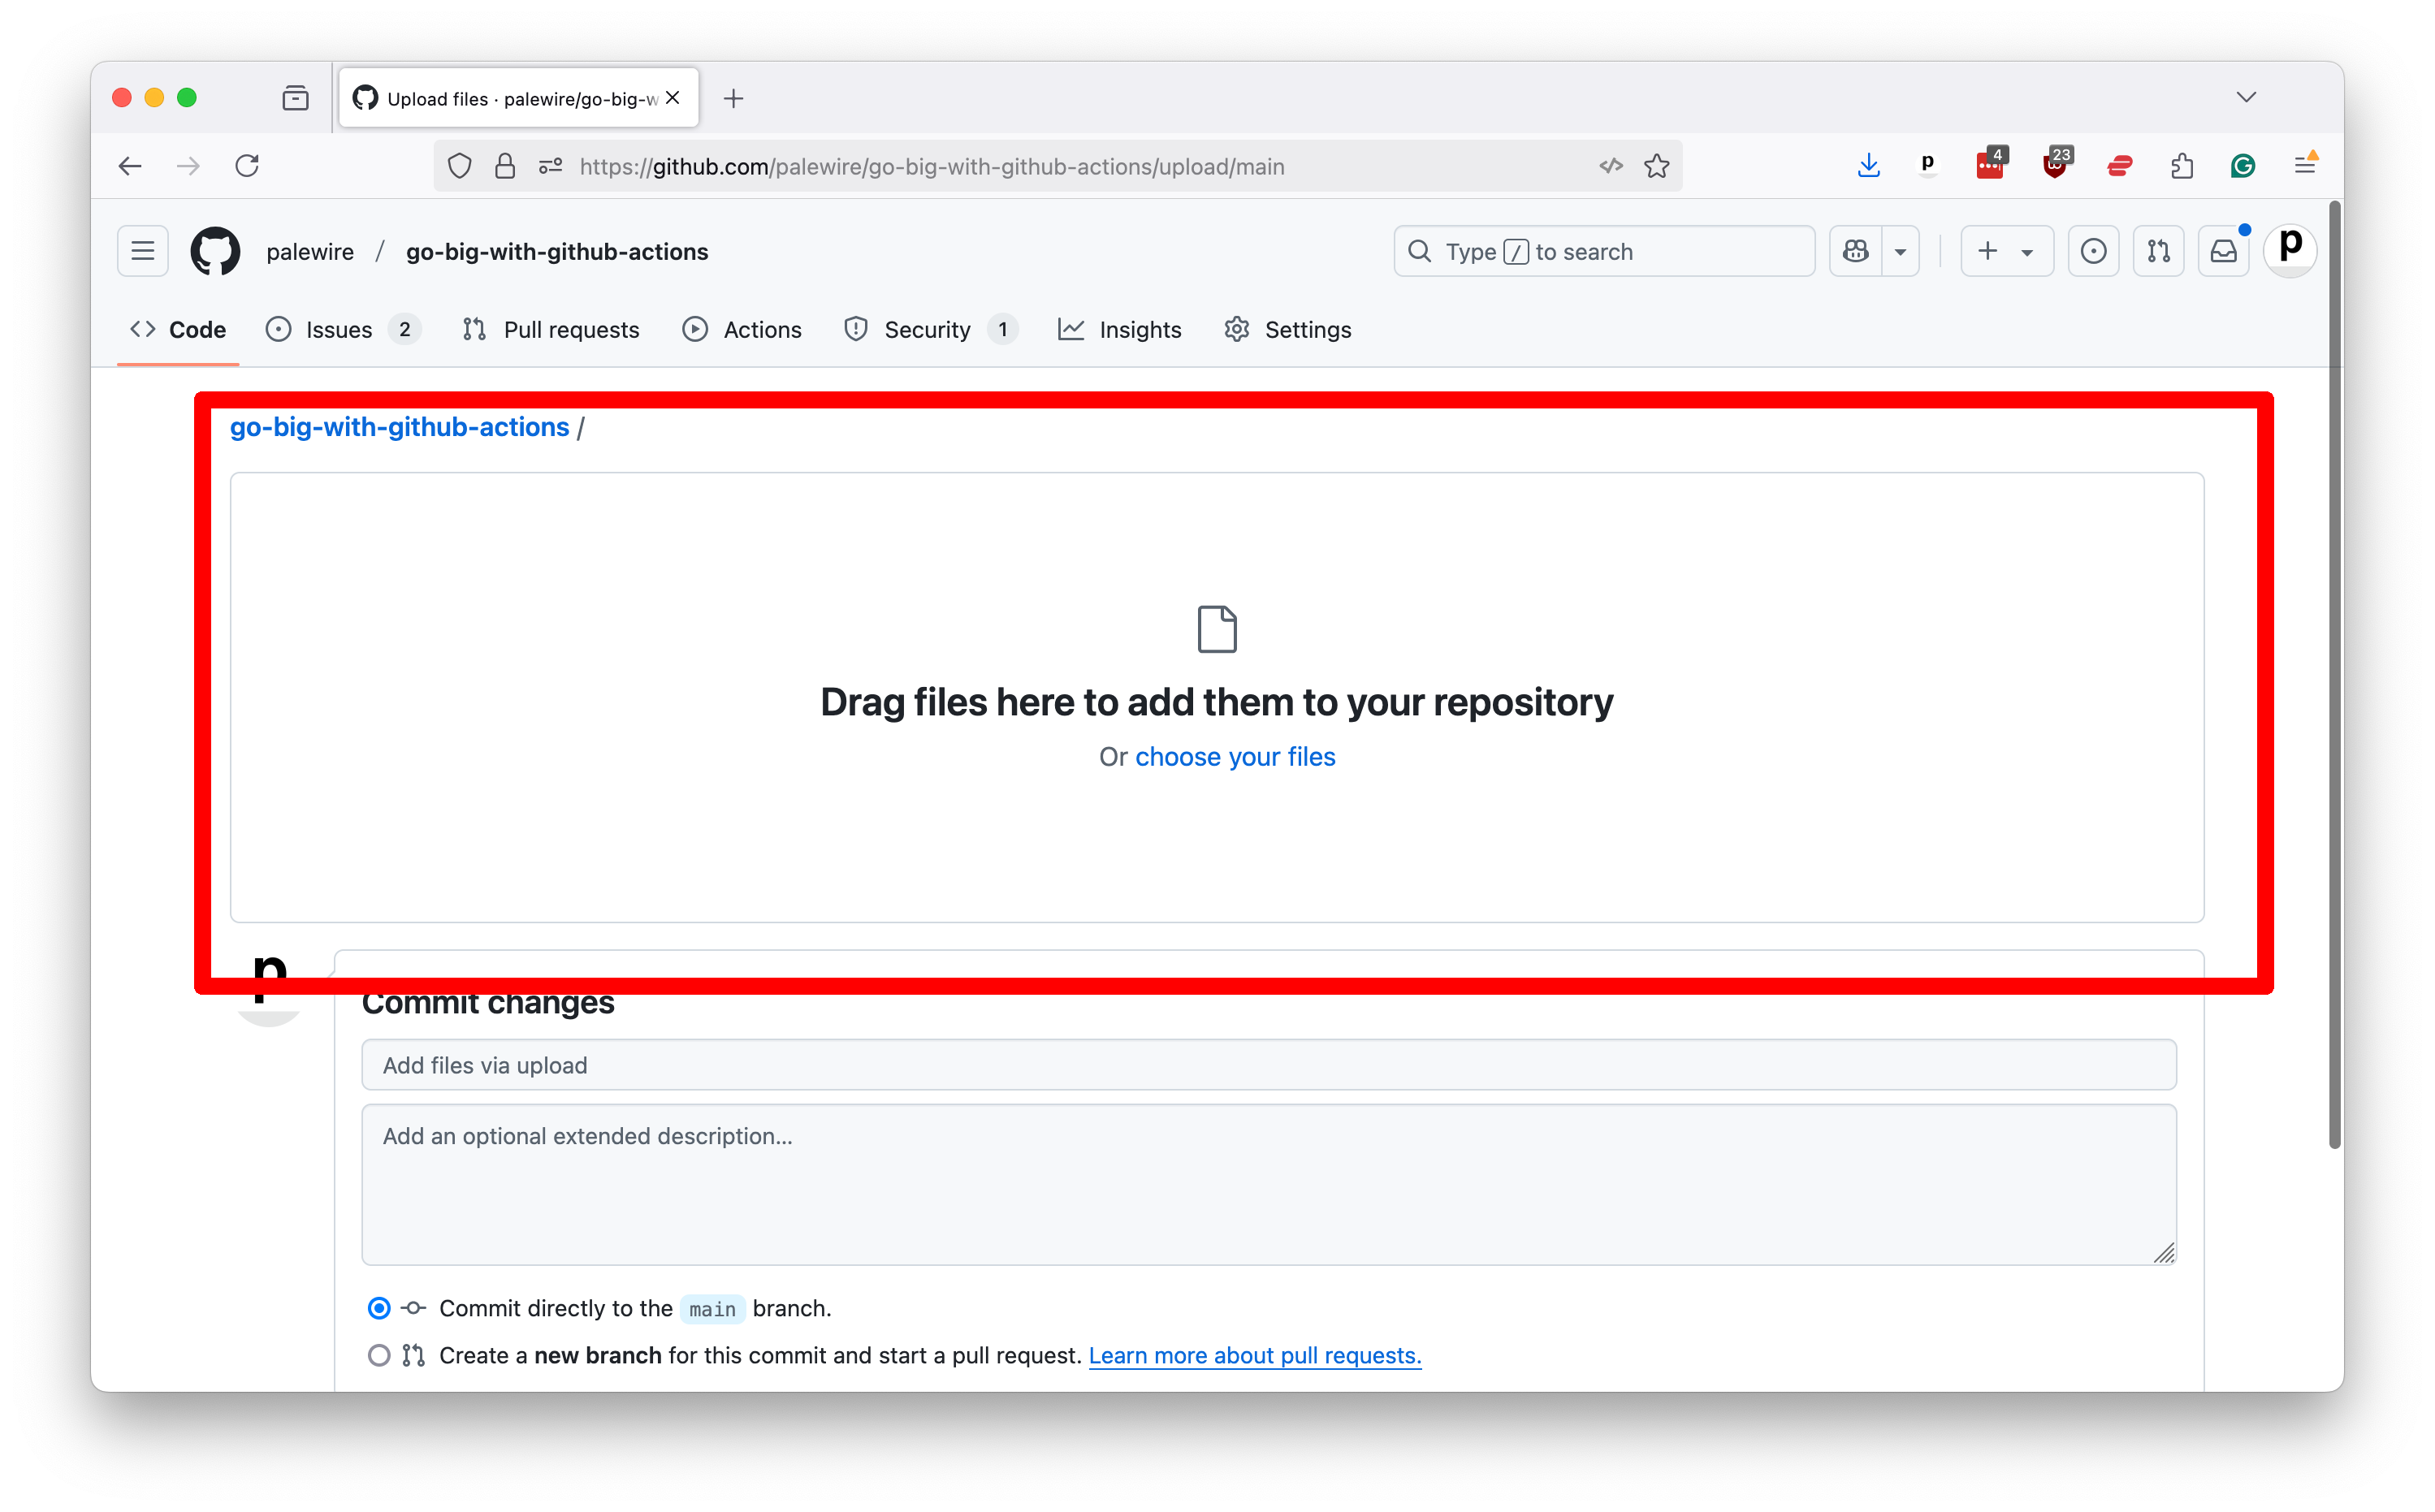
After the files finish uploading, scroll to the bottom of the page and commit them to your repository.
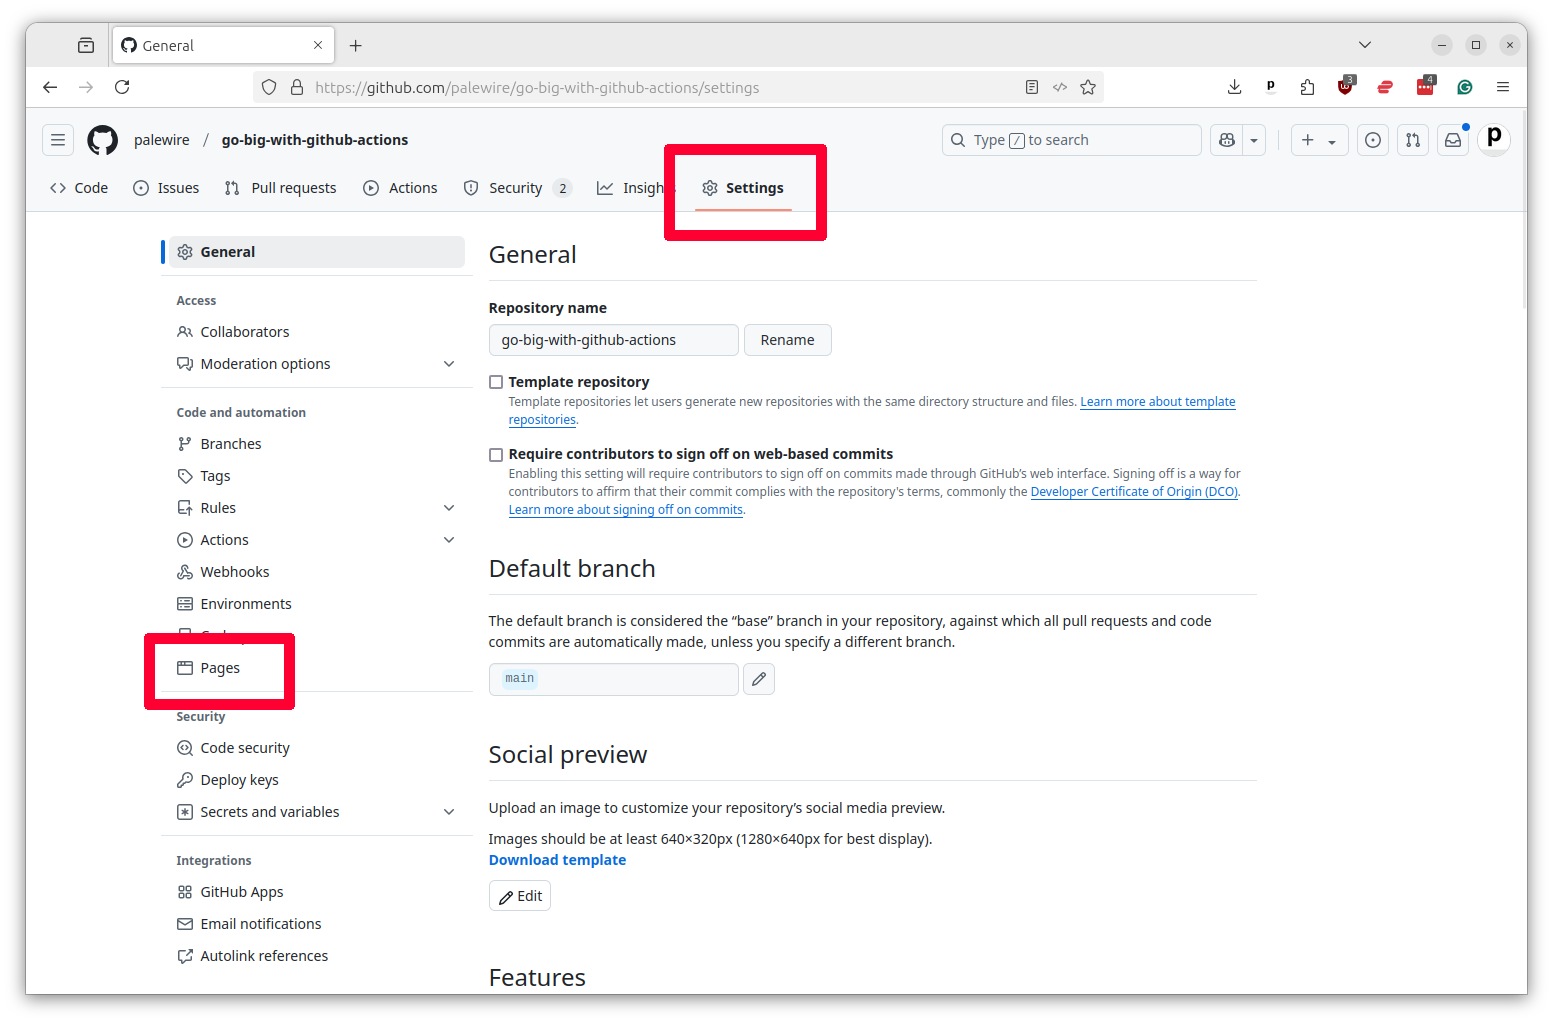
Before we can move to start working with GitHub Pages, you will need to activate the service in your repository. To do this, click on the “Settings” tab in your repository and then select “Pages” from the left-hand toolbar.
Next you should select the “Source” pulldown in the “Build and Deployment” section and choose “GitHub Actions.”
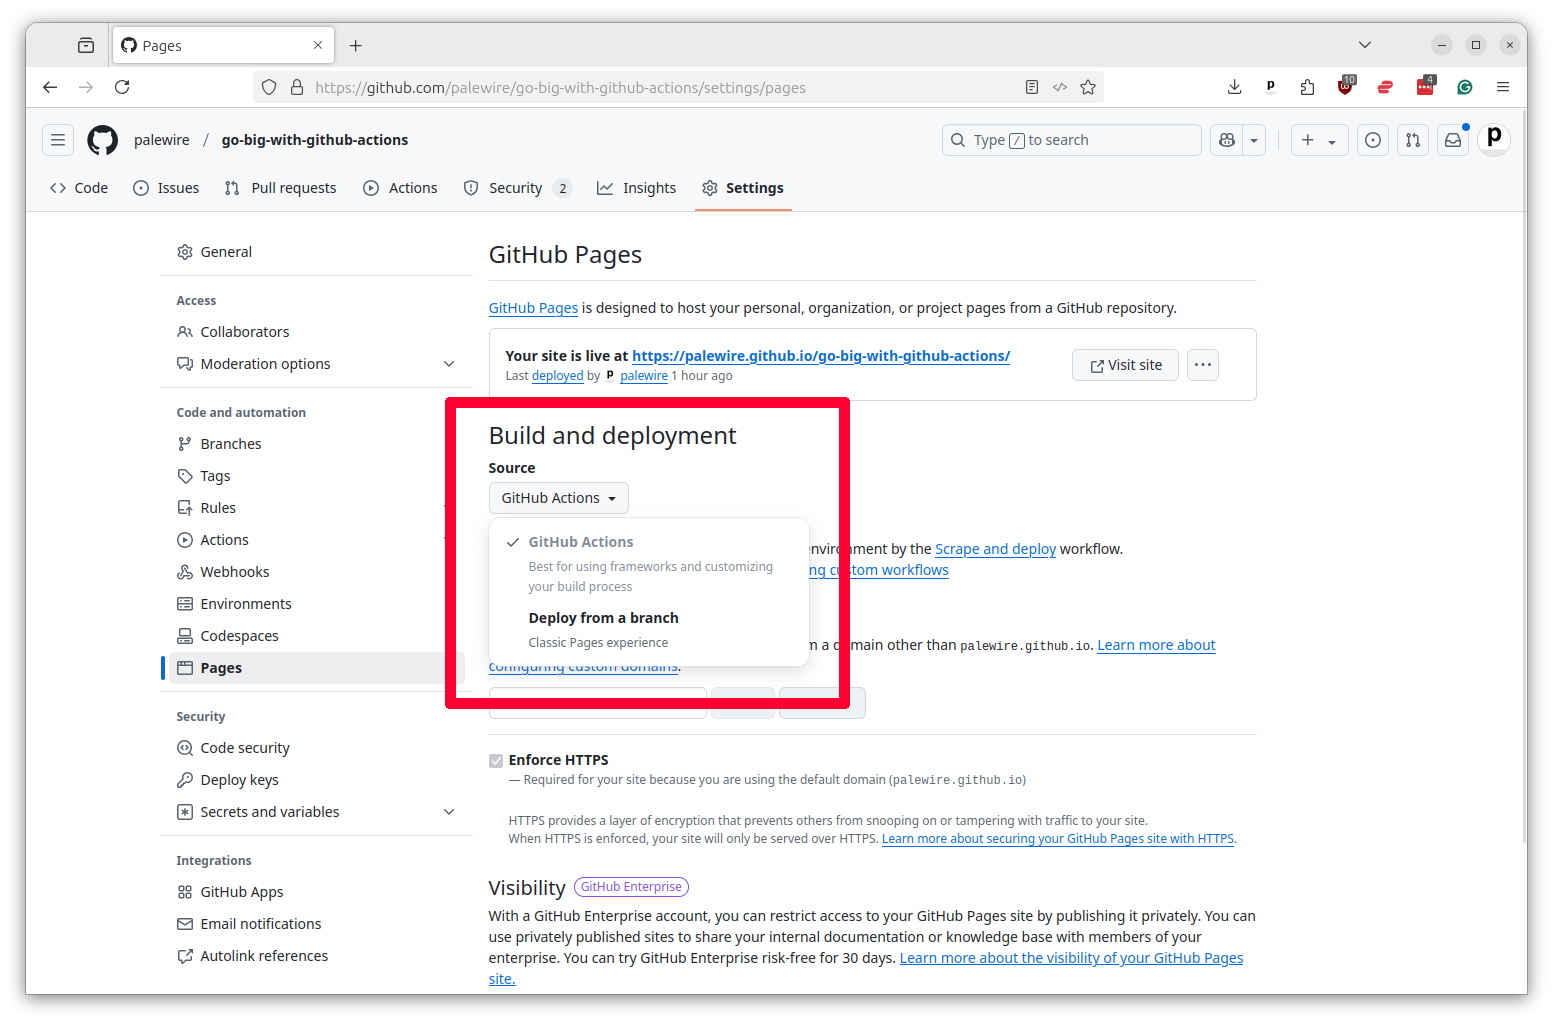
Now Pages is ready to run.
Next you should create a new YAML file in your workflows folder called scrape-and-deploy.yml. Remember, it needs to be in the .github/workflows directory of your repository next to all of your other tasks.
We will start this file off by pasting in code similar what we used to scrape WARN Act data in previous chapters. It will simply scrape the latest layoff notices from Iowa’s website, commit the data to the repository and then attach it to Action’s log.
Copy and paste what you see below into your file.
name: Scrape and Deploy

on:
  workflow_dispatch:

permissions:
  contents: write

jobs:
  scrape:
    name: Scrape
    runs-on: ubuntu-latest
    steps:
      - name: Checkout
        uses: actions/checkout@v6

      - name: Install Python
        uses: actions/setup-python@v6
        with:
          python-version: '3.12'

      - name: Install scraper
        run: pip install warn-scraper

      - name: Scrape
        run: warn-scraper ia --data-dir ./data/

      - name: Commit and push
        run: |
          git config user.name "GitHub Actions"
          git config user.email "actions@users.noreply.github.com"
          git add ./data/
          git commit -m "Latest data" && git push || true

      - name: upload-artifact
        uses: actions/upload-artifact@v6
        with:
          name: data
          path: ./data/
Insert a second step at the bottom named Build. It will be tasked with using Observable Framework to create a bundle of data and code that’s ready to be served up as a website.
We can start with the standard step of checking out the code. Notice that the step needs the scrape step, which ensures that it will not run until our first step has finished.
  build:
    name: Build
    runs-on: ubuntu-latest
    needs: scrape
    steps:
      - name: Checkout
        uses: actions/checkout@v6
Unlike our WARN notice scraper, Observable Framework uses the Node.js programming language. So we need to install that instead of Python to run the build. We’ll do that using pre-packaged actions/setup-node shortcut offered by GitHub and the npm package manager, which amount to the Node.js equivactions/upload-pages-artifact@v4alent of the tools we used for Python in our scraping step.
  build:
    name: Build
    runs-on: ubuntu-latest
    needs: scrape
    steps:
      - name: Checkout
        uses: actions/checkout@v6

      - name: Setup Node.js
        uses: actions/setup-node@v6
        with:
          node-version: "20.11"

      - name: Install dependencies
        run: npm install --prefix site
Add a step to download the data we scraped in the previous step. This is done using the actions/download-artifact companion to the uploader. We will instruct it to unzip the files in a special directory we’ve set aside in our Observable Framework configuration for its data sources.
  build:
    name: Build
    runs-on: ubuntu-latest
    needs: scrape
    steps:
      - name: Checkout
        uses: actions/checkout@v6

      - name: Setup Node.js
        uses: actions/setup-node@v6
        with:
          node-version: "20.11"

      - name: Install dependencies
        run: npm install --prefix site

      - name: Download data
        uses: actions/download-artifact@v7
        with:
          name: data
          path: site/src/data/
Add another step that will run Observable Framework’s custom command for building the app. This will take the data we downloaded and create a bundle of HTML, CSS and JavaScript that can be served up as a website in the site/dist directory.
  build:
    name: Build
    runs-on: ubuntu-latest
    needs: scrape
    steps:
      - name: Checkout
        uses: actions/checkout@v6

      - name: Setup Node.js
        uses: actions/setup-node@v6
        with:
          node-version: "20.11"

      - name: Install dependencies
        run: npm install --prefix site

      - name: Download data
        uses: actions/download-artifact@v7
        with:
          name: data
          path: site/src/data/

      - name: Build
        run: npm run build --prefix site
Finally, we need to add a step that will upload the built files to the Action so they can be used in the next step. This is done using the actions/upload-pages-artifact, a shortcut created by GitHub to make it easier to work with Pages.
  build:
    name: Build
    runs-on: ubuntu-latest
    needs: scrape
    steps:
      - name: Checkout
        uses: actions/checkout@v6

      - name: Setup Node.js
        uses: actions/setup-node@v6
        with:
          node-version: "20.11"

      - name: Install dependencies
        run: npm install --prefix site

      - name: Download data
        uses: actions/download-artifact@v7
        with:
          name: data
          path: site/src/data/

      - name: Build
        run: npm run build --prefix site

      - name: Upload release candidate
        uses: actions/upload-pages-artifact@v4
        with:
          path: "site/dist"
This will upload the site/dist directory where Framework builds the site to the Action so it can be published in the final step.
GitHub’s documentation provides a ready-to-go example for publishing to Pages that requires only a little customization. You only need to paste the code below into the bottom of your workflow and make sure that the needs line is set to the slug of your build step.
  deploy:
    name: Deploy
    runs-on: ubuntu-latest
    needs: build
    permissions:
      pages: write
      id-token: write
    environment:
      name: github-pages
      url: ${{ steps.deploy.outputs.page_url }}
    steps:
      - id: deploy
        name: Deploy to GitHub Pages
        uses: actions/deploy-pages@v4
That’s all it should take. Save your workflow file and commit it your repository. The final file should look like this:
name: Scrape and Deploy

on:
  workflow_dispatch:

permissions:
  contents: write

jobs:
  scrape:
    name: Scrape
    runs-on: ubuntu-latest
    steps:
      - name: Checkout
        uses: actions/checkout@v6

      - name: Install Python
        uses: actions/setup-python@v6
        with:
          python-version: '3.12'

      - name: Install scraper
        run: pip install warn-scraper

      - name: Scrape
        run: warn-scraper ia --data-dir ./data/

      - name: Commit and push
        run: |
          git config user.name "GitHub Actions"
          git config user.email "actions@users.noreply.github.com"
          git add ./data/
          git commit -m "Latest data" && git push || true

      - name: upload-artifact
        uses: actions/upload-artifact@v6
        with:
          name: data
          path: ./data/

  build:
    name: Build
    runs-on: ubuntu-latest
    needs: scrape
    steps:
      - name: Checkout
        uses: actions/checkout@v6

      - name: Setup Node.js
        uses: actions/setup-node@v6
        with:
          node-version: "20.11"

      - name: Install dependencies
        run: npm install --prefix site

      - name: Download data
        uses: actions/download-artifact@v7
        with:
          name: data
          path: site/src/data/

      - name: Build
        run: npm run build --prefix site

      - name: Upload release candidate
        uses: actions/upload-pages-artifact@v4
        with:
          path: "site/dist"

  deploy:
    name: Deploy
    runs-on: ubuntu-latest
    needs: build
    permissions:
      pages: write
      id-token: write
    environment:
      name: github-pages
      url: ${{ steps.deploy.outputs.page_url }}
    steps:
      - id: deploy
        name: Deploy to GitHub Pages
        uses: actions/deploy-pages@v4
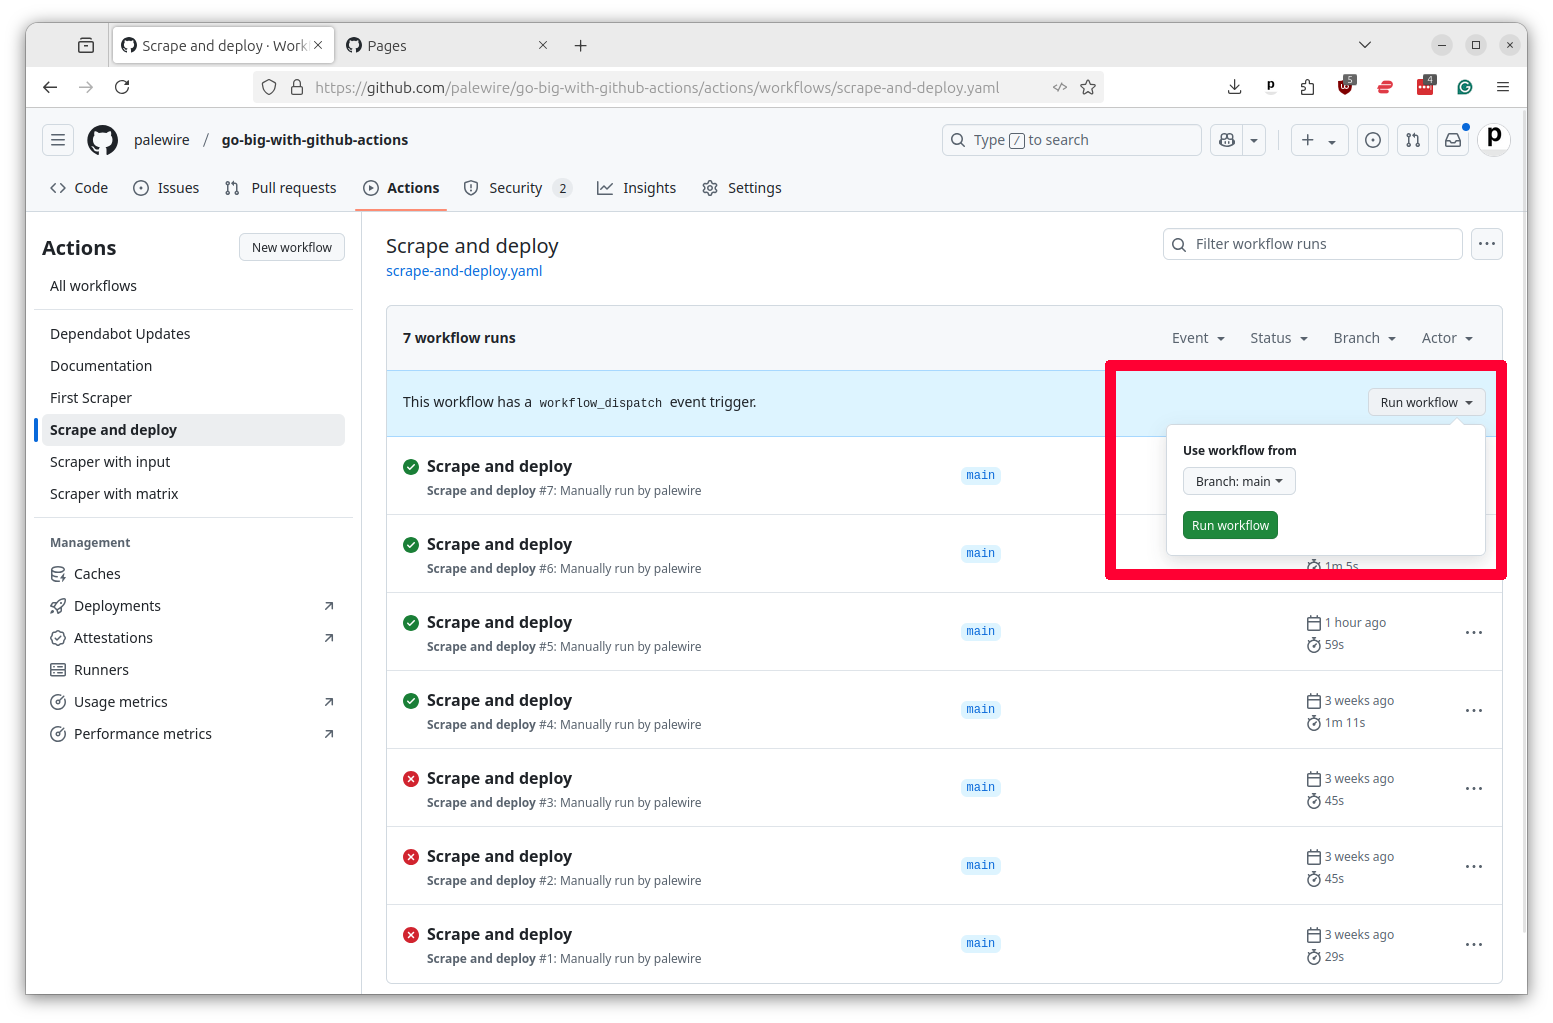
Once it’s been pushed to GitHub you should be able to see it in the Actions tab of your repository. You can run it manually by clicking on the Run workflow button.
After the task finishes, your dashboard should be available at the URL https://<your-username>.github.io/<your-repo-name>/. You can also find the link in the Pages tab of your repository settings and it should appear in the Deploy box in your job’s summary page.
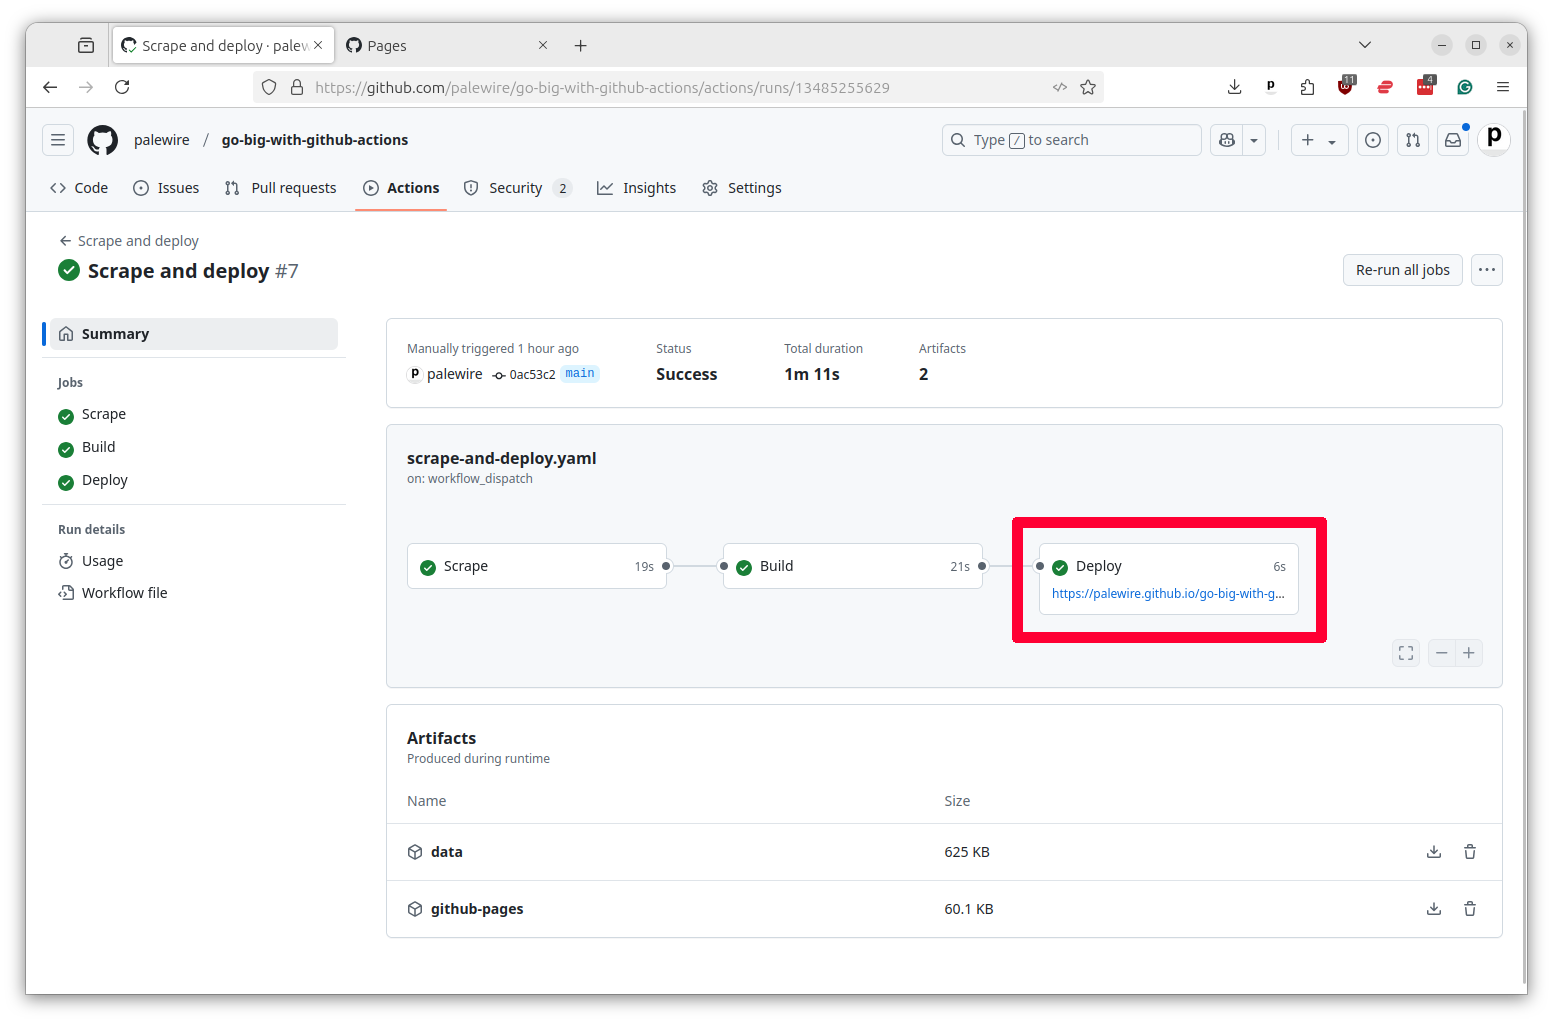
Hit the link and you should see the dashboard we built in the site directory of this repository.
Congratulations. You’ve deployed a dashboard using GitHub Pages. If you’re having trouble with your YAML file, you can find a full working example in our class repository.
To schedule it to automatically update, all you’d need to do is schedule the workflow to run on a regular basis as we did in previous chapters.
name: Scrape and deploy

on:
  workflow_dispatch:
  schedule:
    - cron: "0 0 * * *"