11. Publishing
In our last chapter, all the work we’ve done will finally be published online.
11.1. The importance of being static
Our baker framework, with its tools, structure and shortcuts, has served us well. It’s been a great place to experiment, organize and develop our work. But it’s useless to our readers — it’s the kitchen. We want our readers to have the cake.
We need to publish HTML, JavaScript and CSS files generated by baker. We don’t need the Node.JS code we used to develop them.
The process of converting a dynamic, living website to simple files living on the filesystem is a common strategy for publishing news sites. It goes by different names, like “flattening,” “freezing” or “baking.”
Whatever you call it, it’s a solid path to cheap, stable hosting for simple sites. It is used across the industry for publishing election results, longform stories, special projects and numerous other things.
Note
Examples of static news pages in the wild include:
Visual stories and special reports by Reuters
A wide array of interactive graphics by The Washington Post
Hundreds of Los Angeles Times stories at latimes.com/projects
Dozens more from The Seattle Times at projects.seattletimes.com
Interactive apps by The Dallas Morning News
Live election results published by The New York Times
Data downloads from the California Civic Data Coalition
11.2. Bake your page
Lucky for us, baker is pre-configured to flatten our dynamic site. And GitHub has a hosting service for publishing static pages.
Open the baker.config.js file at the root of the project. It’s the control room where we can adjust how baker works.
To fit our work with GitHub’s publishing system, will instruct baker to output files to the docs directory instead of _dist and set the name of our GitHub repository as the domain. That will require you to make three careful changes to what you see in the file, highlighted below. Take a moment to do that now.
const entrypoints = [
  // Add more script entrypoints here as needed
  'app',
];

export default {
  output: 'docs',
  domain: 'https://your-username.github.io',
  entrypoints: `scripts/${
    entrypoints.length > 1 ? `{${entrypoints.join(',')}}` : entrypoints[0]
  }.js`,
  pathPrefix: '/your-repo-name/',
// An example of how creating dynamic pages, as described in the README
// createPages(createPage, data) {
//   const pageList = data.example;
//   for (const d of pageList) {
//     const template = 'year-detail.html';
//     const url = `${d.year}`;
//     const context = { obj: d };
//     createPage(template, url, context);
//   }
// },
};
Note
In my case, that would look like:
  output: 'docs',
  domain: 'https://palewire.github.io',
  entrypoints: `scripts/${
    entrypoints.length > 1 ? `{${entrypoints.join(',')}}` : entrypoints[0]
  }.js`,
  pathPrefix: '/my-first-visual-story/',
Return to your terminal where the serve command is running. Hit CTRL-C or CTRL-Z to terminate its process.
Once you are back at the standard terminal, enter the following command to build a static version of your site. Rather than start up the local test server we’ve been using so far, it will instead save the site as flat files in docs.
npm run build
That saves the entire file to the docs folder.
11.3. Commit your work
We’re doing that because it’s the folder expected by GitHub’s free publishing system, called “Pages.”
To take advantage of it, we should start by committing and push to GitHub.
First add.
git add .
Then commit.
git commit -m "Built site to docs folder"
Then push.
git push origin main
11.4. Configure GitHub Pages
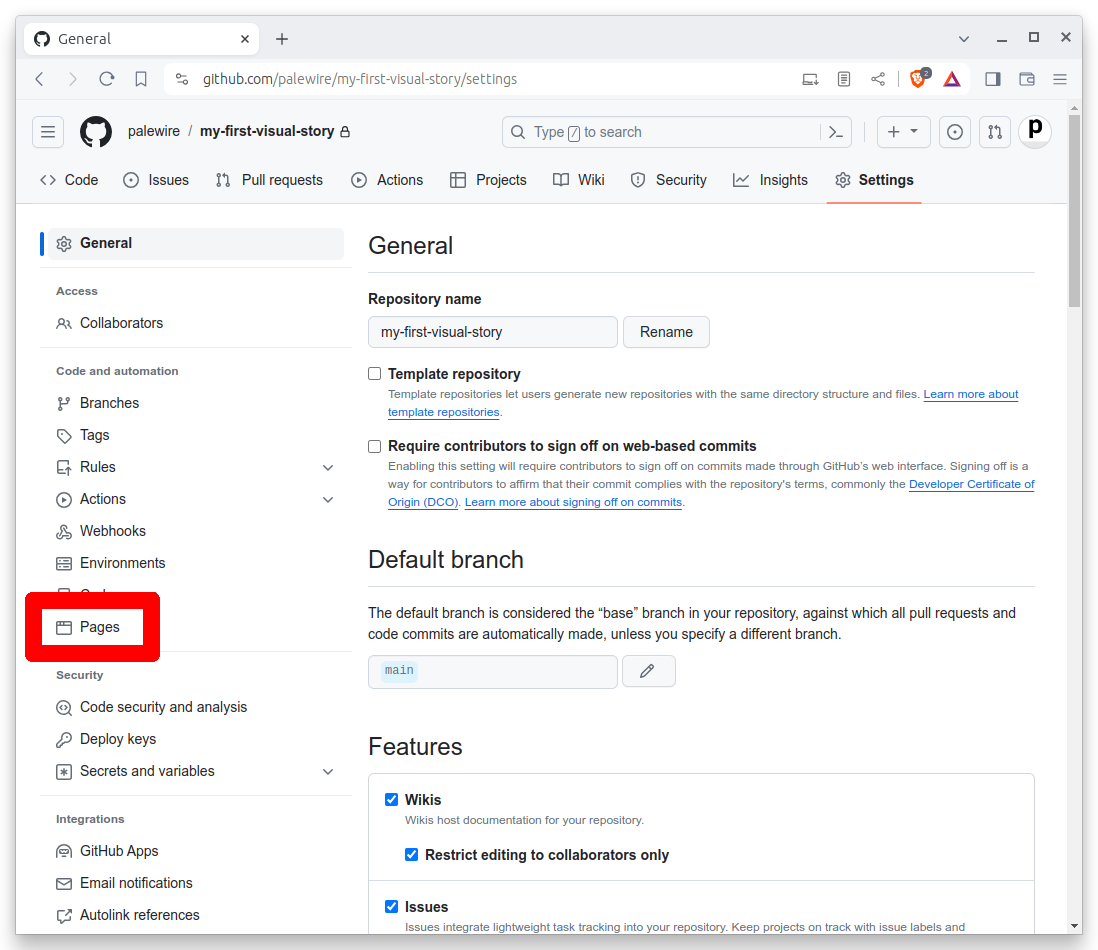
Go to the repository on GitHub. Click on the “Settings” tab.

Click on the “Pages” tab in the left-hand sidebar.
In the “Source” section select the main branch and the /docs folder. Hit Save.
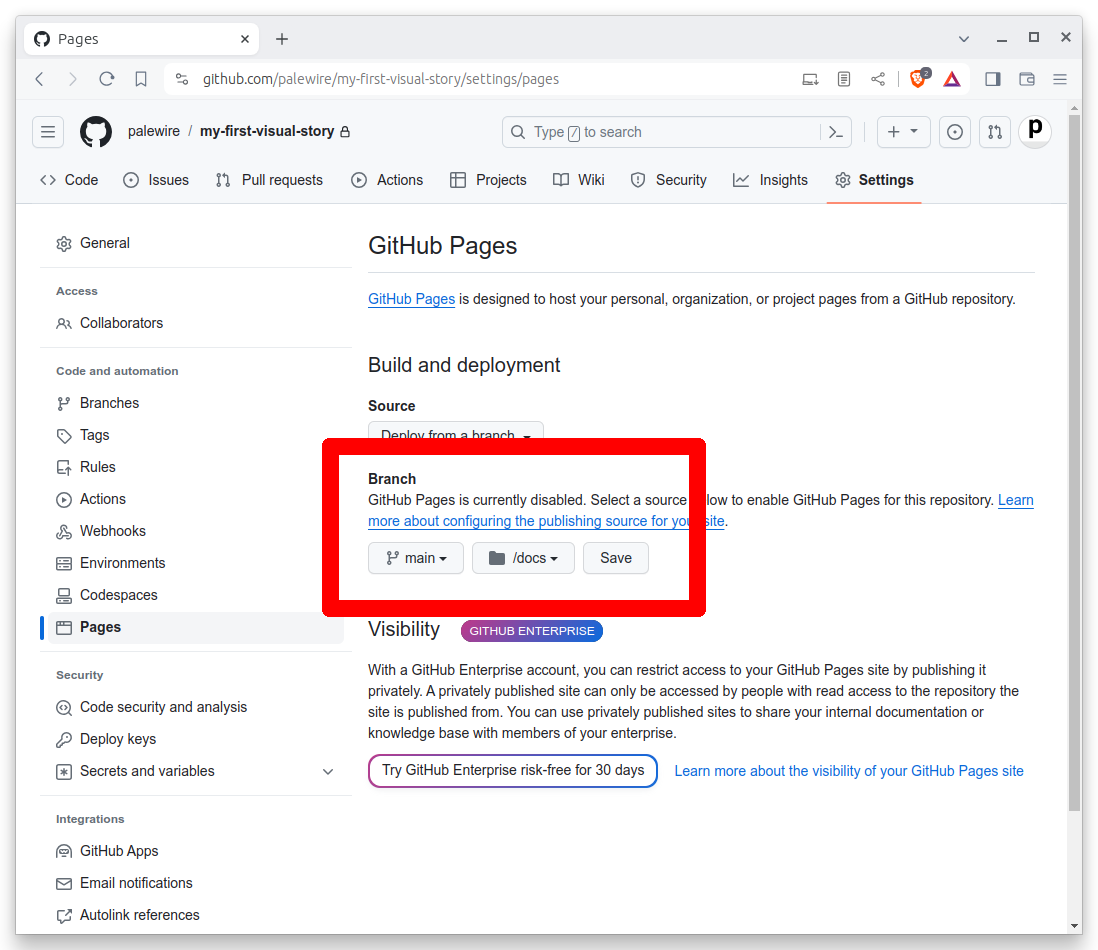
This will result in any files pushed to the ./docs directory of your repository being published on the web. For free.
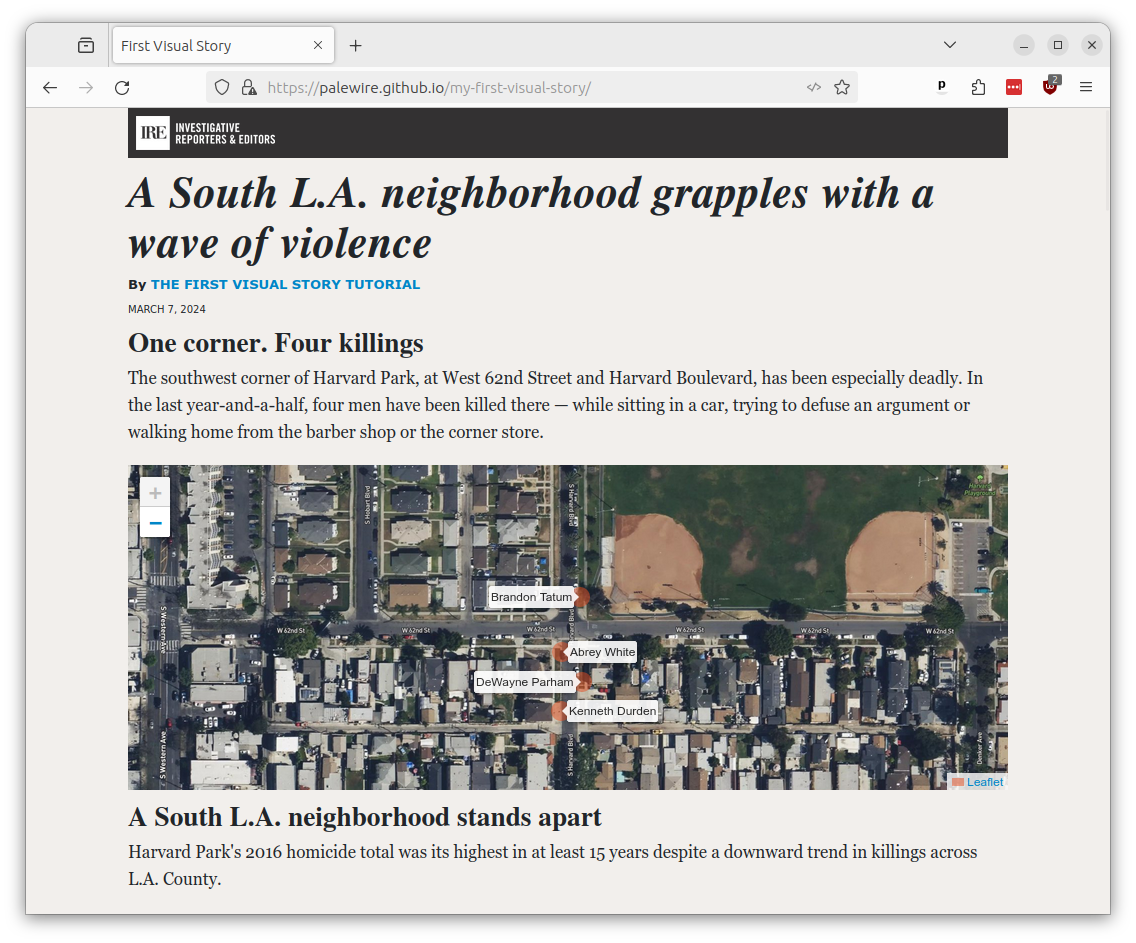
Wait a few minutes and then visit <your_username>.github.io/first-visual-story/. You should see your app published live on the World Wide Web.
If your page does not appear, make sure that you have verified your email address with GitHub. It is required before the site will allow publishing pages. And keep in mind there are many other options for publishing flat files, like Amazon’s S3 service.
If your page does appear, congratulations! You’ve finished this class.